DIY - How To Hardwire A DashCam (or any other device)
 03-31-2012, 01:44 PM
#1
Whats up with RDX owners?
Thread Starter
iTrader: (9)

DIY - How To Hardwire A DashCam (or any other device)
Some of you may venture into Car Talk, in which case you may have seen this thread:
https://acurazine.com/forums/car-talk-5/why-you-should-run-dash-camera-847301/
I've been meaning to pick up a dedicated dash camera for awhile, and finally decided to pull the trigger and got a BlackVue DR400G-HD. Here is how to install it on a 2G CL/TL, taken from my review here:
https://acurazine.com/forums/showpos...&postcount=233
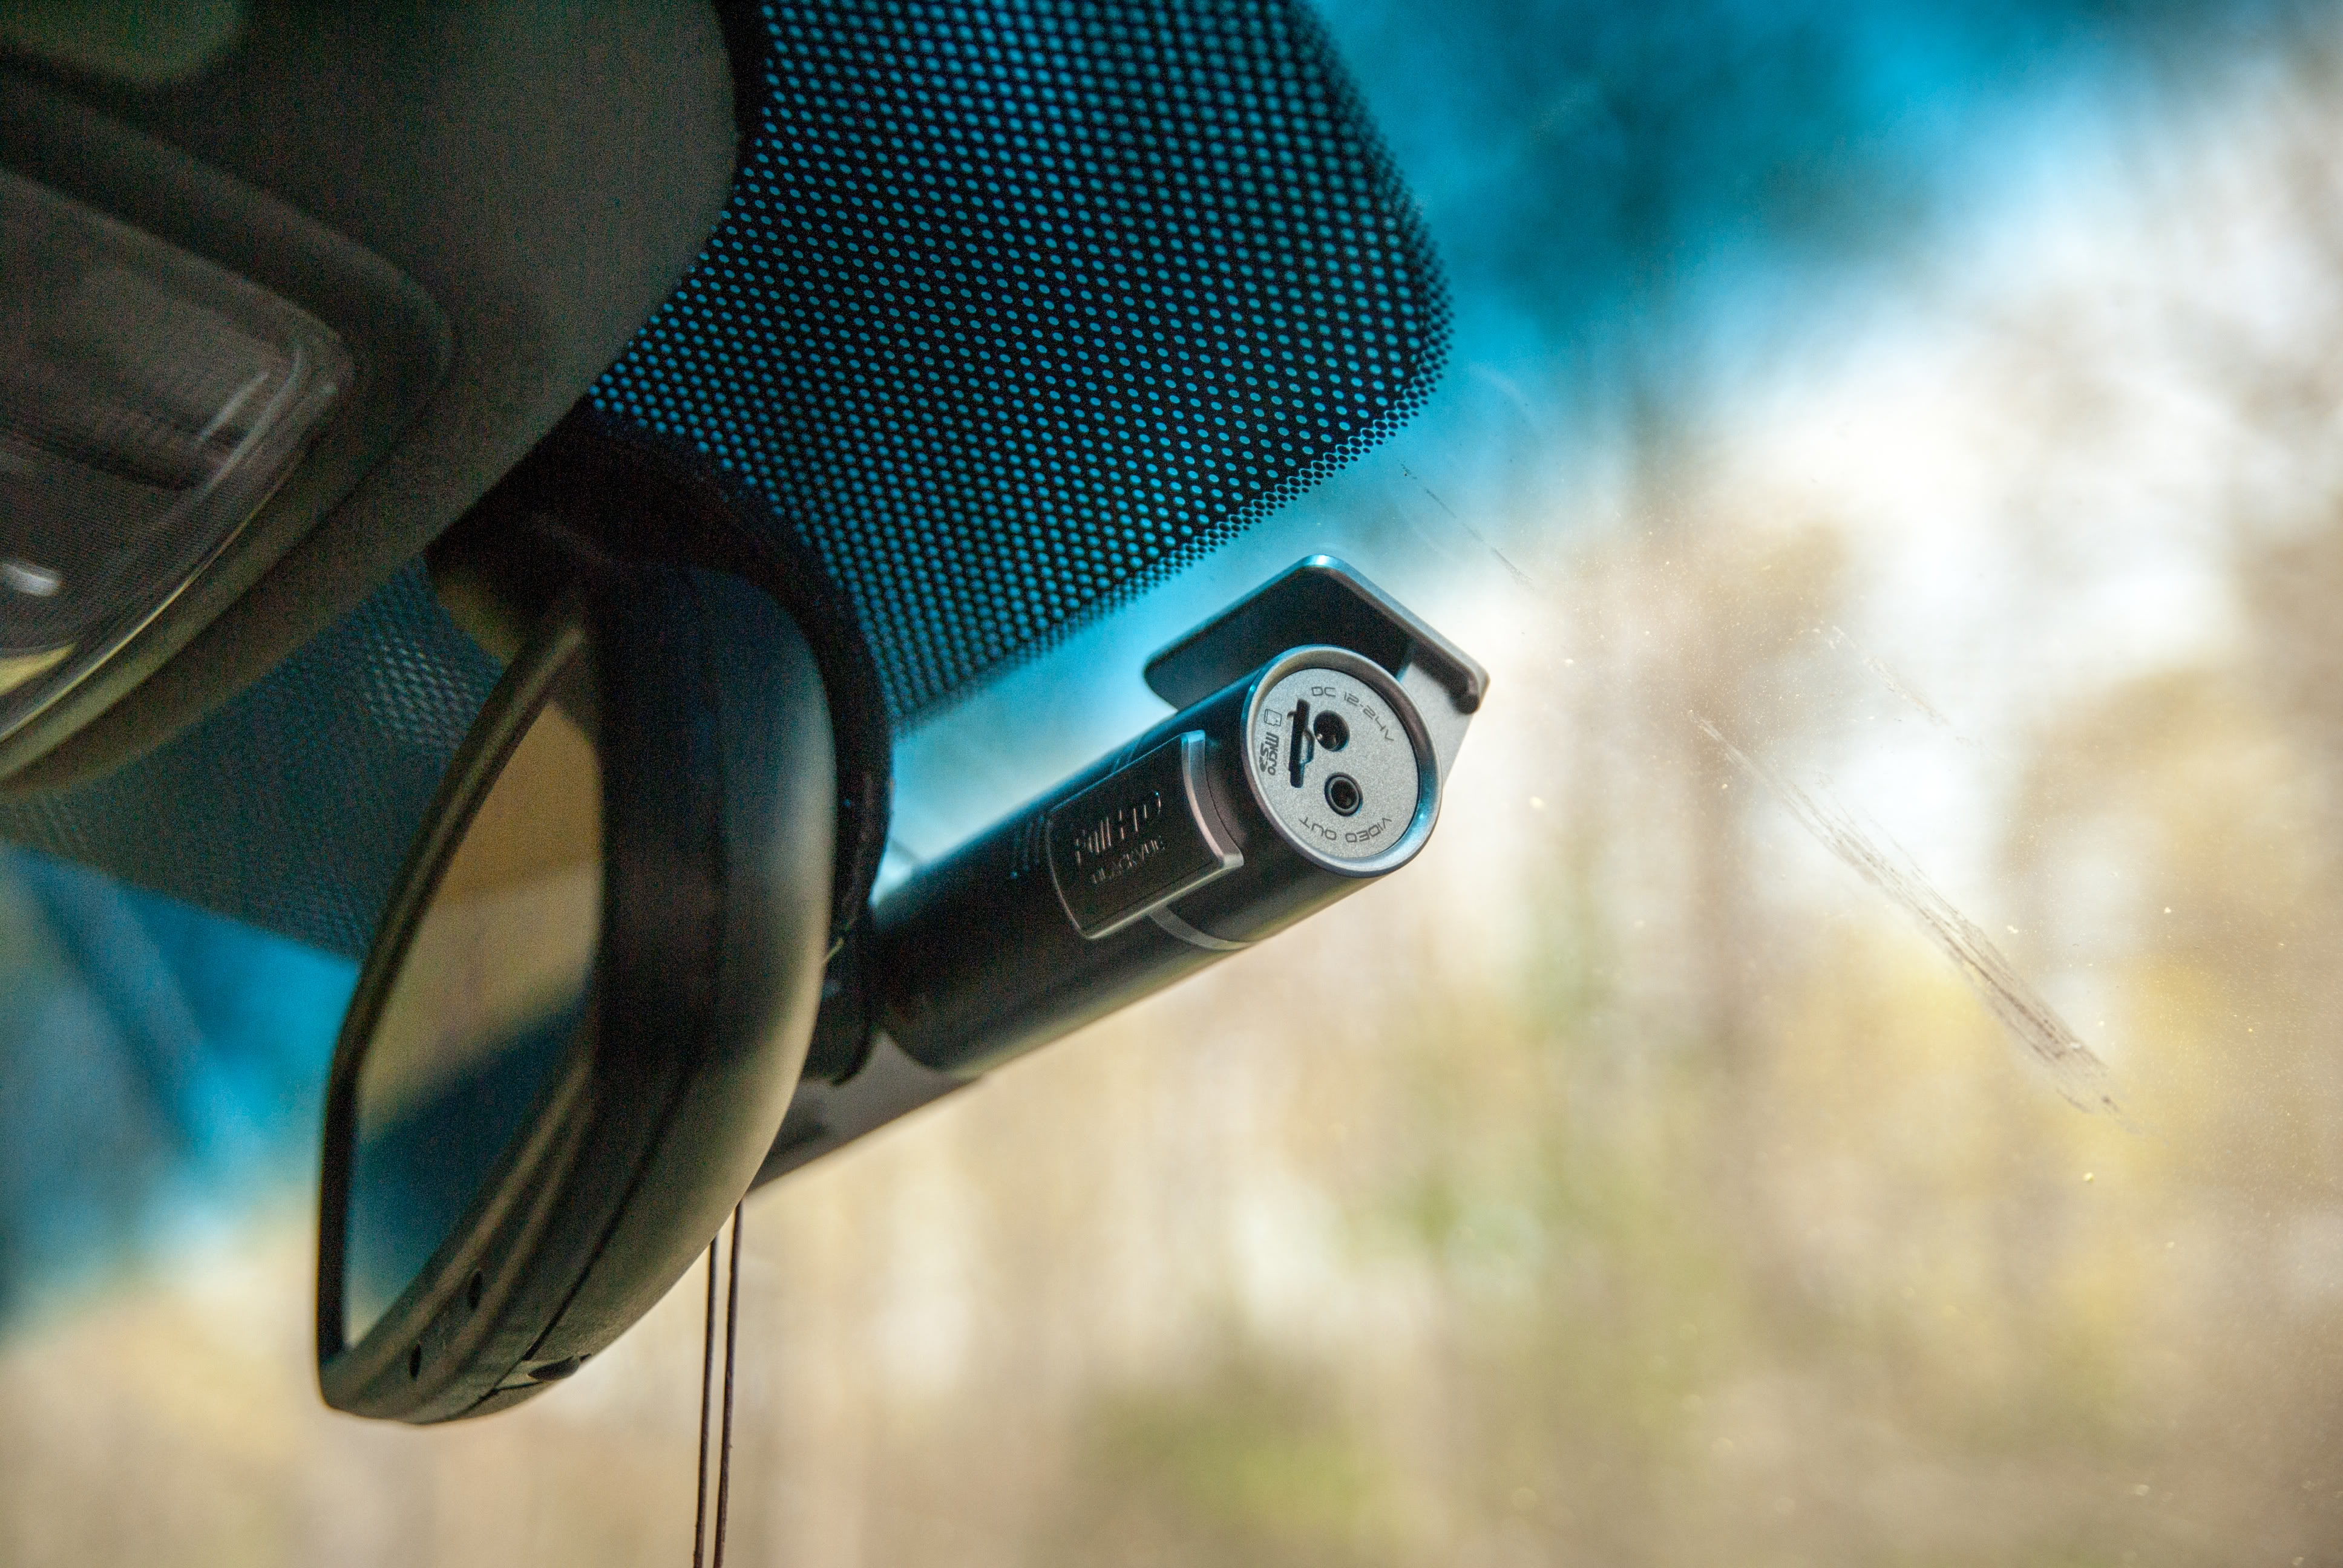
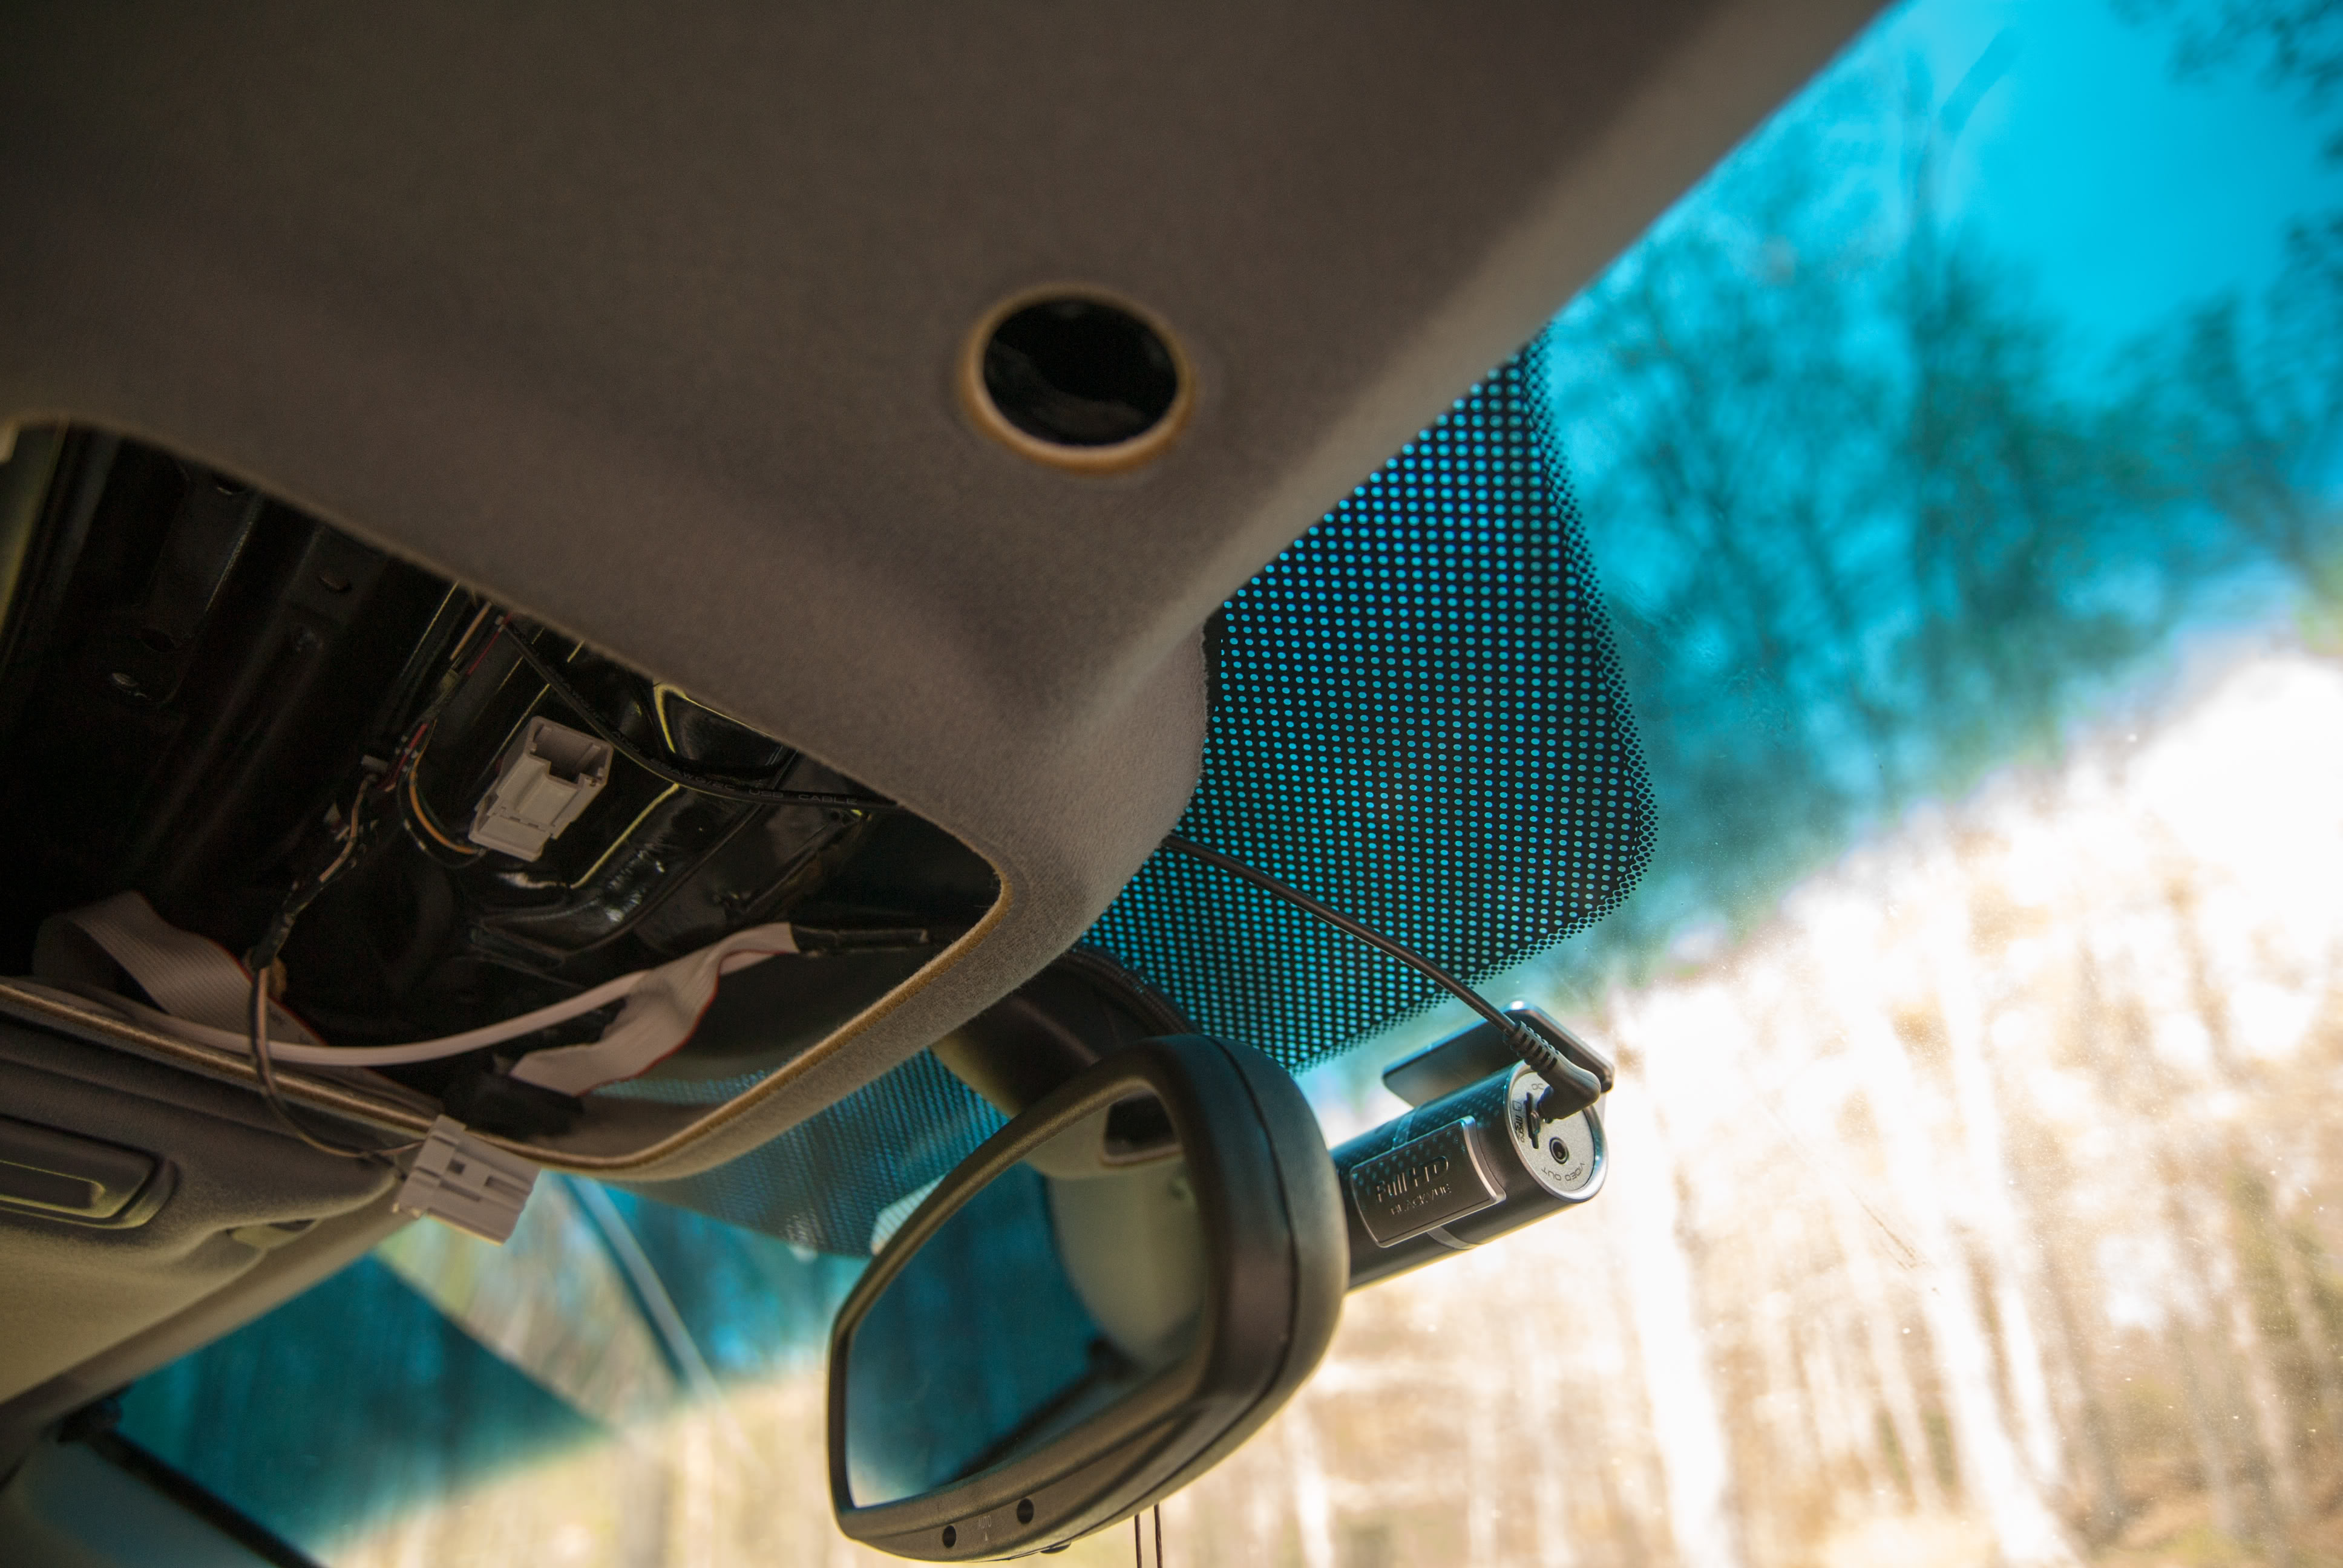
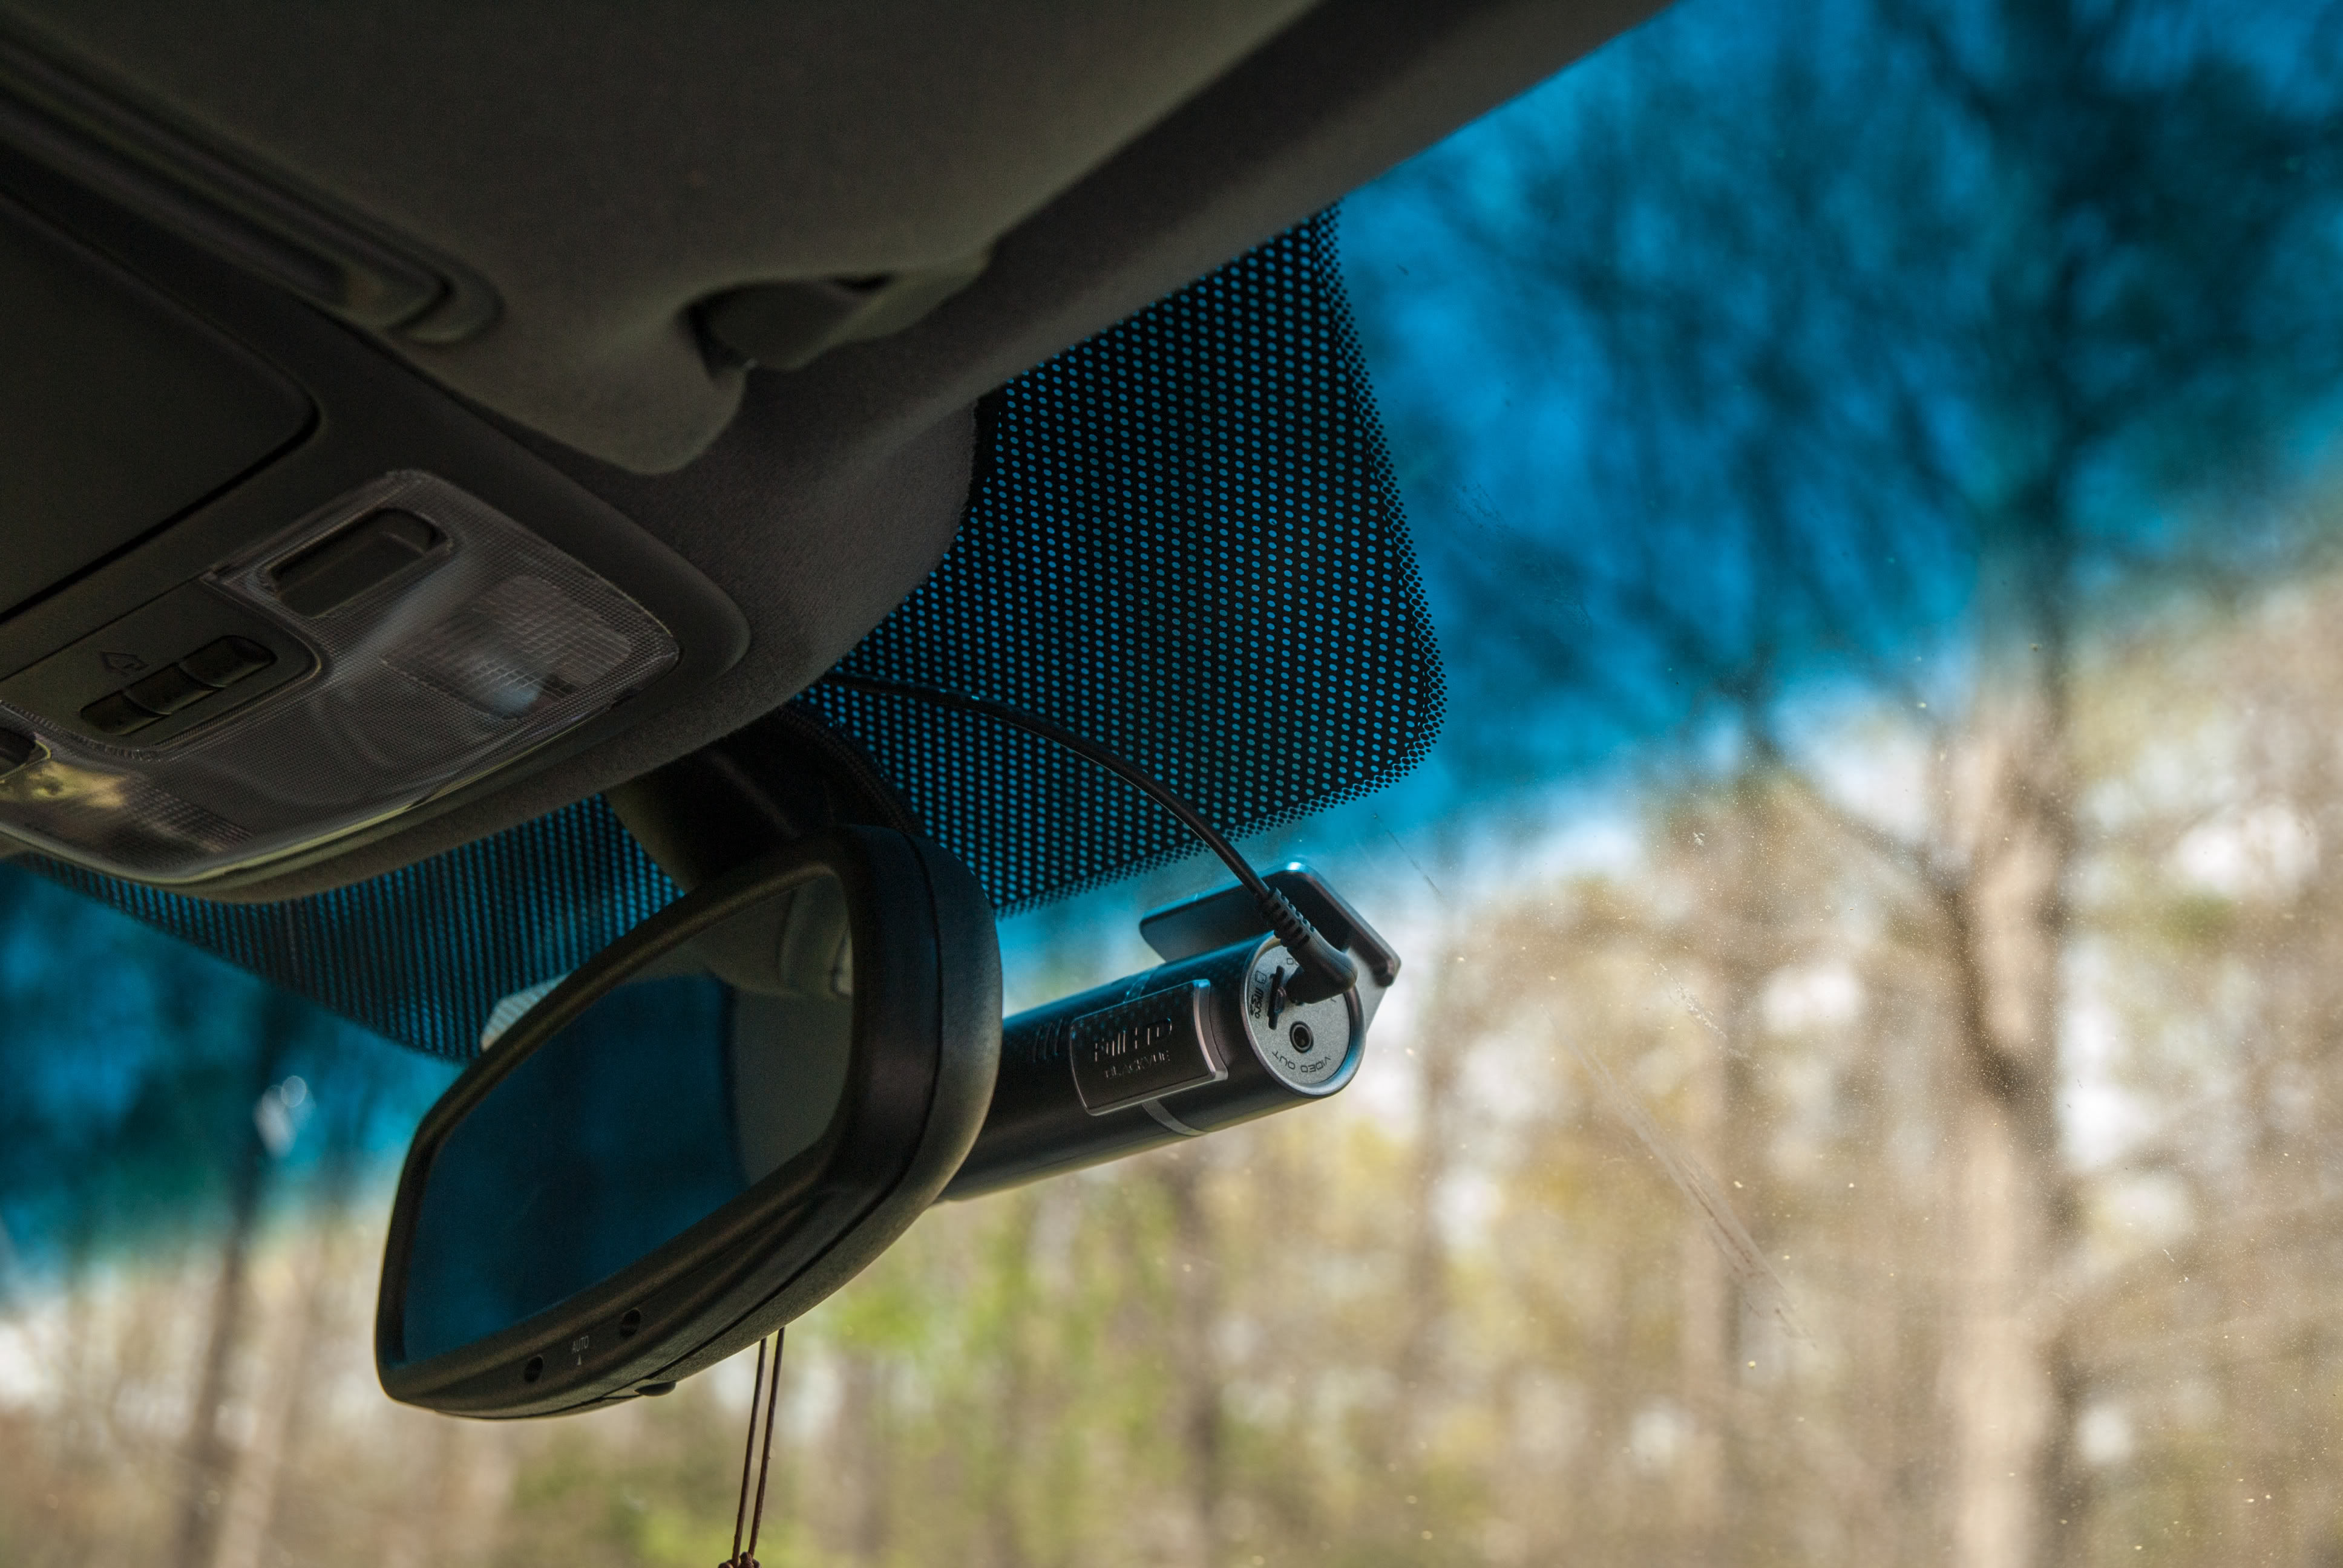
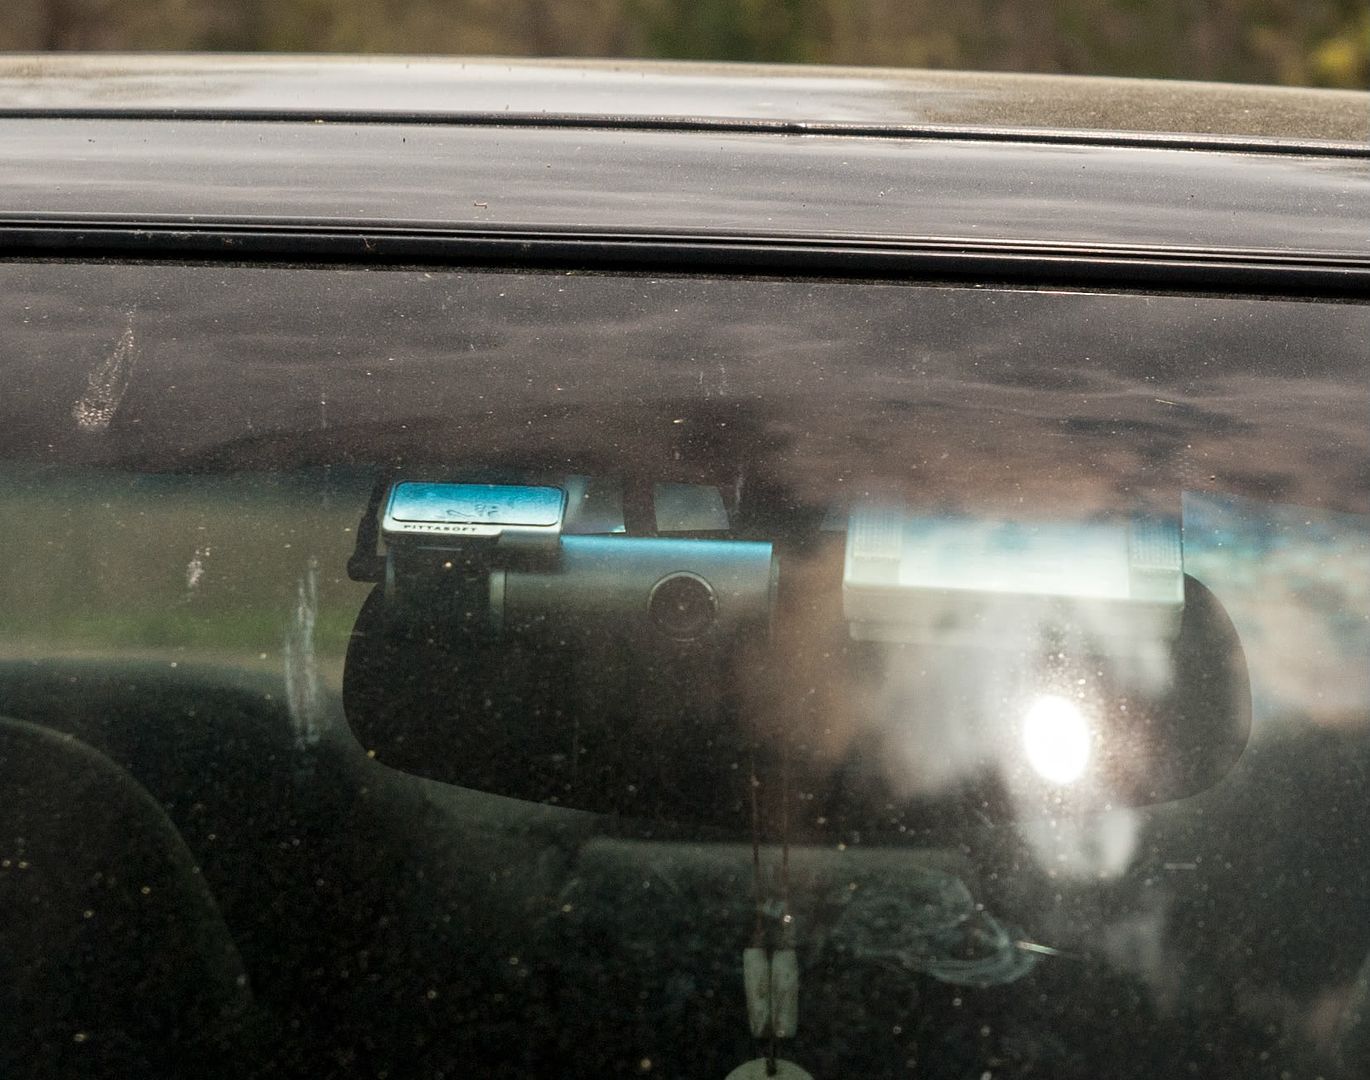
The Camera comes with a holder and very strong 3M double sided tape. I placed my camera in front of the rear view mirror so it does not interfere with my line of sight.
You have two options for power – use the cigarette lighter adapter or hardwire it. For testing, I had it plugged into the adapter, however I wanted a more permanent solution, so I decided to hardwire it to a constant power source. If you are doing the same, please remember that I am in no way, shape or form responsible if you screw up.
With that out of the way, you'll need to pick up an add-a-circuit at you local parts store. The 2G CL/TL uses ATM fuses, so make sure you get that as well as a package of fuses if you don't already have them. I am running it on a 7.5amp fuse, but you should be able to get away with a 5amp fuse.
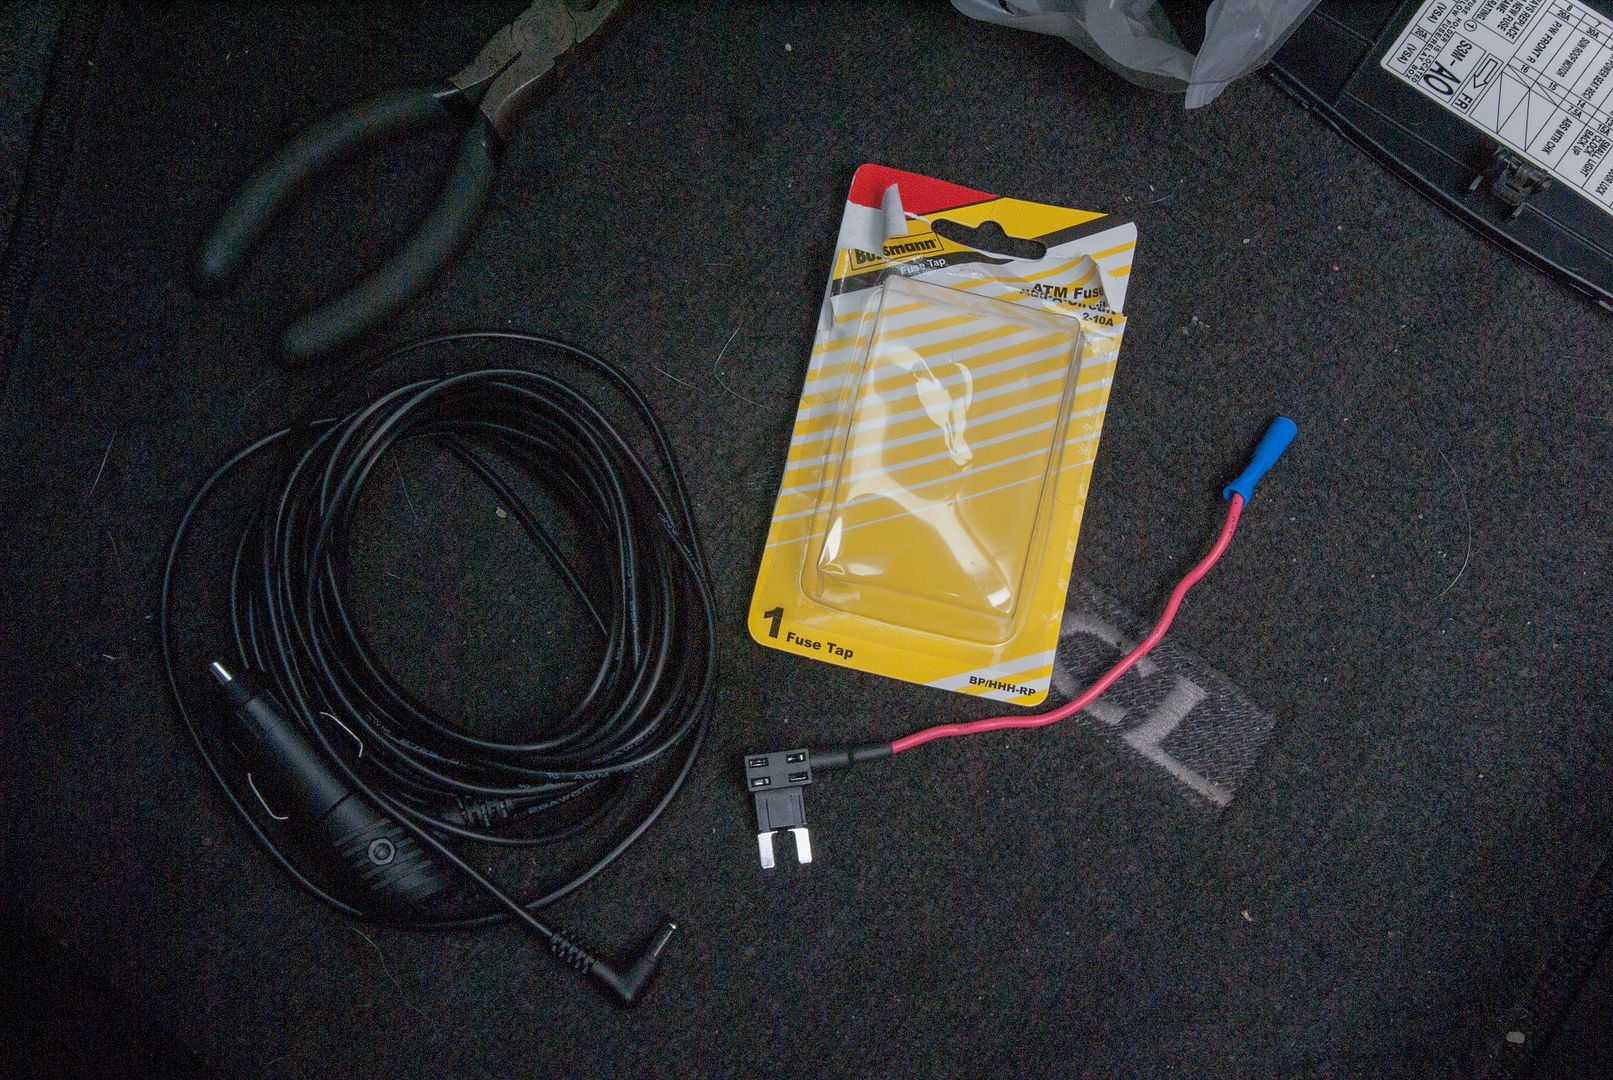
Tools needed:
-Wire snips
-Crimp tool
-Electrical tape
-Razor blade
-Phillips head screwdriver
-Flat head screwdriver
-Small flat head screwdriver for prying
-10mm socket wrench (use a thin walled socket for the pass grab handle)
The first thing to do is mount the camera to the windshield if you haven't already.
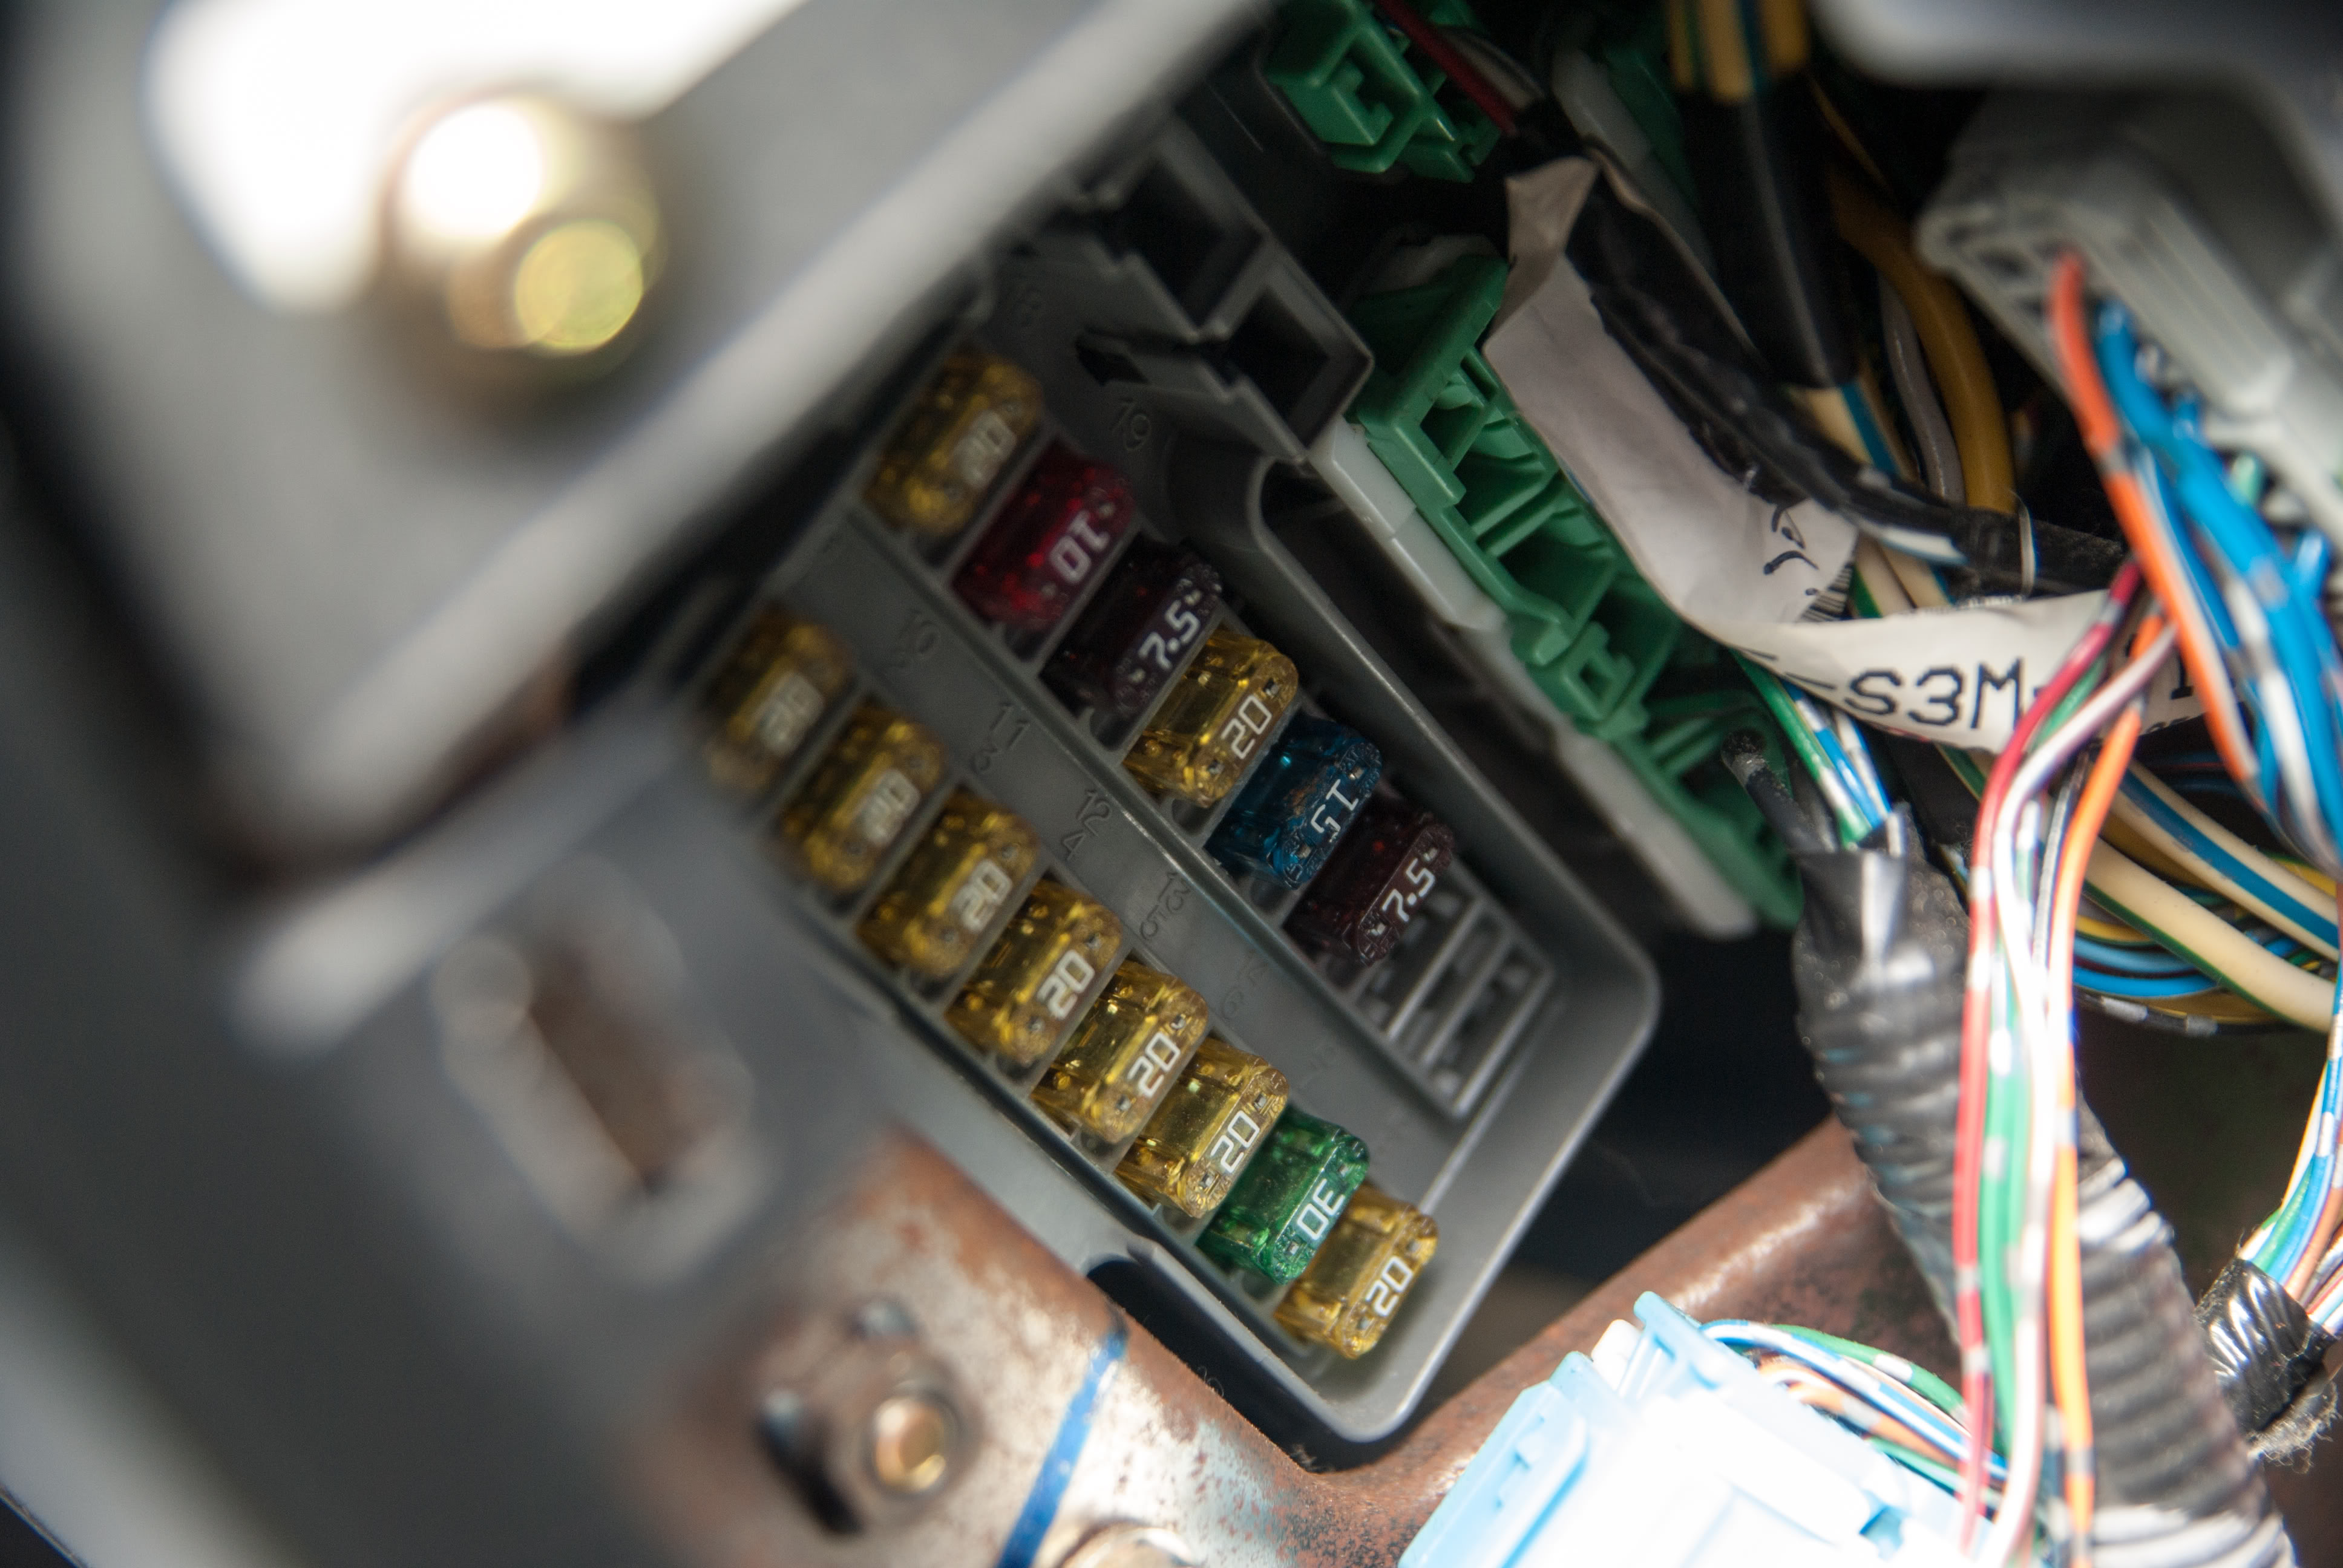
Next figure out the best route for the power wire to the fuse box. The 2G CL/TL has two fuse boxes, I chose the passenger side since I already had a few wires running down the driver side A-pillar. I looked at all the circuits and decided to tap into the overhead light circuit, the 7.5amp fuse in #11.
Remove:
-A-pillar cover, lightly pull it away from the pillar.
-Sun visor, there are two screws holding it on. Once you remove those screws you need to turn the visor as you pull it down. There is a wire harness on it that needs to be unplugged.
-Sun visor stay, twist it clockwise, then pull down.
-HomeLink, there are two phillips head screws in the sunglass holder and two behind the light diffuser. Use a small phillips head screw driver to pry off the cover.
-Grab handle, not needed but it allowed me to drop the headliner just a bit more. Flip the little covers up, then use a thin walled 10mm socket to unbolt it.
I also pulled the weatherstripping away from the body where the A-pillar cover is. If makes it easier for you to get the weatherstripping on top of the cover when reinstalling.
Next step, cut off the end of the power cable that connects to the cigarette lighter adapter.
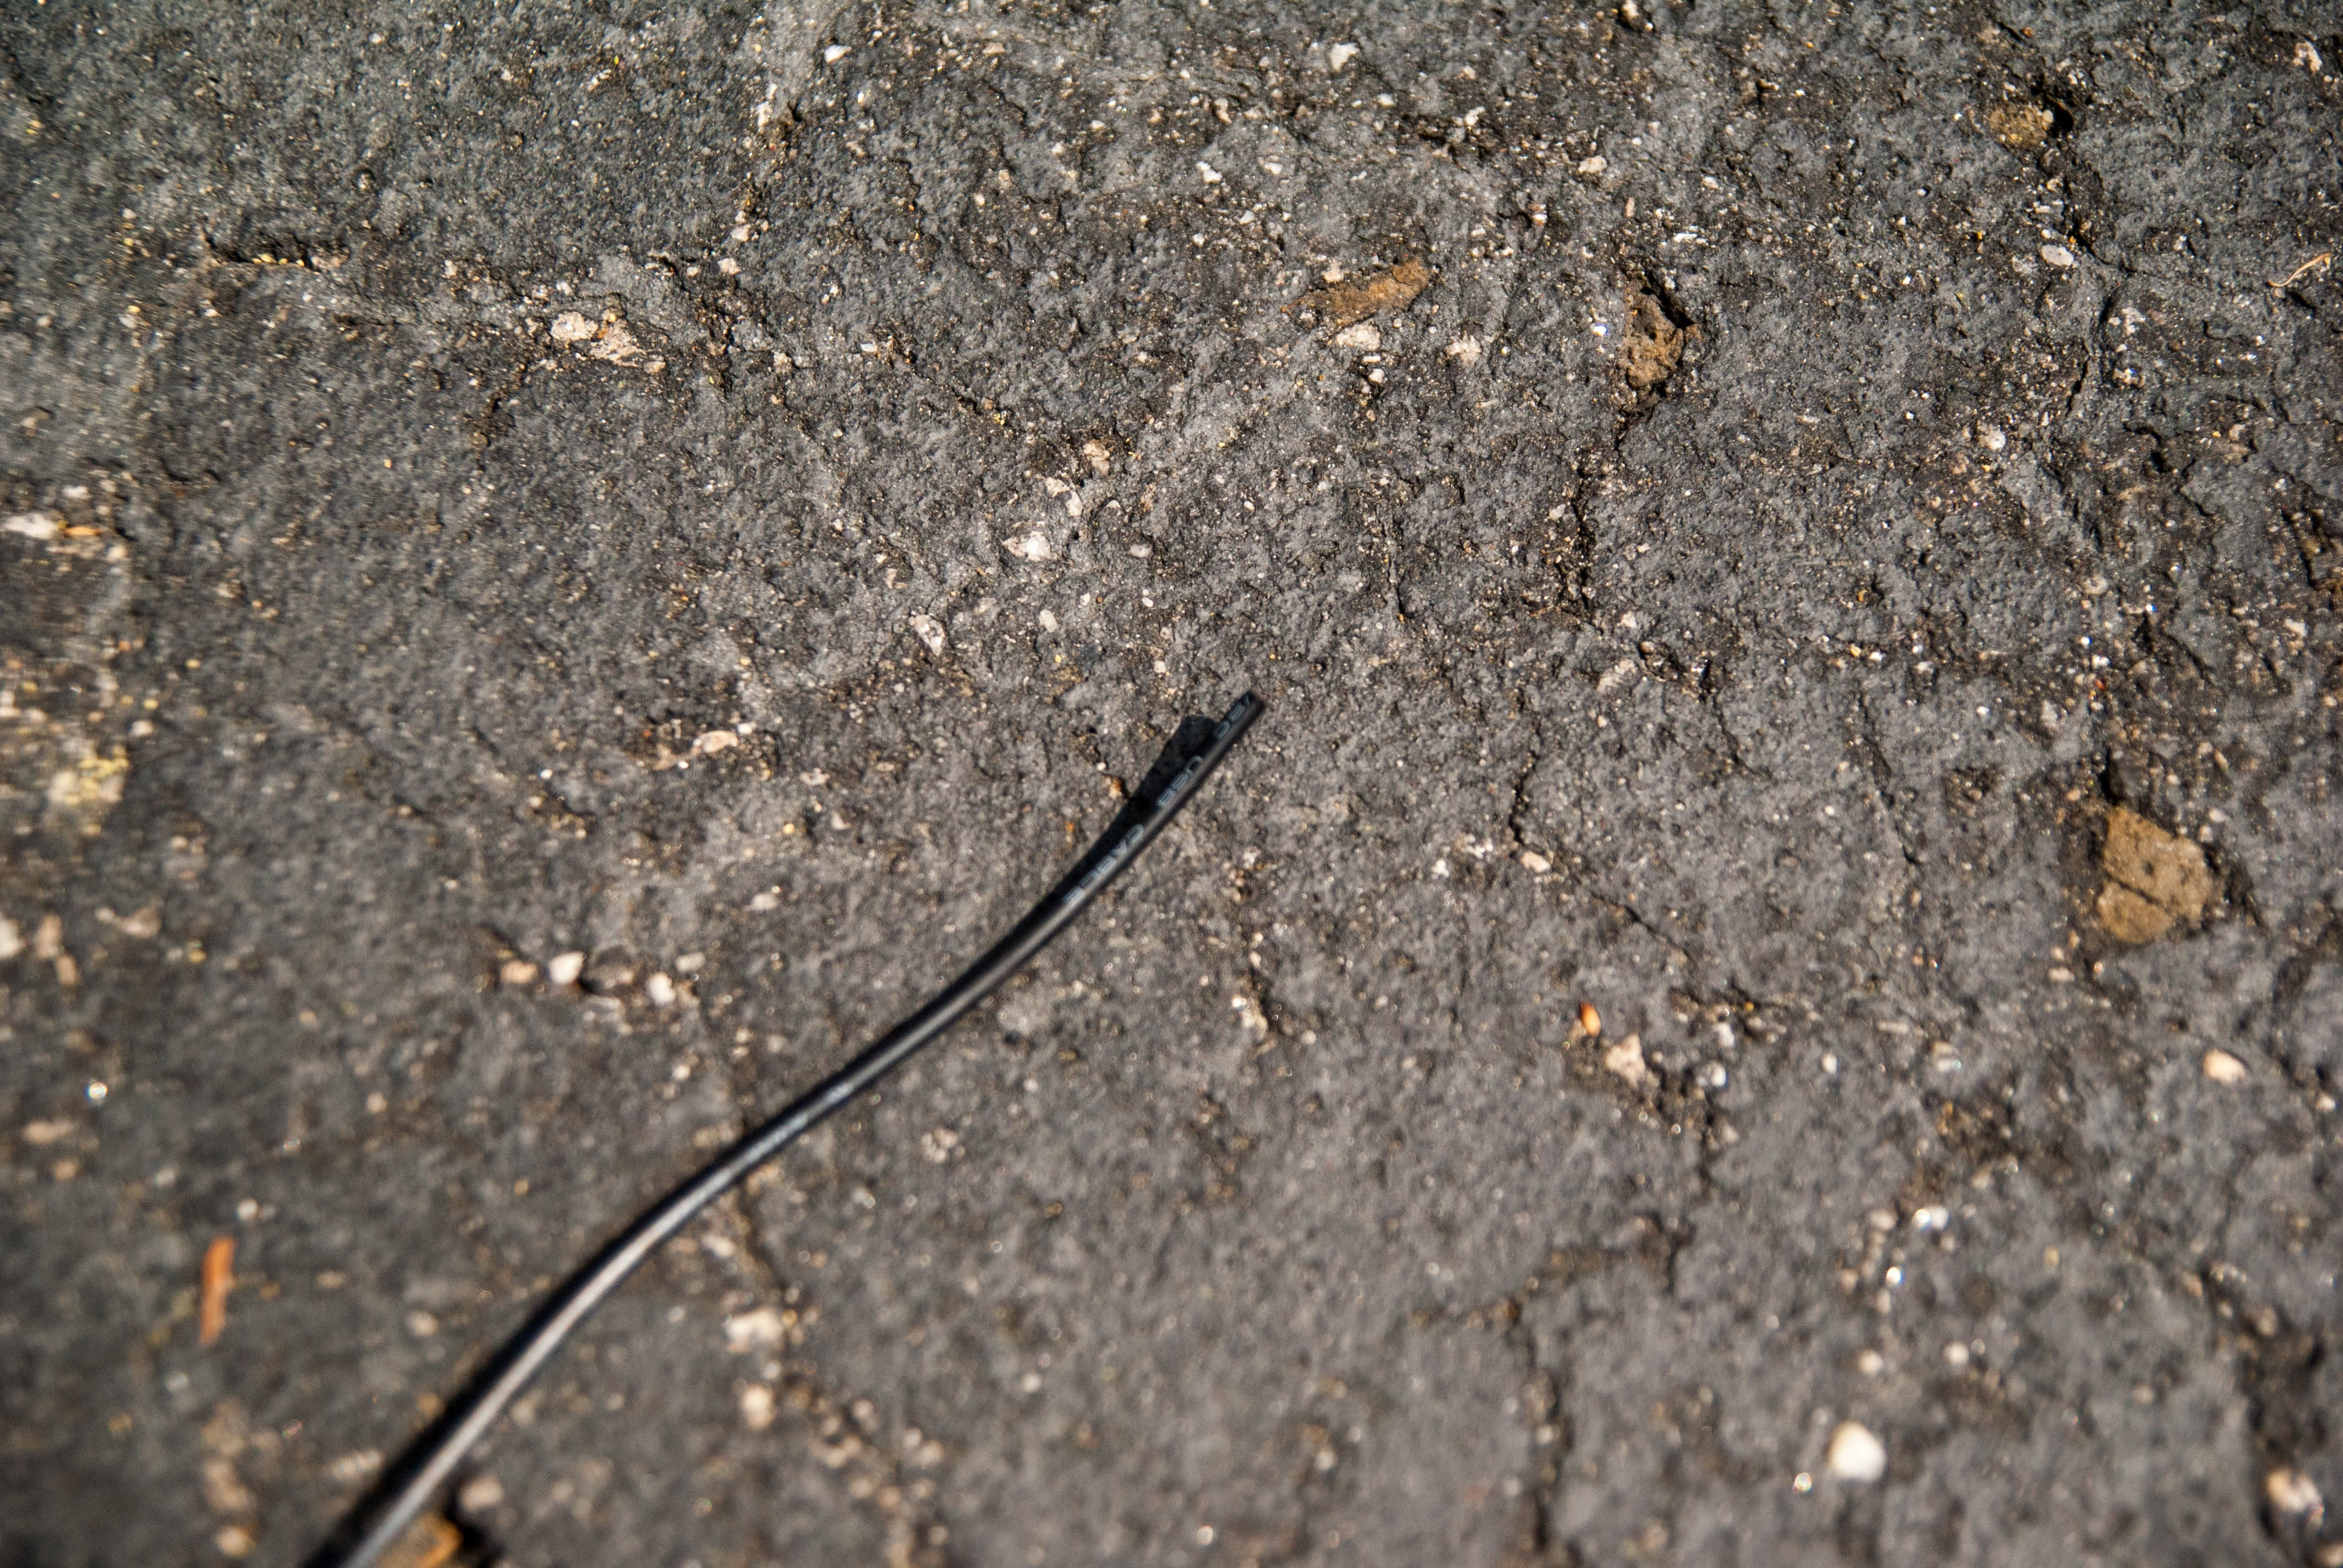
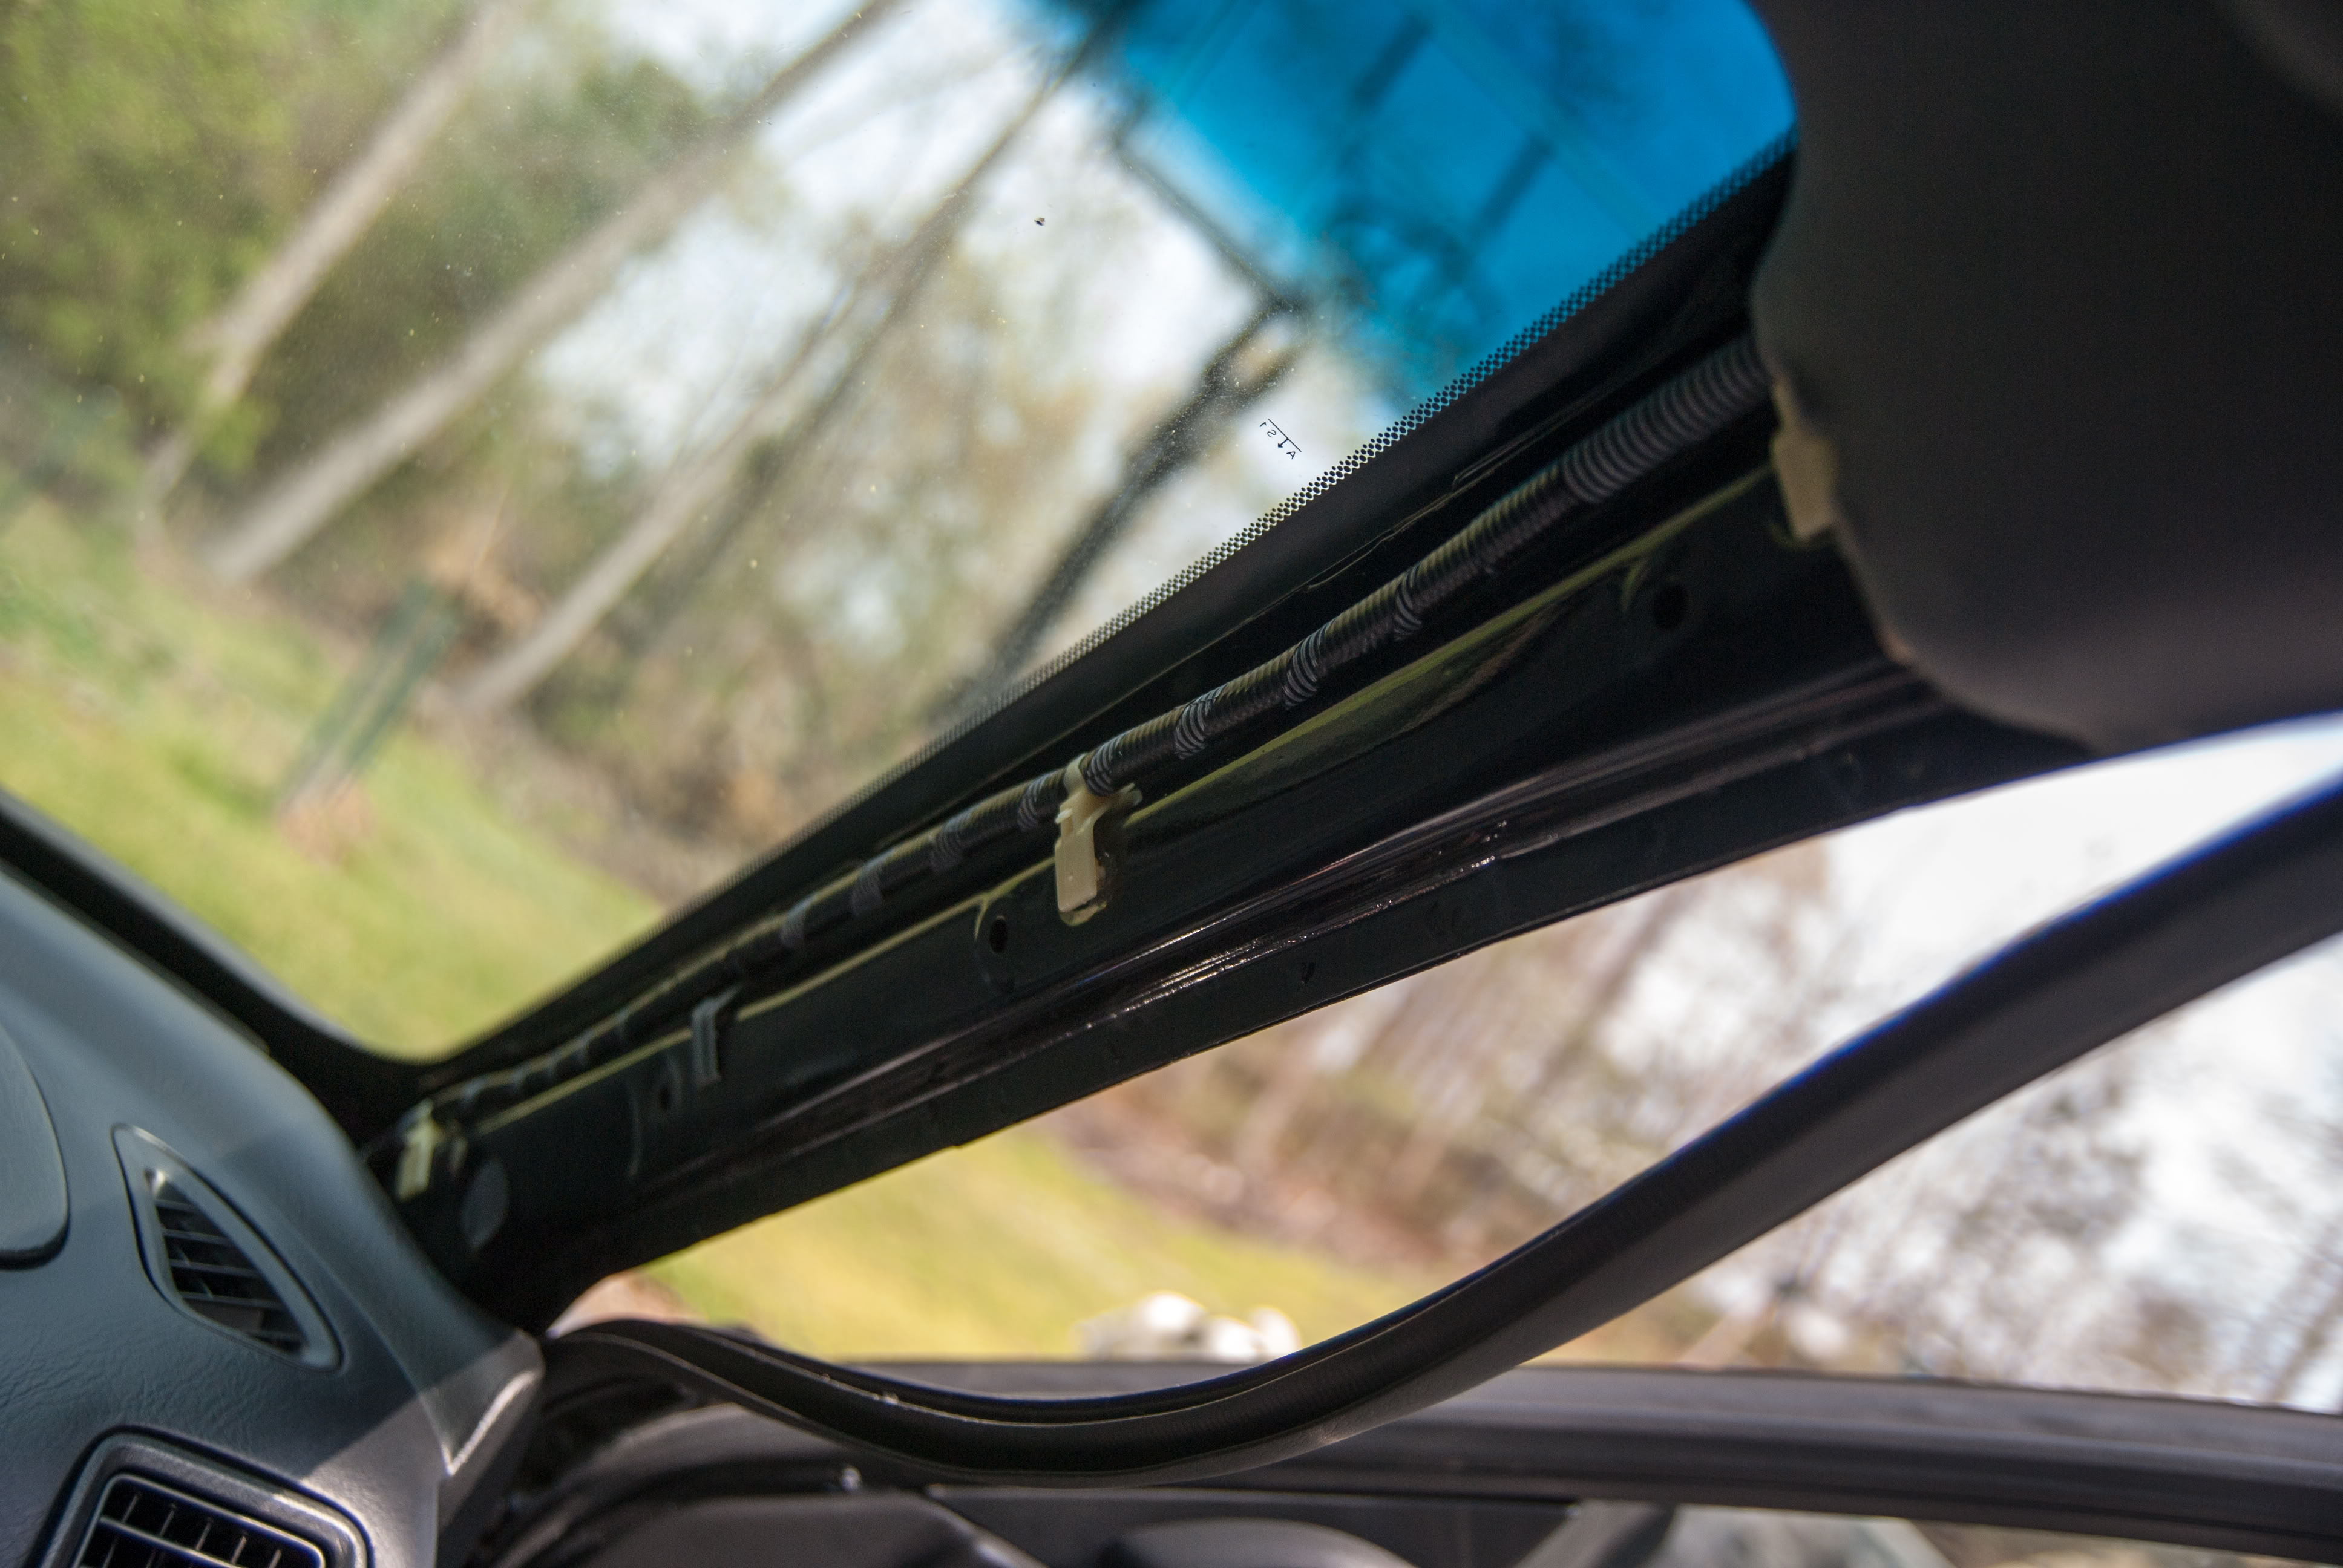
Route the cable through the headliner and down whichever pillar you chose. There is a ridge on the roof right at the front edge of the headliner. I routed the wire behind that ridge so it would stay up there and not slide out. It takes some maneuvering to get it in the right spot.
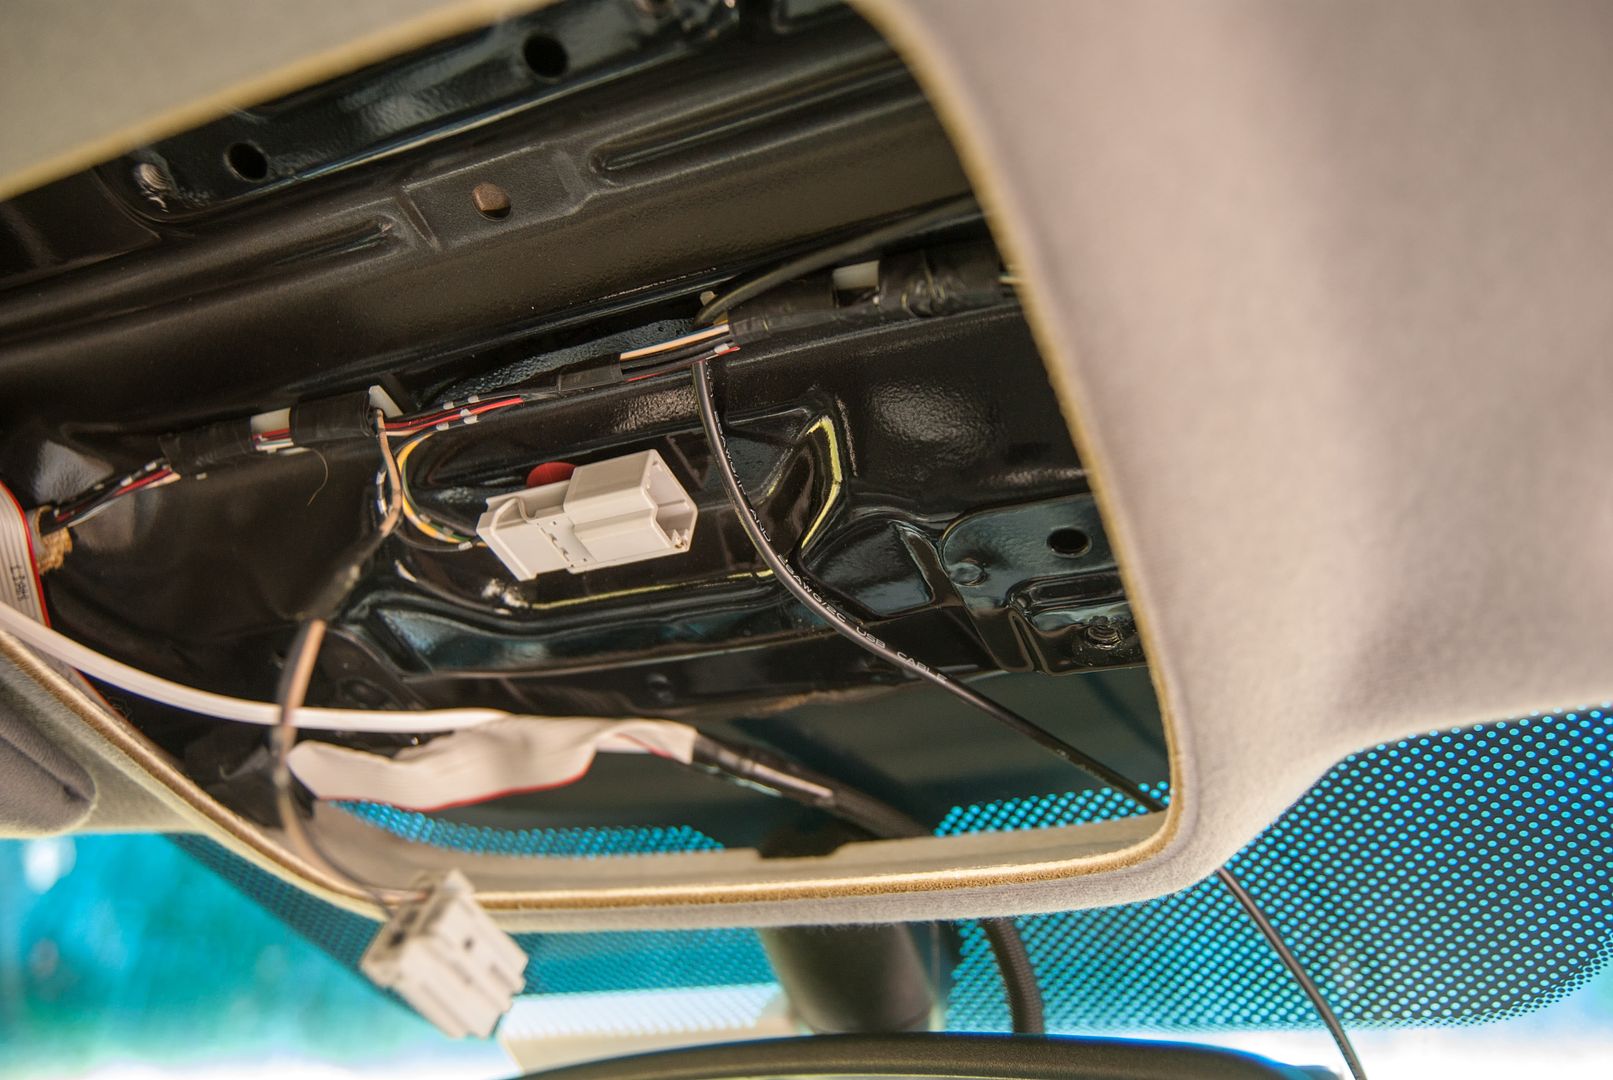
Here, I wrapped the cable around the wires already running up the A-pillar, then dropped the wire down below the dash. Once again, some careful maneuvering helps here.

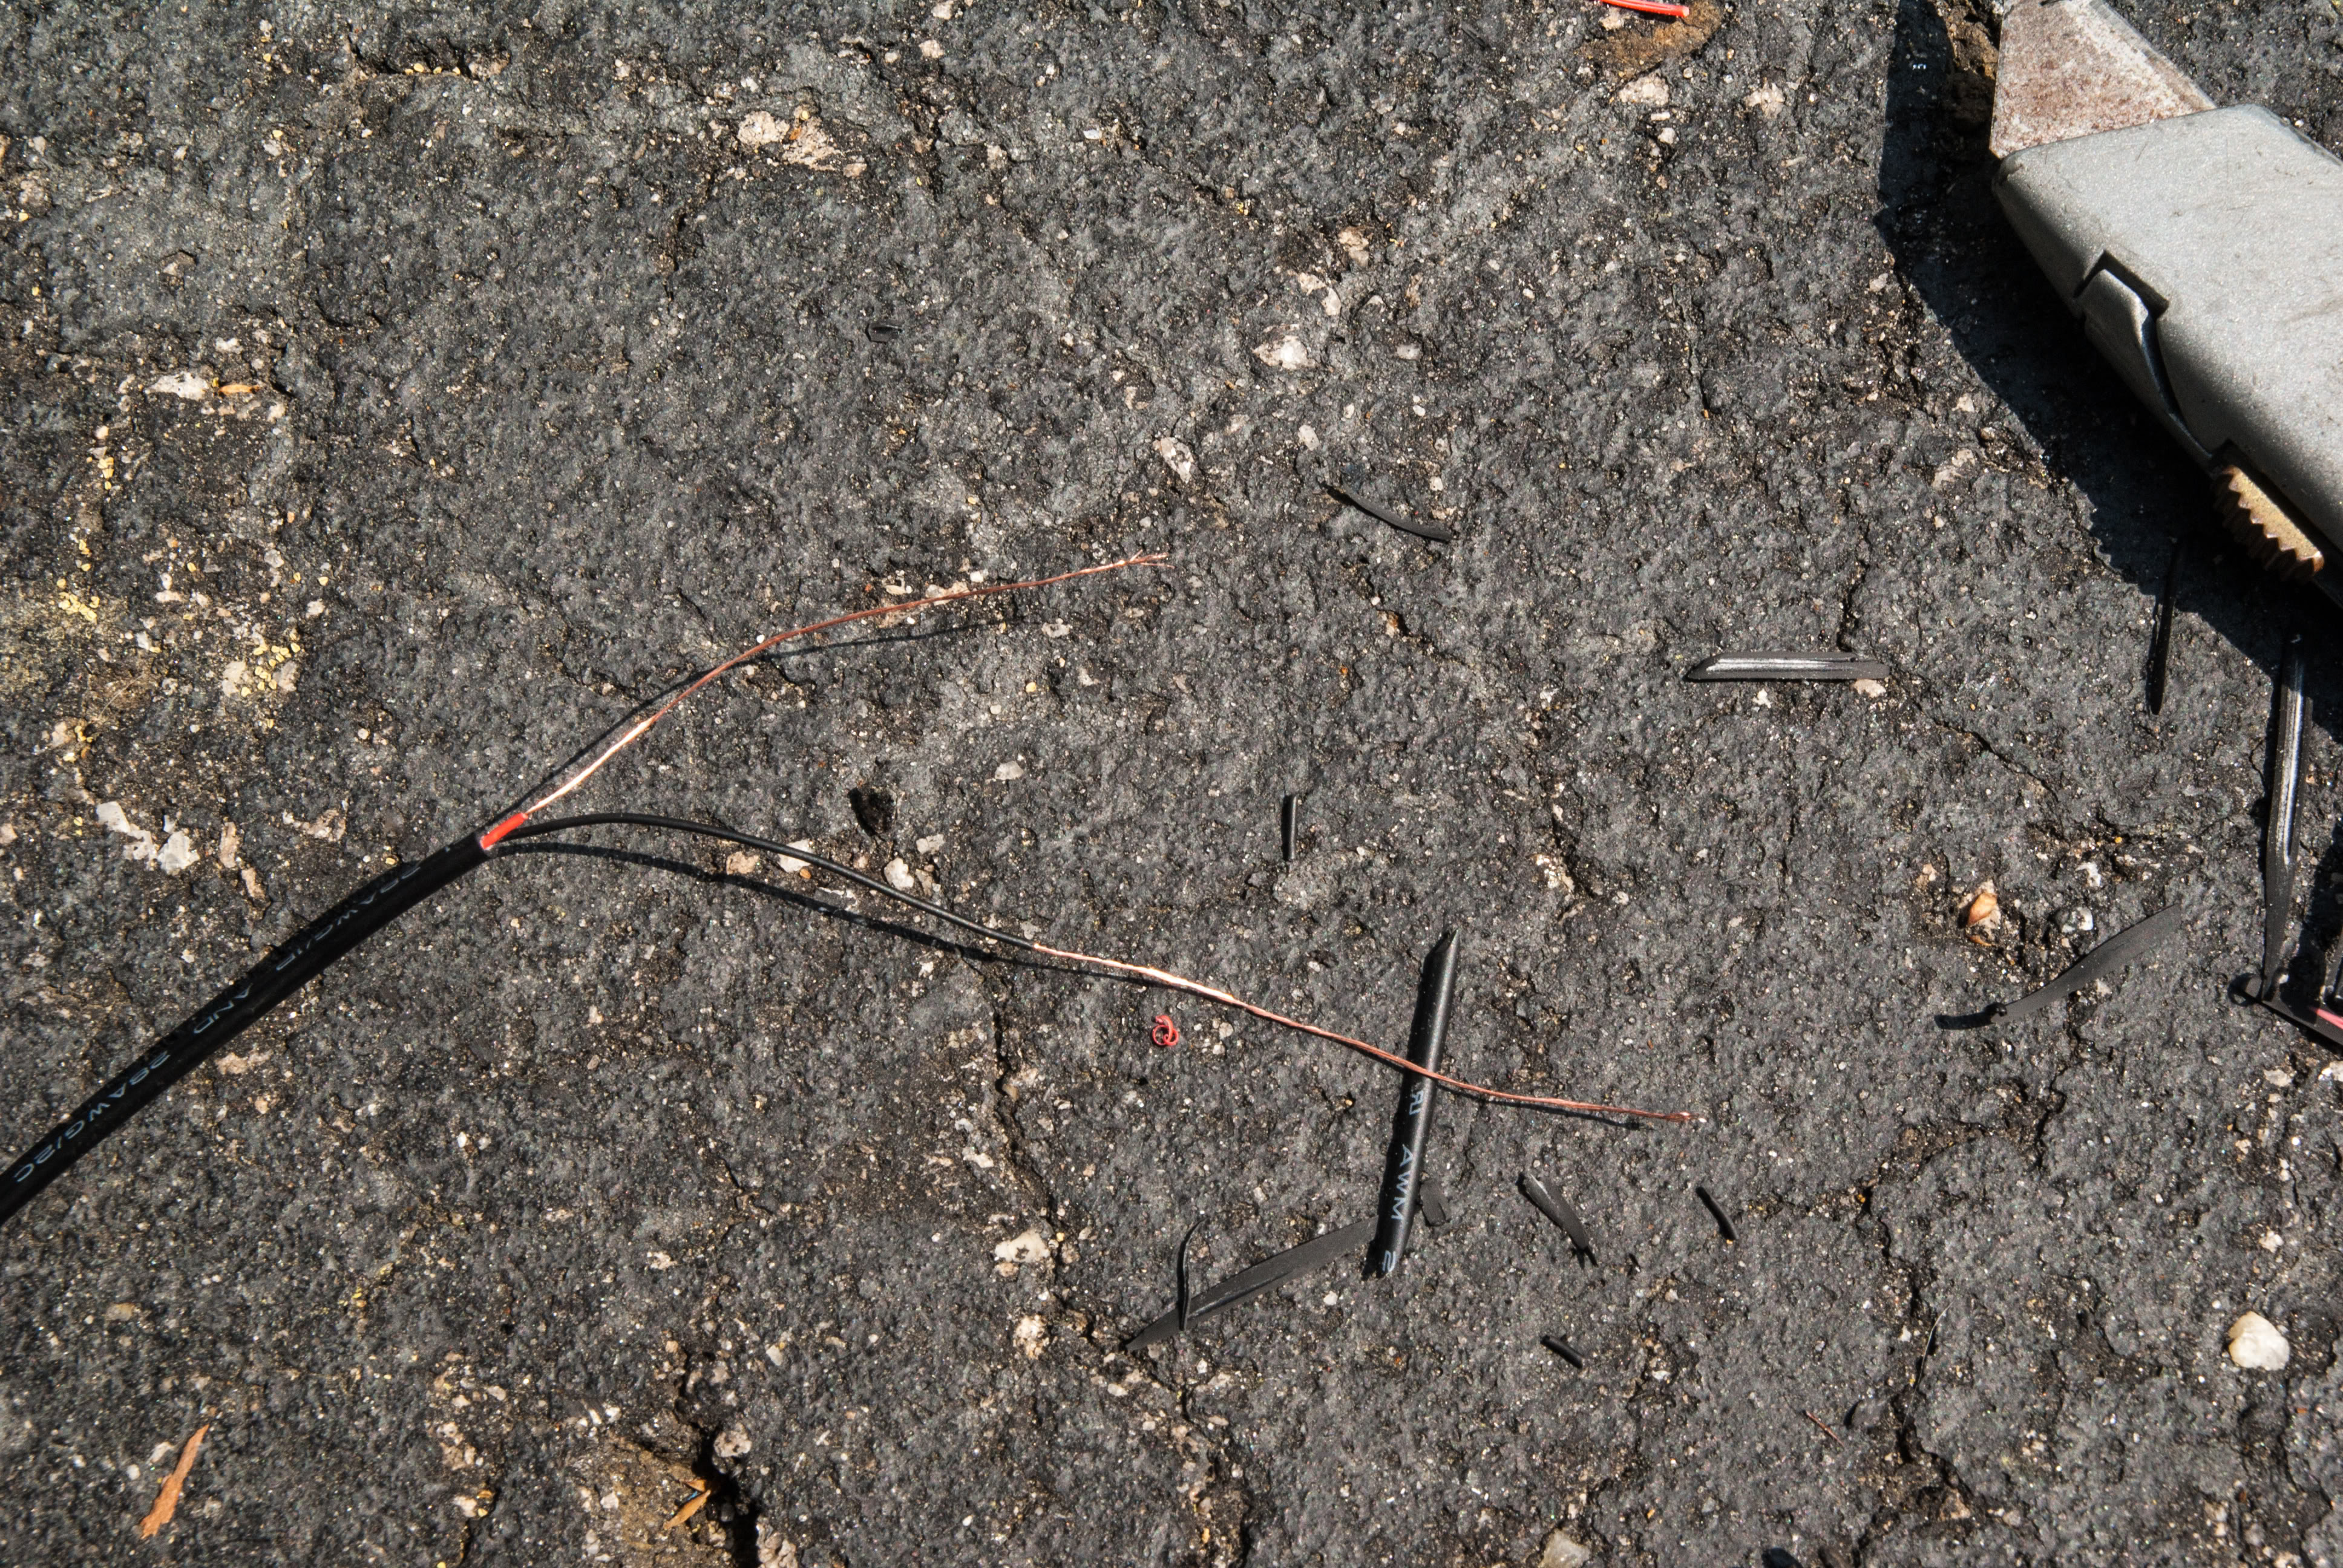
Now this is the tricky part. The insulation is pretty thick, the wires inside are not. What I did was place the blade flat on top the wire and lightly applied pressure while pulling the wire towards it. It may take a few passes to get enough of the insulation off, but I found it to be the easiest way. Unfortunately, I didn't take any pictures of that step as I was busy not trying to cut through the wires or my hands. Once you are done, you should see this:
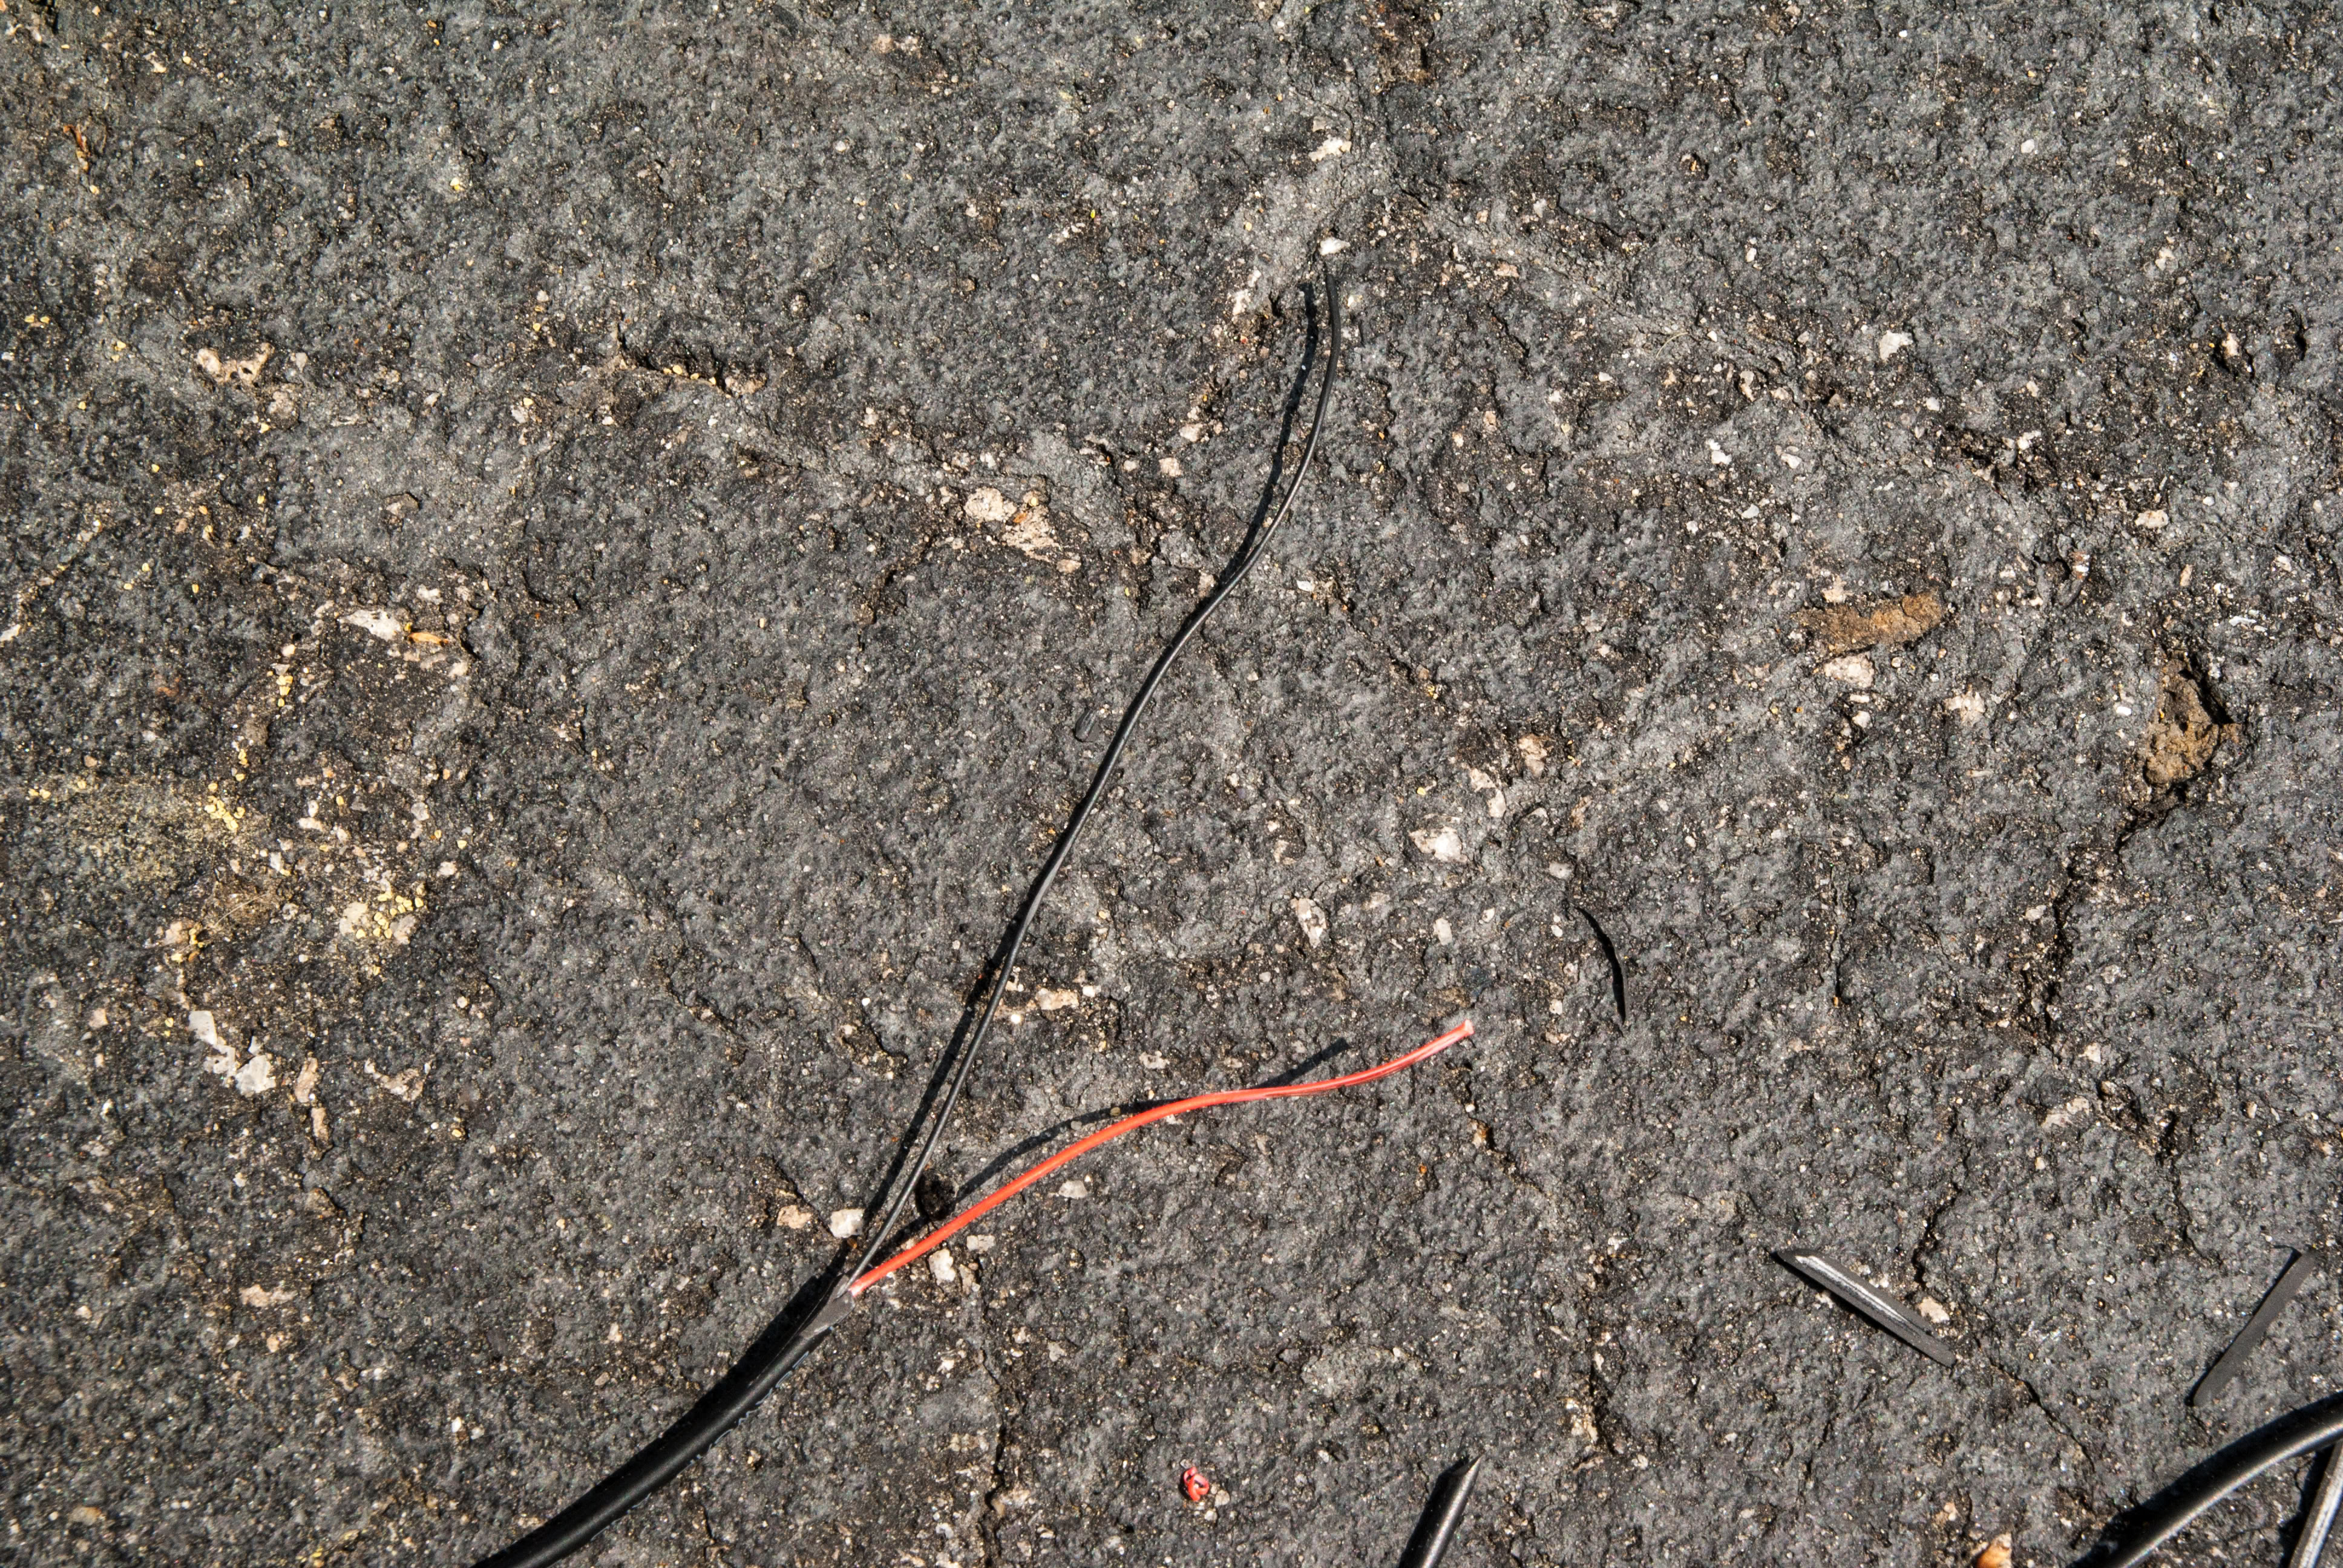
Once you have the insulation stripped away, you need to strip the wires themselves. These wires have maybe 6 copper strands in them, so they are very easy to break off. Once again, take your time stripping them.
Since they were such a thin gauge wire, I stripped them of about 3-4 inches of the insulation – that way I could fold the wire over itself to bulk it up. Once you do that, gently place it into the butt connector and crimp it shut.
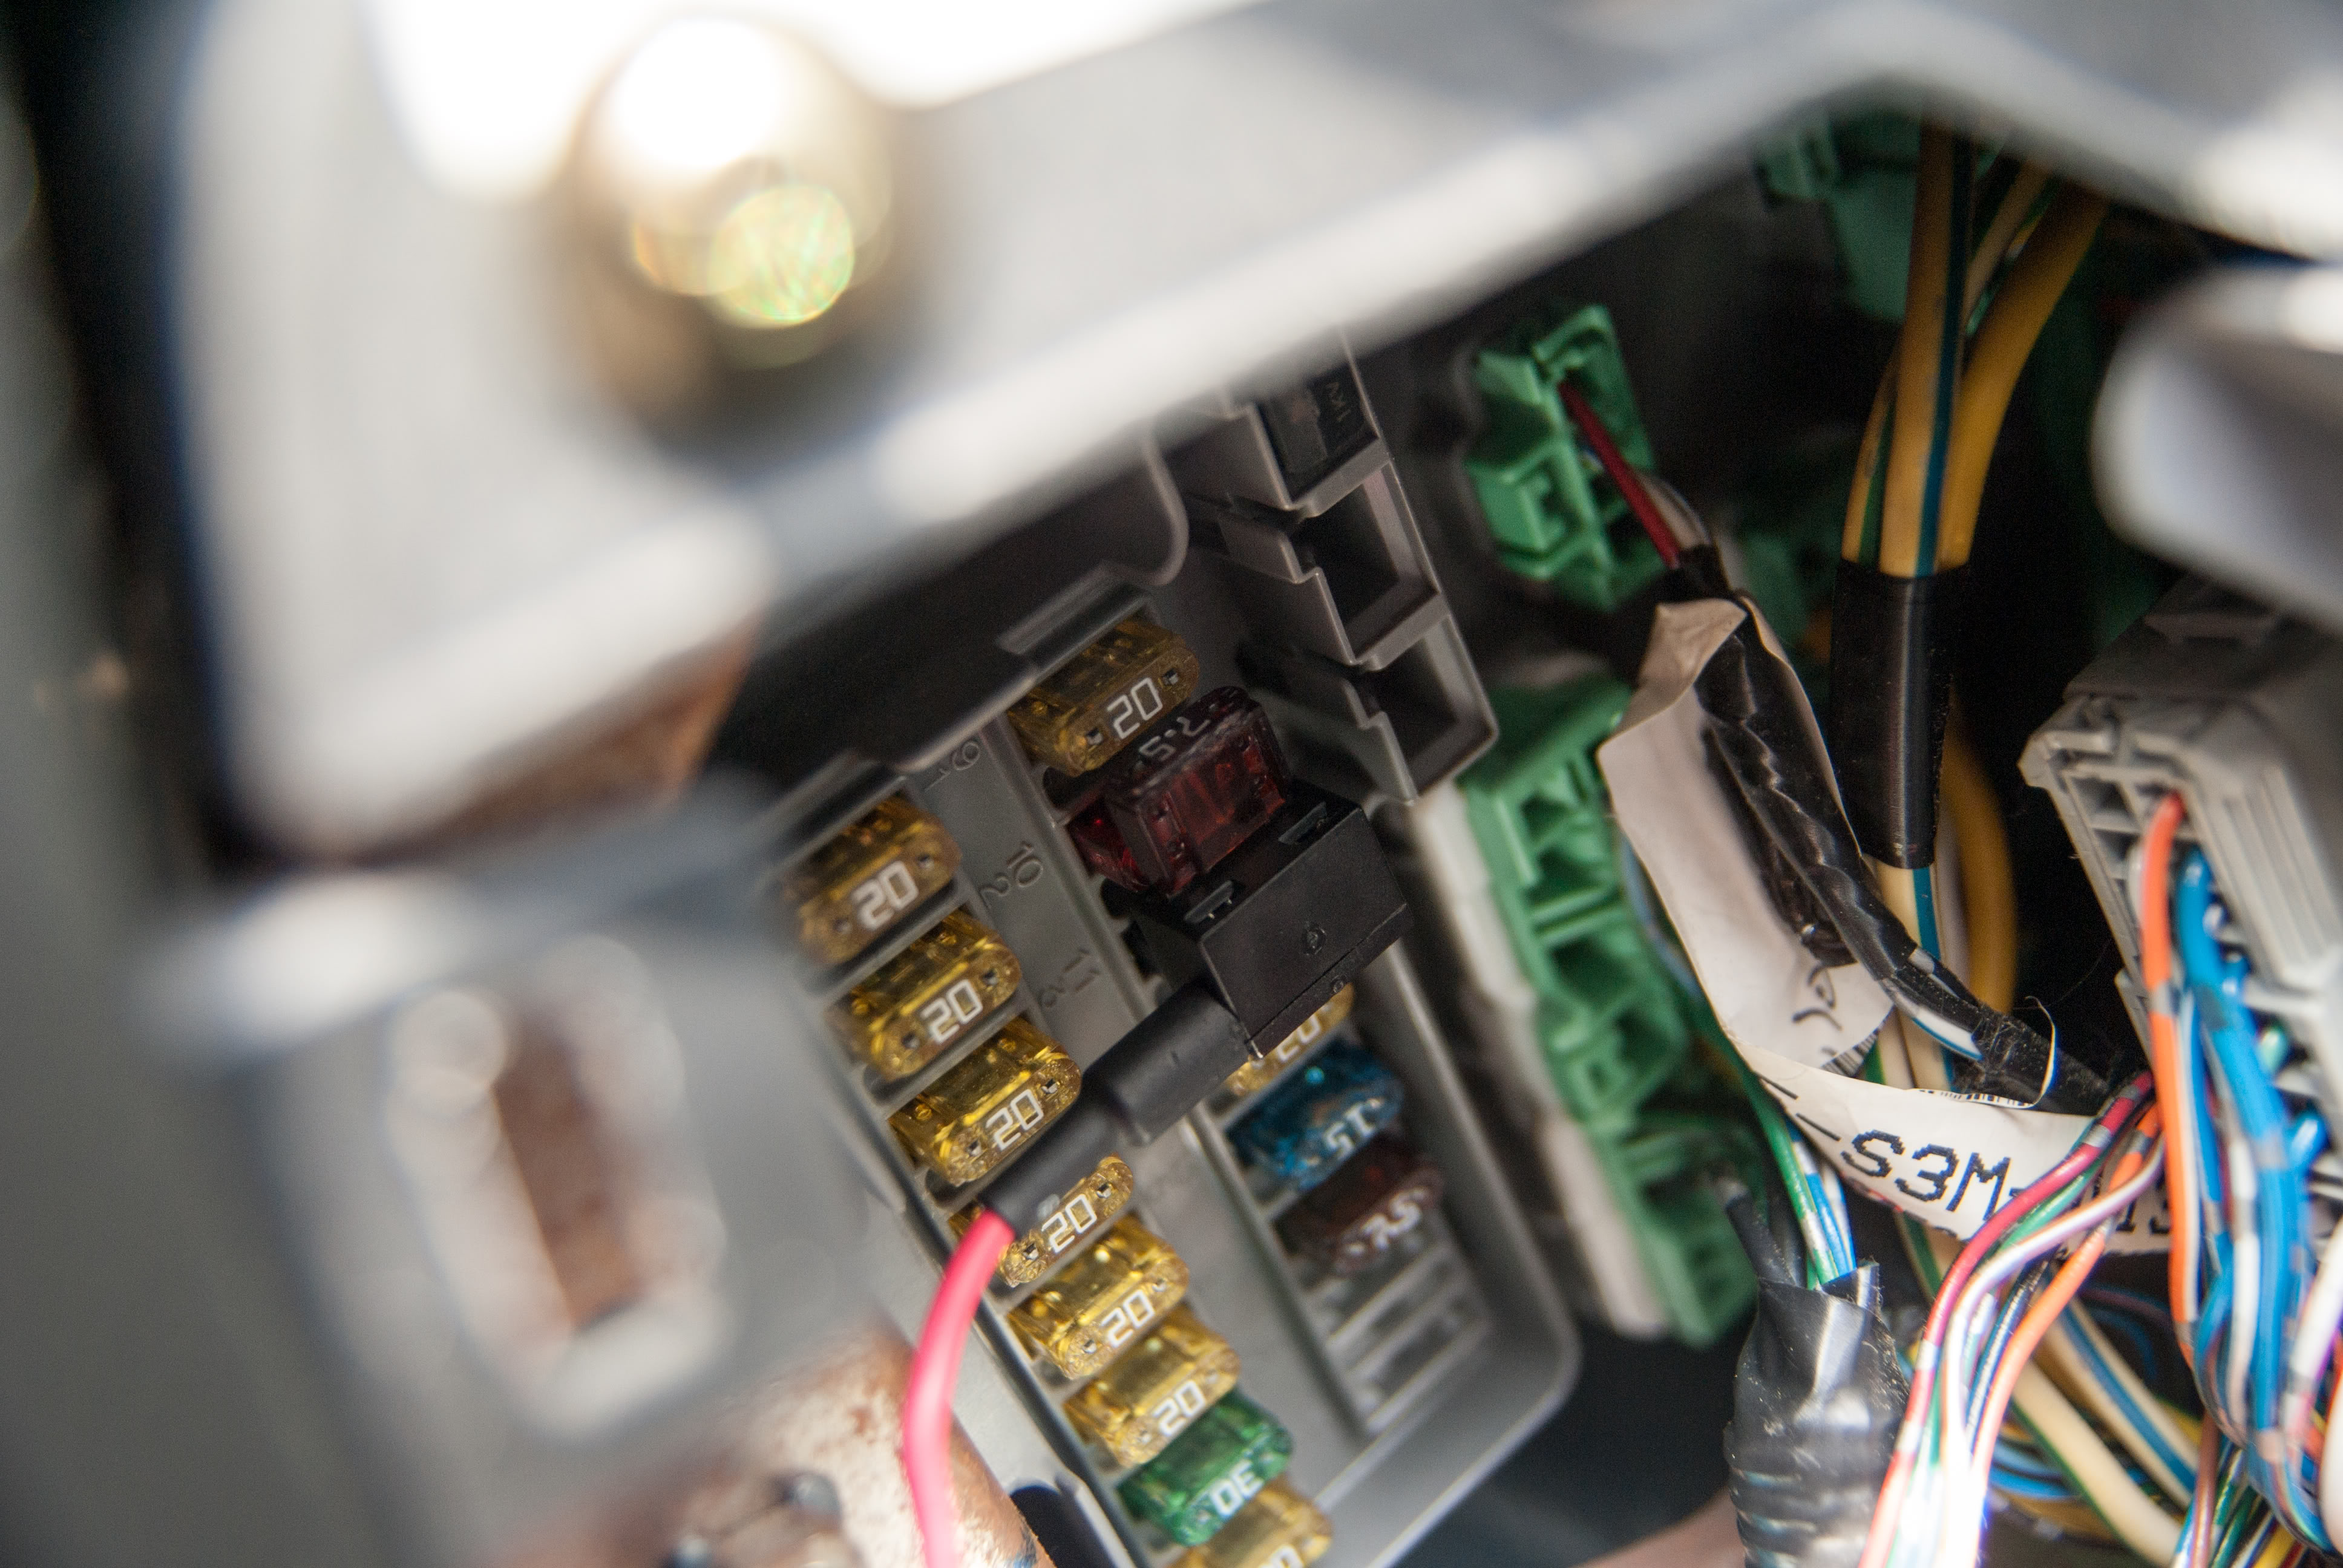
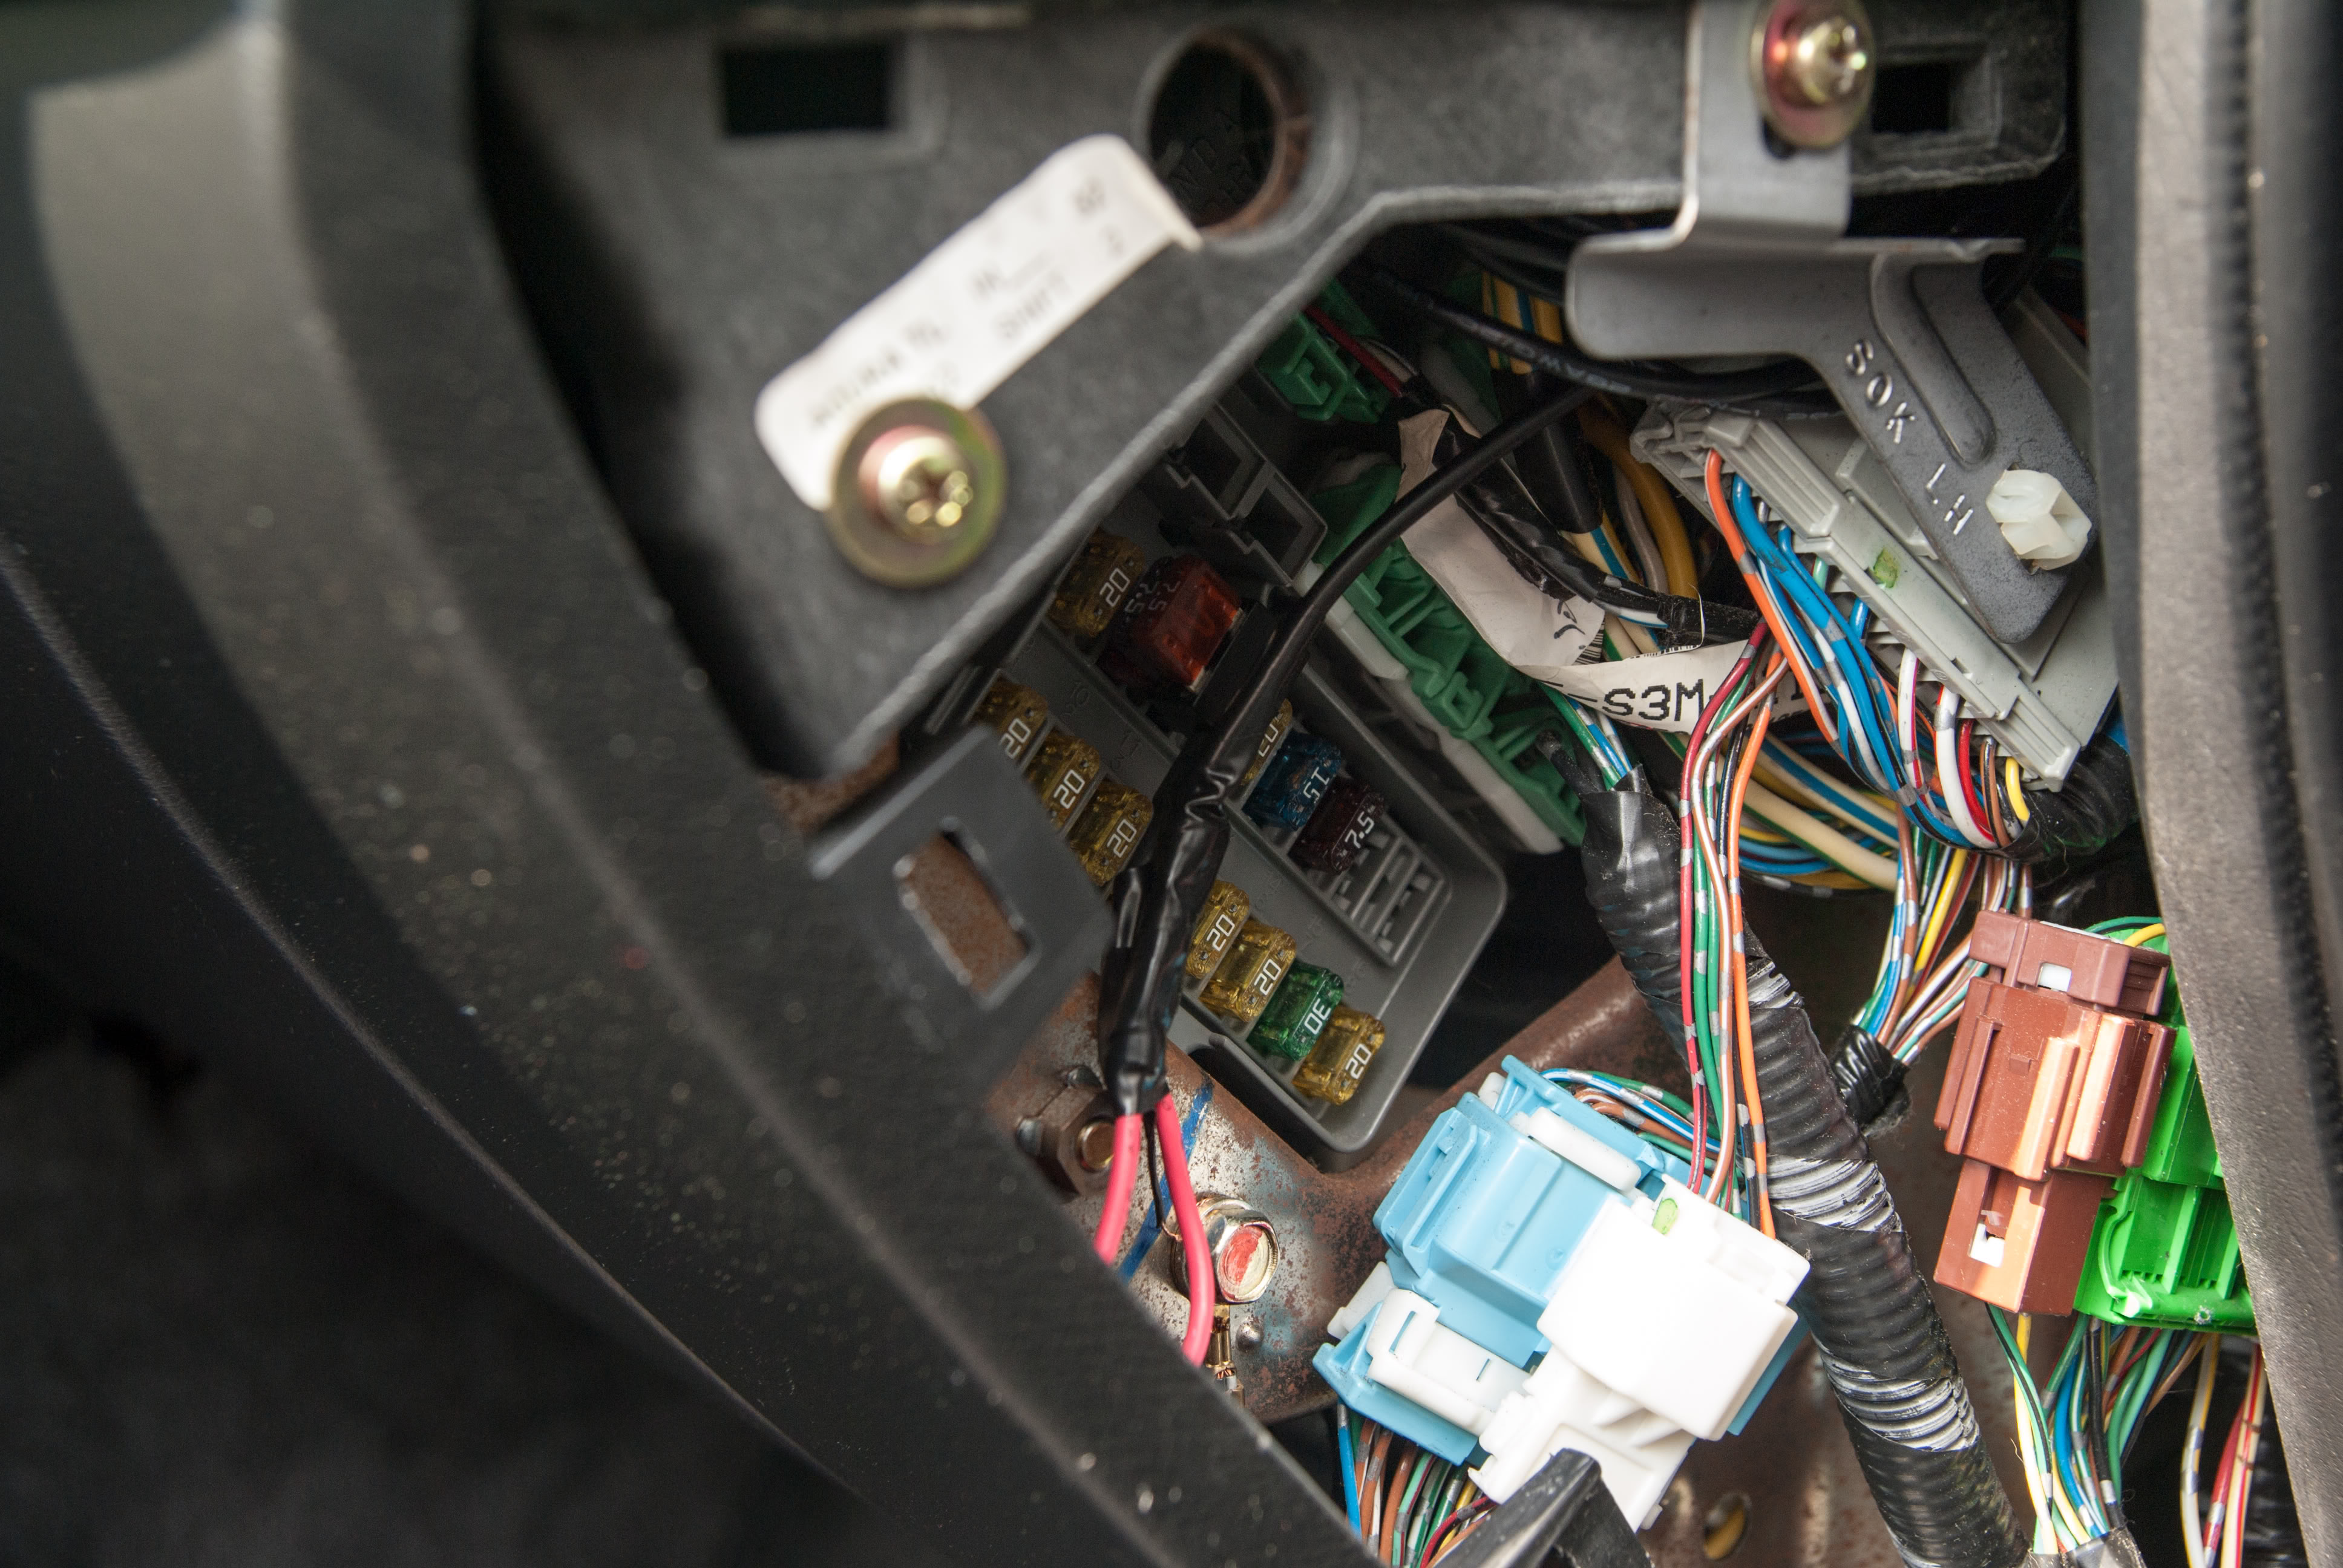
Next, find a bolt to use as a ground. I used an existing ground location that was right in front of the fuse box. Install the old overhead lighting fuse and the new fuse into the add-a-circuit, and plug it into the fuse box. Note – I only had one fuse in the add-a-circuit when this picture was taken. The fuse nearest the fusebox is used for the original circuit; in my case, the overhead lights. The output we need runs through the second fuse location. Without a fuse there, the device will not get power.
Once you attach the fuse, the device should begin to power on. With the BlackVue, when you park the car, the shock sensor will monitor for any movement for 10 minutes and then enter Parking mode. All thats left is to reinstall all interior pieces that you removed and clean up.
https://acurazine.com/forums/car-talk-5/why-you-should-run-dash-camera-847301/
I've been meaning to pick up a dedicated dash camera for awhile, and finally decided to pull the trigger and got a BlackVue DR400G-HD. Here is how to install it on a 2G CL/TL, taken from my review here:
https://acurazine.com/forums/showpos...&postcount=233
The Camera comes with a holder and very strong 3M double sided tape. I placed my camera in front of the rear view mirror so it does not interfere with my line of sight.
You have two options for power – use the cigarette lighter adapter or hardwire it. For testing, I had it plugged into the adapter, however I wanted a more permanent solution, so I decided to hardwire it to a constant power source. If you are doing the same, please remember that I am in no way, shape or form responsible if you screw up.
With that out of the way, you'll need to pick up an add-a-circuit at you local parts store. The 2G CL/TL uses ATM fuses, so make sure you get that as well as a package of fuses if you don't already have them. I am running it on a 7.5amp fuse, but you should be able to get away with a 5amp fuse.
Tools needed:
-Wire snips
-Crimp tool
-Electrical tape
-Razor blade
-Phillips head screwdriver
-Flat head screwdriver
-Small flat head screwdriver for prying
-10mm socket wrench (use a thin walled socket for the pass grab handle)
The first thing to do is mount the camera to the windshield if you haven't already.
Next figure out the best route for the power wire to the fuse box. The 2G CL/TL has two fuse boxes, I chose the passenger side since I already had a few wires running down the driver side A-pillar. I looked at all the circuits and decided to tap into the overhead light circuit, the 7.5amp fuse in #11.
Remove:
-A-pillar cover, lightly pull it away from the pillar.
-Sun visor, there are two screws holding it on. Once you remove those screws you need to turn the visor as you pull it down. There is a wire harness on it that needs to be unplugged.
-Sun visor stay, twist it clockwise, then pull down.
-HomeLink, there are two phillips head screws in the sunglass holder and two behind the light diffuser. Use a small phillips head screw driver to pry off the cover.
-Grab handle, not needed but it allowed me to drop the headliner just a bit more. Flip the little covers up, then use a thin walled 10mm socket to unbolt it.
I also pulled the weatherstripping away from the body where the A-pillar cover is. If makes it easier for you to get the weatherstripping on top of the cover when reinstalling.
Next step, cut off the end of the power cable that connects to the cigarette lighter adapter.
Route the cable through the headliner and down whichever pillar you chose. There is a ridge on the roof right at the front edge of the headliner. I routed the wire behind that ridge so it would stay up there and not slide out. It takes some maneuvering to get it in the right spot.
Here, I wrapped the cable around the wires already running up the A-pillar, then dropped the wire down below the dash. Once again, some careful maneuvering helps here.
Now this is the tricky part. The insulation is pretty thick, the wires inside are not. What I did was place the blade flat on top the wire and lightly applied pressure while pulling the wire towards it. It may take a few passes to get enough of the insulation off, but I found it to be the easiest way. Unfortunately, I didn't take any pictures of that step as I was busy not trying to cut through the wires or my hands. Once you are done, you should see this:
Once you have the insulation stripped away, you need to strip the wires themselves. These wires have maybe 6 copper strands in them, so they are very easy to break off. Once again, take your time stripping them.
Since they were such a thin gauge wire, I stripped them of about 3-4 inches of the insulation – that way I could fold the wire over itself to bulk it up. Once you do that, gently place it into the butt connector and crimp it shut.
Next, find a bolt to use as a ground. I used an existing ground location that was right in front of the fuse box. Install the old overhead lighting fuse and the new fuse into the add-a-circuit, and plug it into the fuse box. Note – I only had one fuse in the add-a-circuit when this picture was taken. The fuse nearest the fusebox is used for the original circuit; in my case, the overhead lights. The output we need runs through the second fuse location. Without a fuse there, the device will not get power.
Once you attach the fuse, the device should begin to power on. With the BlackVue, when you park the car, the shock sensor will monitor for any movement for 10 minutes and then enter Parking mode. All thats left is to reinstall all interior pieces that you removed and clean up.
Last edited by civicdrivr; 03-31-2012 at 01:48 PM.

The following 3 users liked this post by civicdrivr:
03-31-2012, 02:55 PM
#2
Suzuka Master
iTrader: (1)
Well done. 
I like that add-a-circuit device. It makes for a clean/reliable electical install.
I like that add-a-circuit device. It makes for a clean/reliable electical install.
Last edited by zeta; 03-31-2012 at 02:57 PM.
03-31-2012, 04:31 PM
#3
Whats up with RDX owners?
Thread Starter
iTrader: (9)
Yep, and an easily reversible install as well.
03-31-2012, 05:01 PM
#5
Whats up with RDX owners?
Thread Starter
iTrader: (9)
Picked it up on eBay from a reputable seller out of Korea. Ive noticed the prices have started to rise on them too 
BTW - Video clips can be found at the bottom of this post:
https://acurazine.com/forums/showpos...&postcount=233
BTW - Video clips can be found at the bottom of this post:
https://acurazine.com/forums/showpos...&postcount=233
03-31-2012, 11:14 PM
#6

I got a cam for $60 off ebay, and just run the wire from the cigarette lighter around the centre console, under the glovebox, up the side of the dash, inside the a pillar then under the headliner. A lot less clean than yours but took all of 5 minutes. Seem to be a lot of people getting dash cams now.
Trending Topics
04-01-2012, 03:00 PM
#9
Whats up with RDX owners?
Thread Starter
iTrader: (9)
But the GoPro doesnt loop record, power on with the car, or have a timestamp and speed display.
The whole idea for was in case of an accident. Since I hardwired it into the car, its always on, even when parked.
04-01-2012, 04:08 PM
#10
Suzuka Master
iTrader: (1)
This is tempting for me because there are plenty of f*cktard drivers in my neck of the woods.
Since you stated that you do alot of driving, having an adequately charged battery would be less of a concern in your case; however, do you anticipate any problems during the colder winter months with battery drain after the car sits in low temps for an extended length of time?
Since you stated that you do alot of driving, having an adequately charged battery would be less of a concern in your case; however, do you anticipate any problems during the colder winter months with battery drain after the car sits in low temps for an extended length of time?
04-01-2012, 04:16 PM
#11
Whats up with RDX owners?
Thread Starter
iTrader: (9)
We'll see.
The car sat last night in high 40* weather for about 15 hours. It started up with no issues. I got home from work this morning around 10am, and dont plan on using it until tomorrow afternoon at some point so we'll see how it does for 24 hours+.
From what I found online, the camera will pull about 3V a week. There are more expensive battery monitors out there for this stuff that will cut power when it sees the battery dip below a certain voltage, but Im cheap
The following users liked this post:
zeta (04-01-2012)
04-01-2012, 06:48 PM
#12
battery has crap charge when u roll with an UD pulley, so this unfortunately is not helping. my volt meter tells the whole story with mine. literally it's good for nothing when ur parked. i could drain the battery with the stock system playing in like 45 mins or so, and that's with a new battery (1 month old) and alt works great. but i luv the power so.. w/e can't have it all
civic i'm talking about if u get caught doing something illegal and they see u have a camera, that's all i'm saying..
obv ur not gonna post it online.. did i say that?
civic i'm talking about if u get caught doing something illegal and they see u have a camera, that's all i'm saying..
obv ur not gonna post it online.. did i say that?
04-01-2012, 06:53 PM
#13
Whats up with RDX owners?
Thread Starter
iTrader: (9)
For one, they need to serve me with a warrant or subpoena if they want to use it as evidence. Two, its very difficult to even notice the camera is there unless you are looking for it.
Regarding the UD pulley - yea, it doesnt charge the battery as well as the stock pulley. But this camera draws 3V a week when its running off the battery. Not a day, not an hour - a week.
Thats a far cry from the radio running off the battery for 45 minutes, especially since when you have the car on ACC, its not just the radio that is powered on. Everything has power. The fuel pump, ECU, gauge cluster, headlights, windows, etc.
When the key is out of the ignition, none of that has power - which is when this camera is running off the battery.
Last edited by civicdrivr; 04-01-2012 at 06:56 PM.
04-01-2012, 07:33 PM
#14
watts is power usage. volts and amps is what it needs to run/operate. volts and amps is how u calculate the power consumption which watts. just like ur powerbill which is rated in kilowatts.
so do u mean it'll lower the battery 3v over a week? cause i dunno what u meant
so do u mean it'll lower the battery 3v over a week? cause i dunno what u meant
04-01-2012, 07:56 PM
#16
Whats up with RDX owners?
Thread Starter
iTrader: (9)
Fuck, thats what I get when Im going on 4 hours of sleep.
I didn't mean volts, I meant watts. It uses 3W.
So yea, replace volts with watts, and my argument still stands.
I didn't mean volts, I meant watts. It uses 3W.
So yea, replace volts with watts, and my argument still stands.
The following users liked this post:
civicdrivr (04-01-2012)
04-01-2012, 11:36 PM
#18
Whats up with RDX owners?
Thread Starter
iTrader: (9)
Theres a small light purple LED that is on during parking mode. You could change the color in the software if you want, or you could even turn it off entirely.
During parking mode, it only records if something moves across the screen or it detects shock. Its constantly "scanning", so you'll get 10 seconds before an object moves or it feels the shock, but it doesnt save the video for the entire time the car is parked. Its a neat little device.
During parking mode, it only records if something moves across the screen or it detects shock. Its constantly "scanning", so you'll get 10 seconds before an object moves or it feels the shock, but it doesnt save the video for the entire time the car is parked. Its a neat little device.
The following users liked this post:
StreetKA (04-02-2012)
The following users liked this post:
civicdrivr (04-02-2012)
04-02-2012, 06:43 AM
#20
Senior Moderator
Another way to wire it so that yo u dont need to figure out what fuse to use and use the add a circuit to the fuse panel is on the back side of the drivers side fuse panel, there are 4 spots that take a female wire connector. 2 are switched power, one is constant and one is on with the lights. You can connect to that with an inline fuse as well 
The following users liked this post:
civicdrivr (04-02-2012)
04-02-2012, 09:23 AM
#21
Advanced
I've had an ebay search email me results on this cam for a while now.. seems to be dropping slightly from last week.. got a result today for $250 shipped with expedited EMS.. How much did you pay for yours? Which seller?
04-02-2012, 11:12 AM
#22
I Wanna Beer
Nice to goto the fuse box. I've done that with past cars for my old Valentine that now just sits in the center console. You could have also just tapped any of the power sources in there overhead such has the lights or HomeLink, both of which have constant power.
The following users liked this post:
civicdrivr (04-02-2012)
04-02-2012, 11:47 AM
#23
Whats up with RDX owners?
Thread Starter
iTrader: (9)
Another way to wire it so that yo u dont need to figure out what fuse to use and use the add a circuit to the fuse panel is on the back side of the drivers side fuse panel, there are 4 spots that take a female wire connector. 2 are switched power, one is constant and one is on with the lights. You can connect to that with an inline fuse as well

Is that the same on the 3G TL?
Last edited by civicdrivr; 04-02-2012 at 11:49 AM.
04-09-2012, 07:50 AM
#24
Advanced
Just an update in case anyone is looking at these.. I just ordered one for $225 with expedited shipping on eBay. The prices seem to be coming back down.
04-09-2012, 03:53 PM
#25
I Wanna Beer
04-10-2012, 08:45 AM
#26
Advanced

Thread
Thread Starter
Forum
Replies
Last Post
MetalGearTypeS
3G TL Audio, Bluetooth, Electronics & Navigation
6
08-29-2016 08:28 PM
dirleton
2G RDX (2013-2018)
8
09-28-2015 04:48 PM