DIY Clear Coat headlights. Permanent fix? maybe.....
 07-17-2010, 02:41 PM
#1
OG 3.x^7 rawr
Thread Starter
iTrader: (5)
Join Date: Feb 2007
Location: Centreville, VA
Age: 38
Posts: 685
Likes: 0
Received 5 Likes
on
5 Posts
DIY Clear Coat headlights. Permanent fix? maybe.....
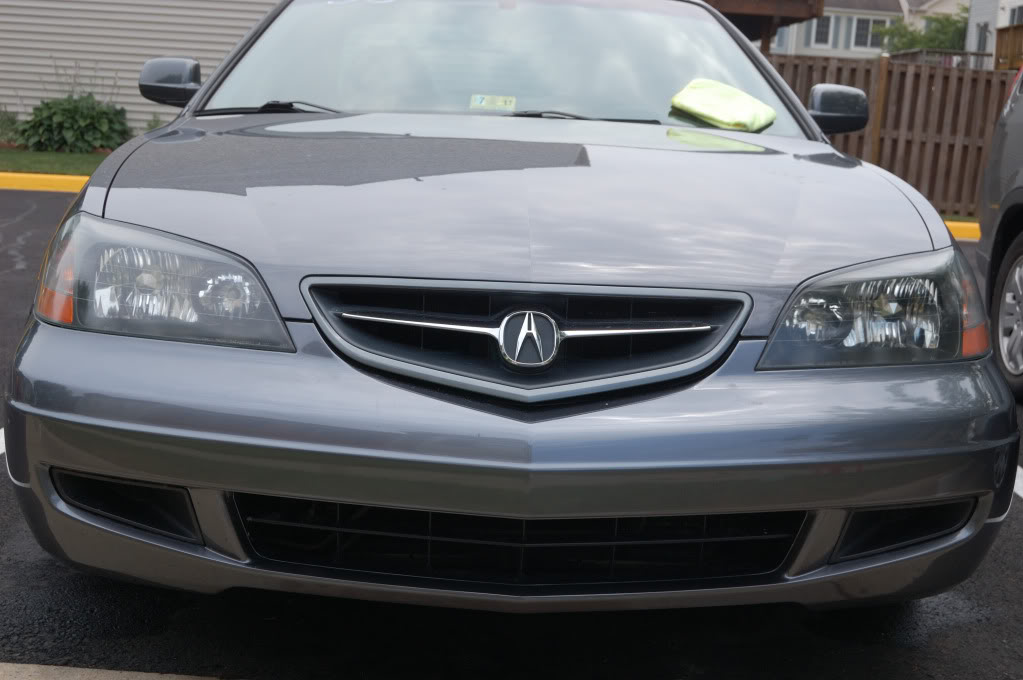
So with the whole wet sand, polish, and seal, I wanted to try something a little different that would last longer with less maintenance. I opted to apply a “clear” on the headlights. Results are pretty good so far, I just need to test how long it will last.
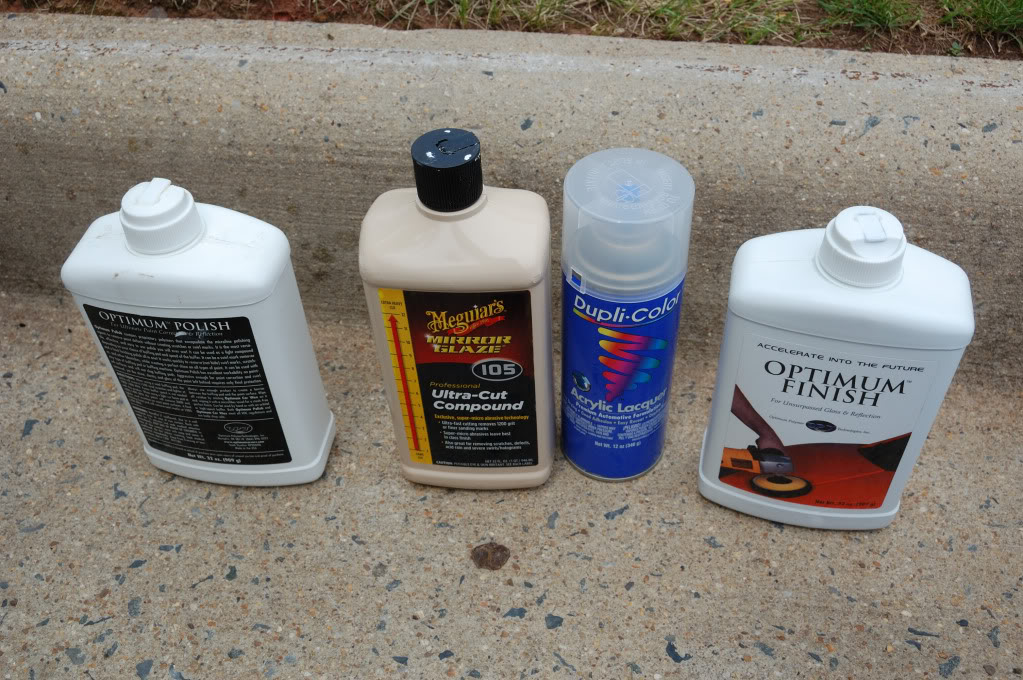
What you need:
-800, 1000, 1500, 2000 grit wet/dry sandpaper
-Painters tape
-Some newspaper or plastic bags
-Denatured alcohol
-Tack Cloth
-Acrylic Lacquer
-PC7424 buffer*
-Compound*
-Polish*
-Sealant*
*Optional, if you don’t have a buffer, you can use your elbow grease and buff by hand with plastic-x or something similar.
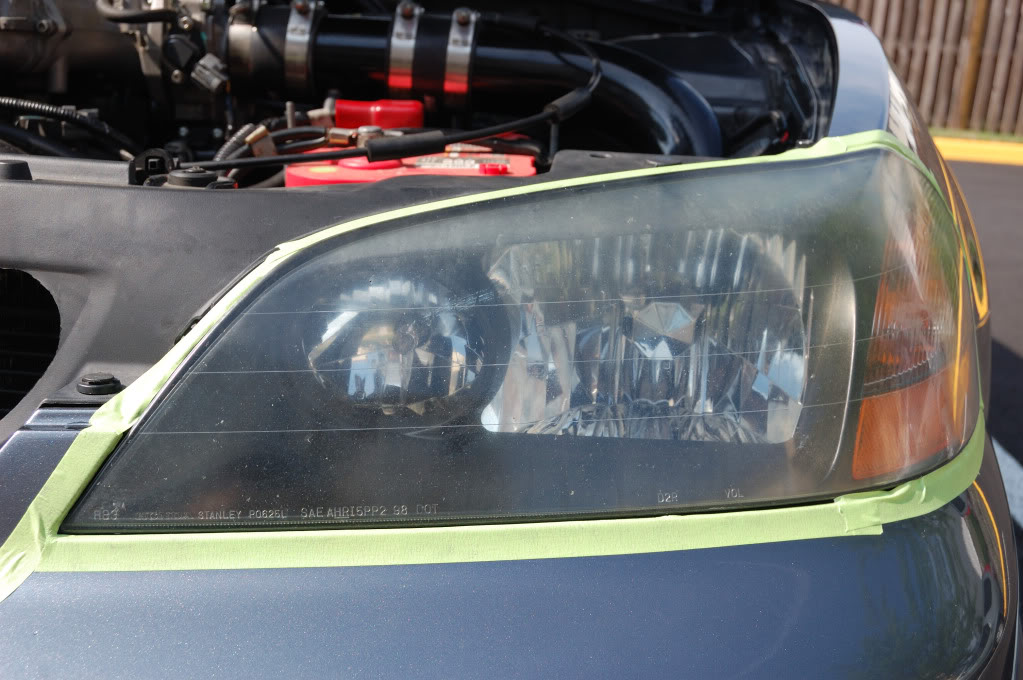
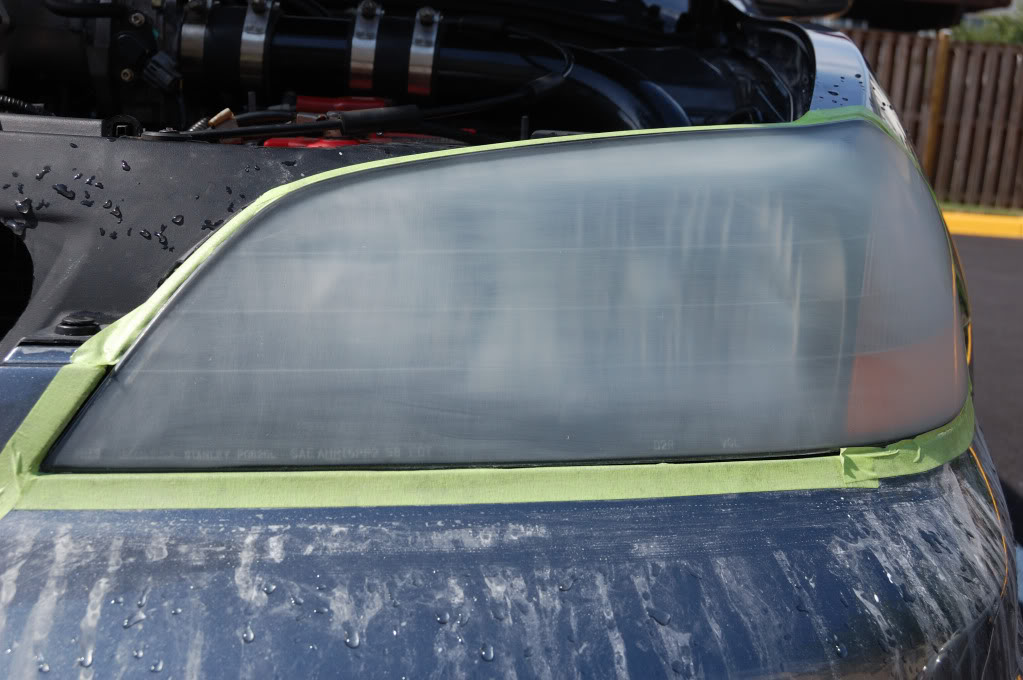
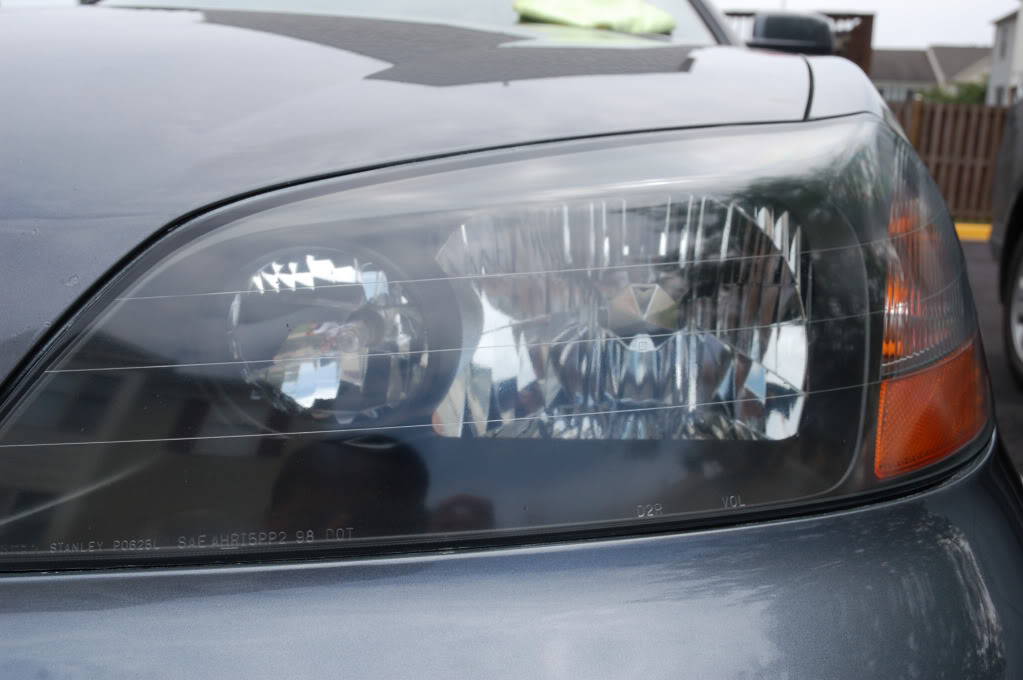
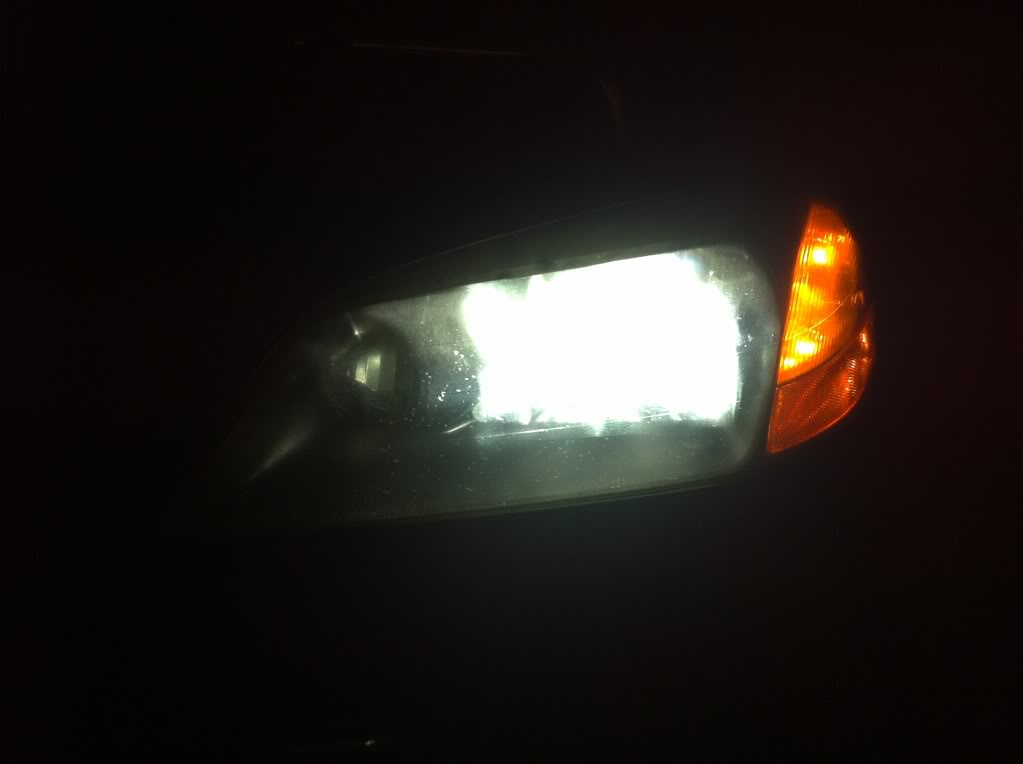
1. Mask headlight to prevent any accidental contact with body. Take your time and try to get as close to the headlight as you can. I opened the hood so I wouldn’t have to worry about the hood. You can see how bad my headlights have become after a year without touching them.
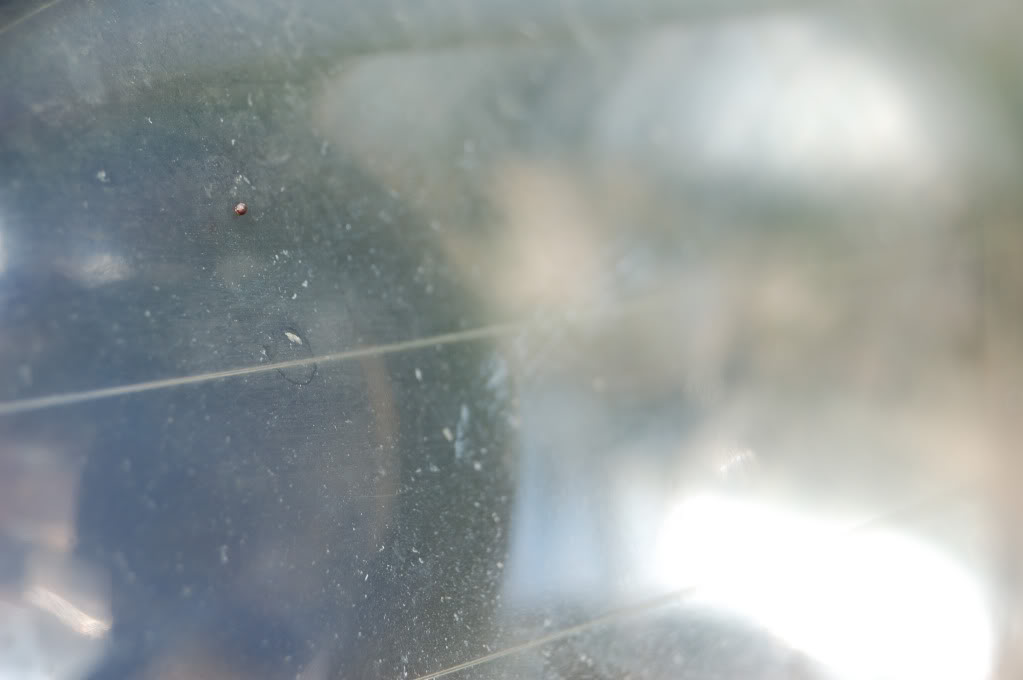
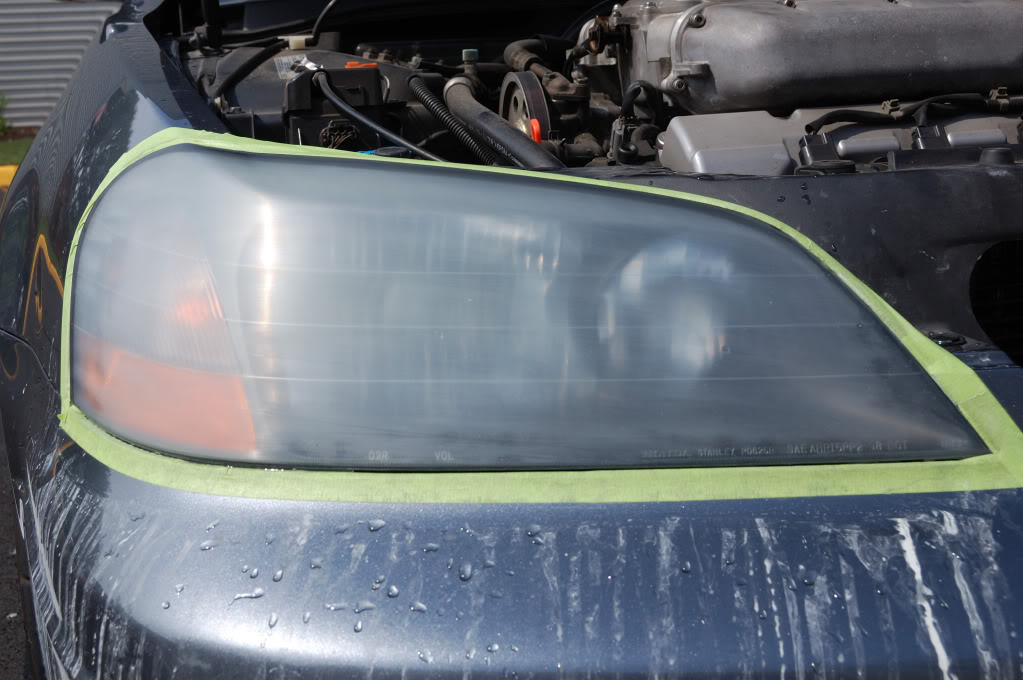
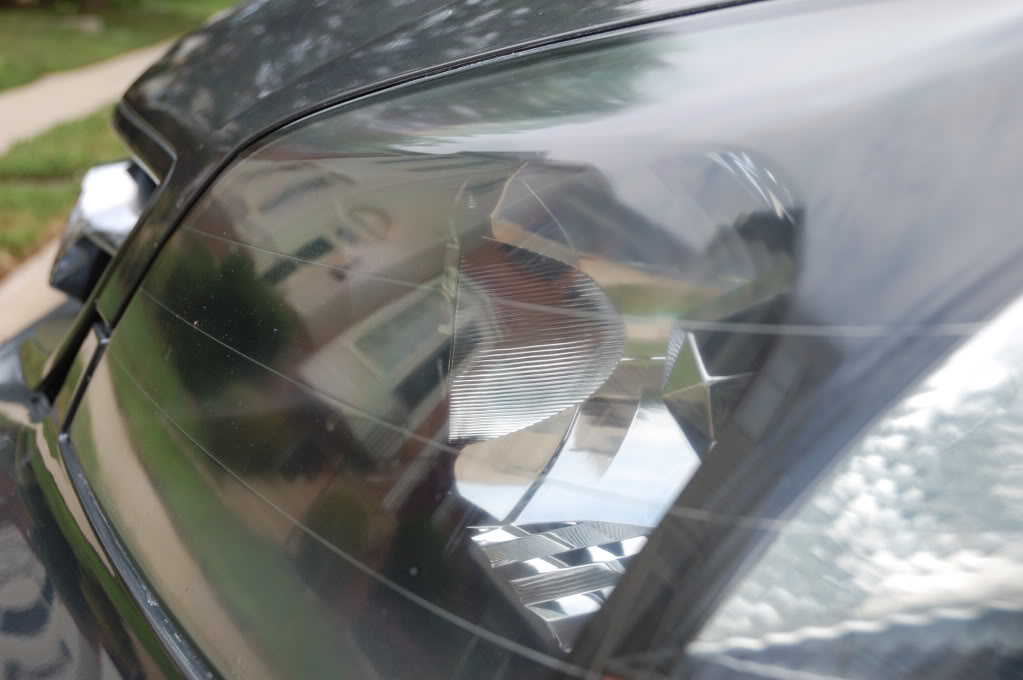
2. Soak the various grades of sand paper in water. Sand headlights with 800grit in a horizontal and vertical motion. Do not go in circles.
3. Once complete and headlights look hazed, rise with water. It should look like this when dry.
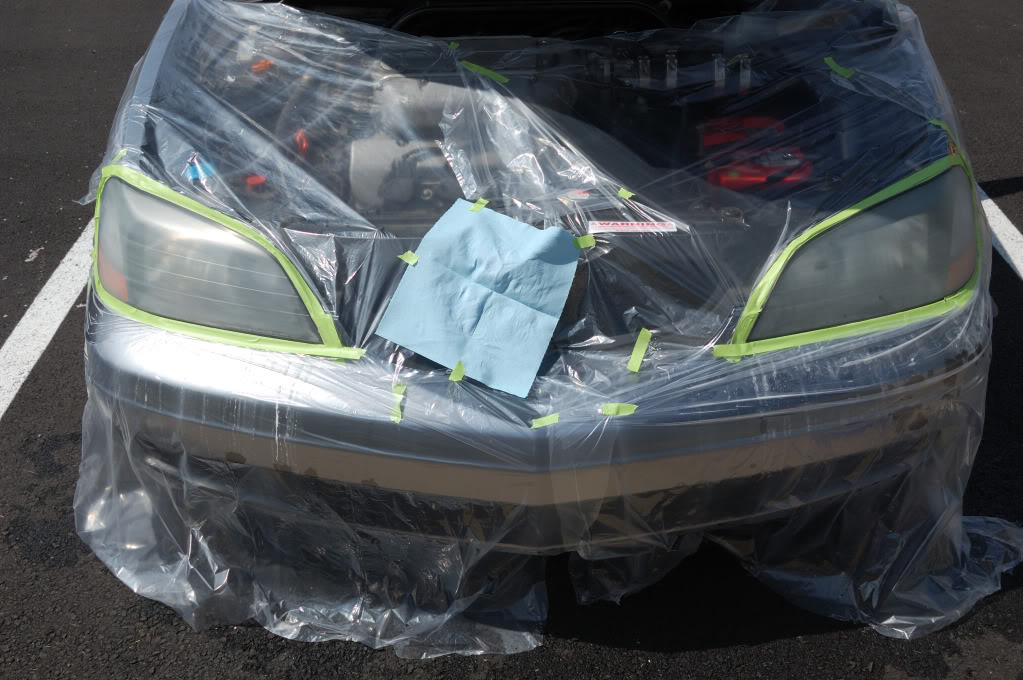
4. Mask off the area around the headlight with your newspaper or plastic bags. Make sure you tape secure the tape down so the wind doesn’t fluff it around. I noticed that it was easier to tape when the body was wet. The plastic bags stuck to the body and allowed me to control my tape line with the plastic bag. Don't mind the paper towel, there was a hole and I didn't want to use another bag.
5. Prep the surface with a quick denatured alcohol wipe with a paper towel to make sure no other wax was left behind that you might have missed from sanding. Next take your tack cloth and gently wipe the surface to remove any dust that maybe stuck on the surface.

6. Now its time to spray your clear. I laid down the first two coats very lightly with 10 minutes in between coats. My third and fourth coat I was pretty heavy on. Make sure you cut into the corners and the bends on the lens and then spray horizontally across. What you want to do is make sure you have enough so you don’t sand it off in the next step.

7. Follow the drying times from the can. You will notice that it might have a milky color to it. Once dry it was clear.
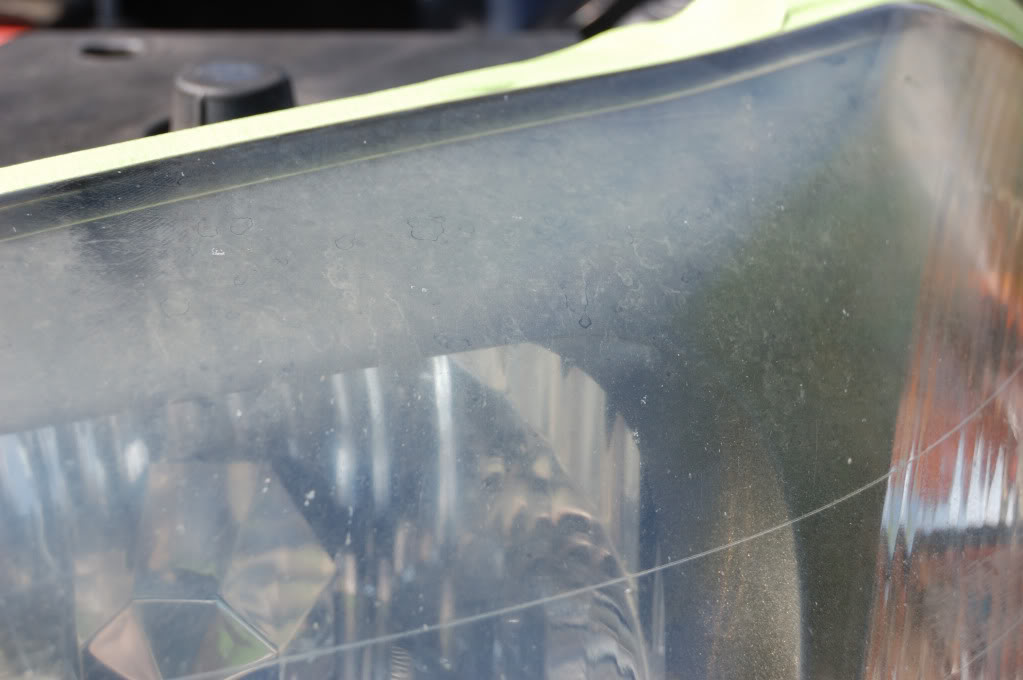
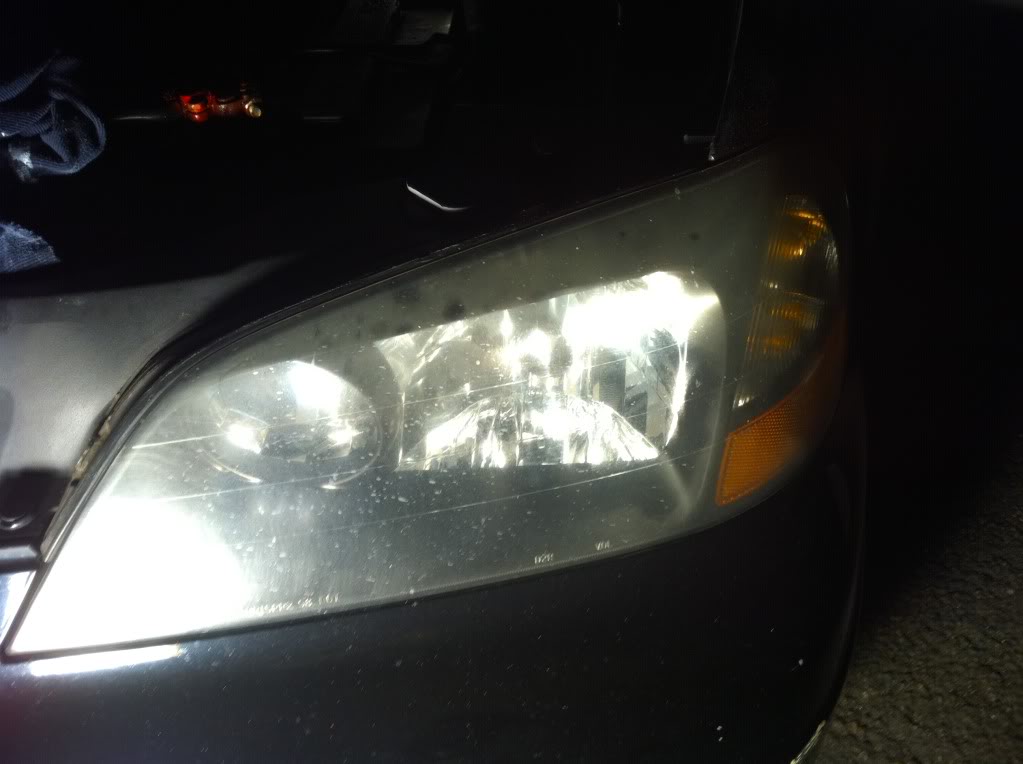
8. You might notice that the surface is a bit rough. What you want to do is go through the sanding process again from 800 to 2000 but very lightly. You just want to make sure that the surface is smooth again.
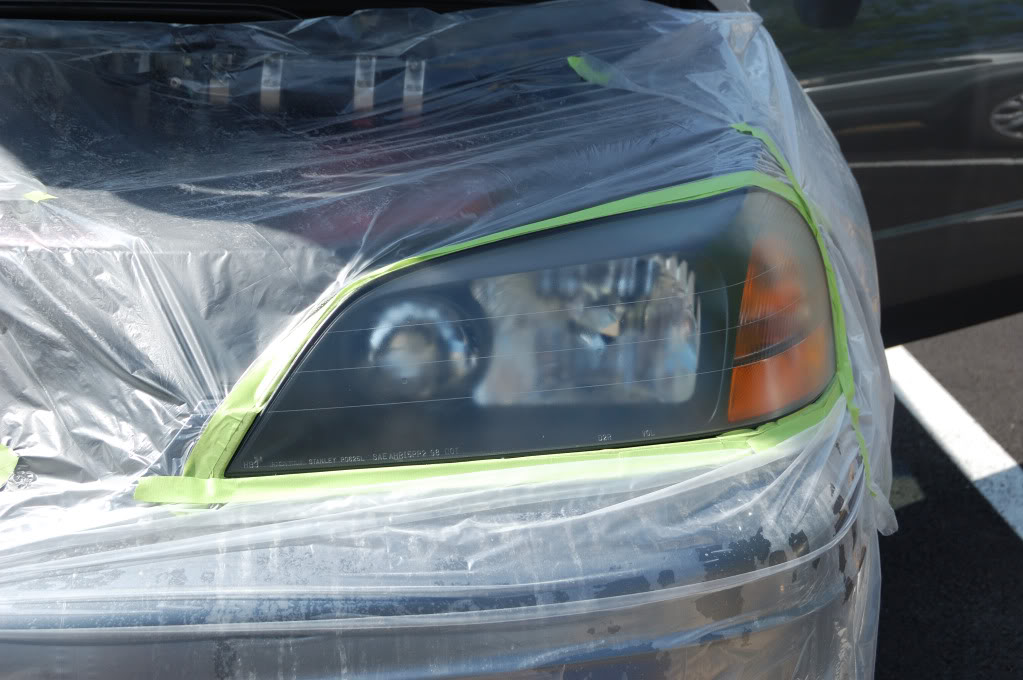
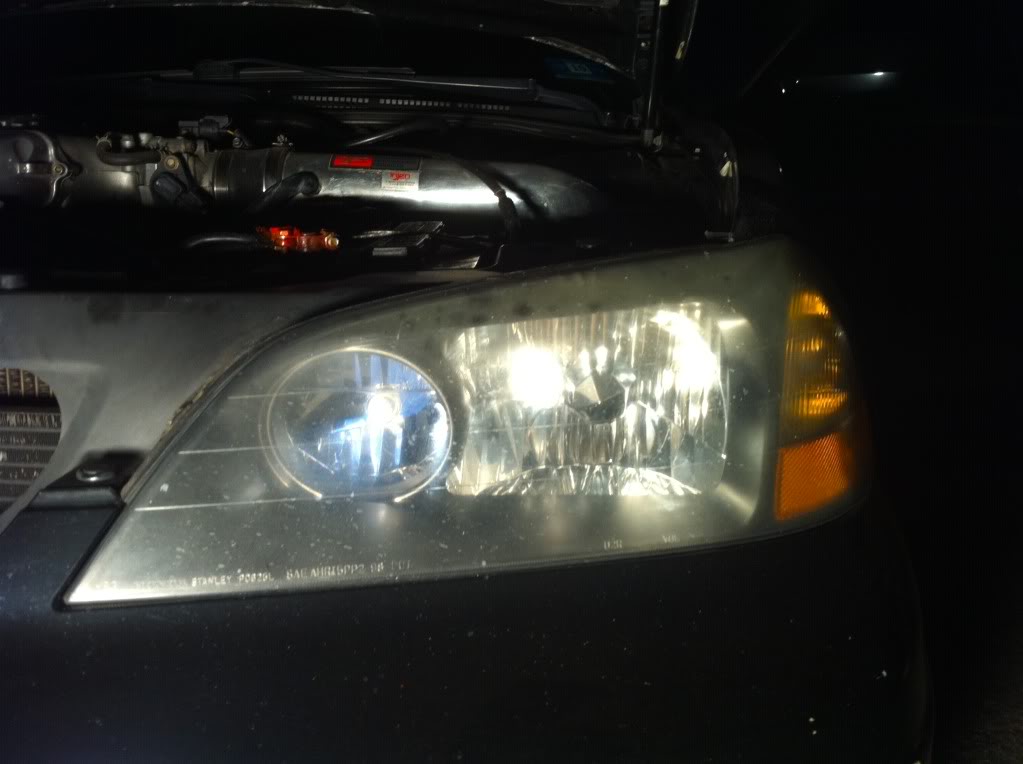
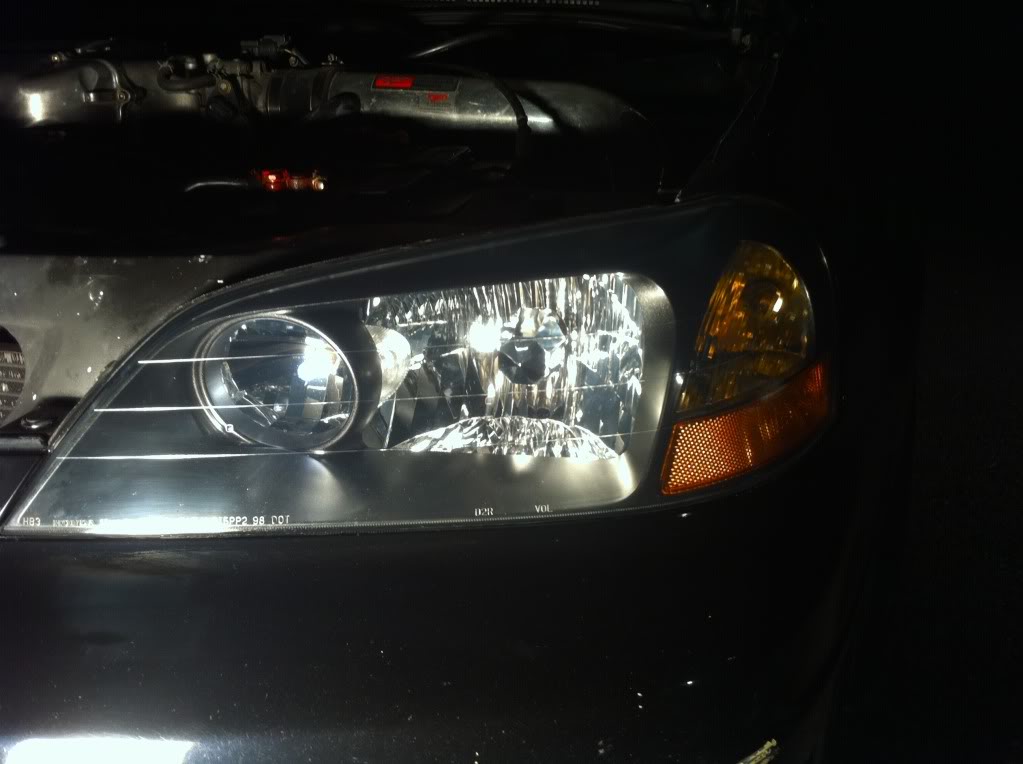
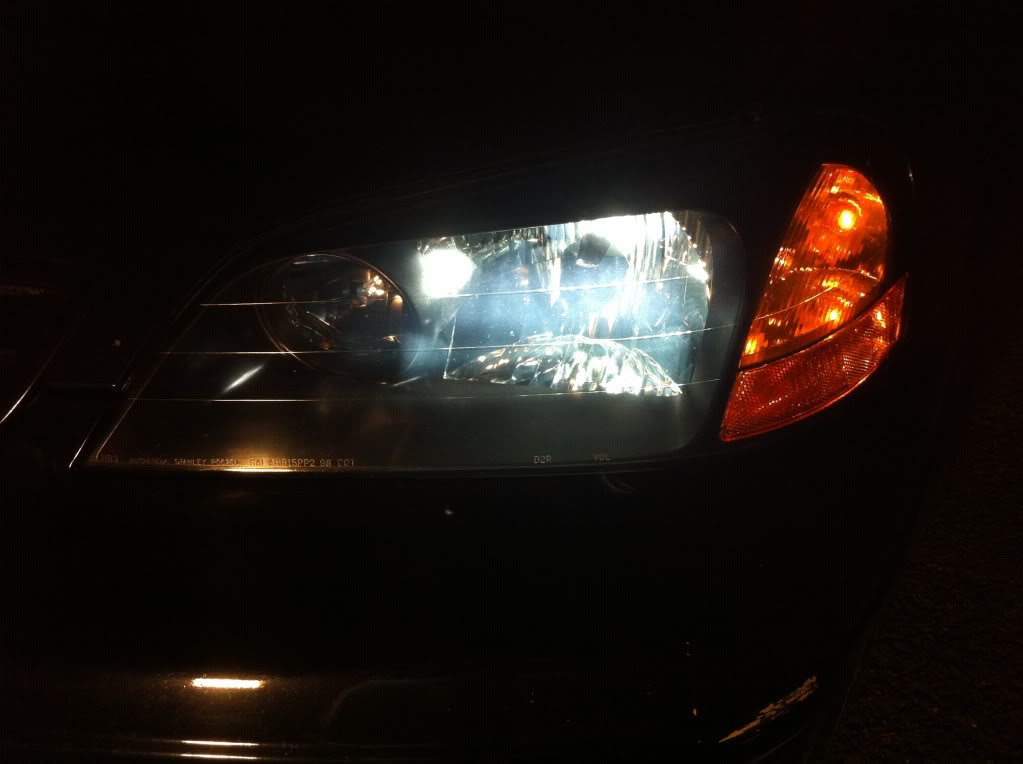
9. Take your compound and buff the headlight so the haze is gone. Next, take your polish and buff the headlights. I opted to use a final polish to give it some more clarity. Finally I topped it off with my sealant. The sun went away when I took these pictures but you can see that they pretty much look new again
I should probably have not sealed it just so I can test it with it being exposed. This was done with readily available materials at parts stores. If you don’t own a buffer, you can use plastic-X and buff with your hand like some of you guys do. There was a slight breeze so when I was clearing I had to wait for it to stop. If you have a garage it should make this a lot easier to control. I am going to update this in a few months to see how it does. Enjoy!
What you need:
-800, 1000, 1500, 2000 grit wet/dry sandpaper
-Painters tape
-Some newspaper or plastic bags
-Denatured alcohol
-Tack Cloth
-Acrylic Lacquer
-PC7424 buffer*
-Compound*
-Polish*
-Sealant*
*Optional, if you don’t have a buffer, you can use your elbow grease and buff by hand with plastic-x or something similar.
1. Mask headlight to prevent any accidental contact with body. Take your time and try to get as close to the headlight as you can. I opened the hood so I wouldn’t have to worry about the hood. You can see how bad my headlights have become after a year without touching them.
2. Soak the various grades of sand paper in water. Sand headlights with 800grit in a horizontal and vertical motion. Do not go in circles.
3. Once complete and headlights look hazed, rise with water. It should look like this when dry.
4. Mask off the area around the headlight with your newspaper or plastic bags. Make sure you tape secure the tape down so the wind doesn’t fluff it around. I noticed that it was easier to tape when the body was wet. The plastic bags stuck to the body and allowed me to control my tape line with the plastic bag. Don't mind the paper towel, there was a hole and I didn't want to use another bag.
5. Prep the surface with a quick denatured alcohol wipe with a paper towel to make sure no other wax was left behind that you might have missed from sanding. Next take your tack cloth and gently wipe the surface to remove any dust that maybe stuck on the surface.
6. Now its time to spray your clear. I laid down the first two coats very lightly with 10 minutes in between coats. My third and fourth coat I was pretty heavy on. Make sure you cut into the corners and the bends on the lens and then spray horizontally across. What you want to do is make sure you have enough so you don’t sand it off in the next step.
7. Follow the drying times from the can. You will notice that it might have a milky color to it. Once dry it was clear.
8. You might notice that the surface is a bit rough. What you want to do is go through the sanding process again from 800 to 2000 but very lightly. You just want to make sure that the surface is smooth again.
9. Take your compound and buff the headlight so the haze is gone. Next, take your polish and buff the headlights. I opted to use a final polish to give it some more clarity. Finally I topped it off with my sealant. The sun went away when I took these pictures but you can see that they pretty much look new again
I should probably have not sealed it just so I can test it with it being exposed. This was done with readily available materials at parts stores. If you don’t own a buffer, you can use plastic-X and buff with your hand like some of you guys do. There was a slight breeze so when I was clearing I had to wait for it to stop. If you have a garage it should make this a lot easier to control. I am going to update this in a few months to see how it does. Enjoy!

The following users liked this post:
LoeyD (03-13-2014)
07-17-2010, 02:50 PM
#3
OG 3.x^7 rawr
Thread Starter
iTrader: (5)
Join Date: Feb 2007
Location: Centreville, VA
Age: 38
Posts: 685
Likes: 0
Received 5 Likes
on
5 Posts
If you send me your headlight I'll do it...but I need to see if this will last. I was going to use another clear that I would have ordered, I’m sure it would have provided better results in the long run, but the clear I used here is available everywhere.
07-17-2010, 02:53 PM
#4
Whats up with RDX owners?
iTrader: (9)

Damn. Very impressive, and nice DIY.
Ill try this with my spare lenses and see how it affects the light output.

Ill try this with my spare lenses and see how it affects the light output.
07-17-2010, 03:19 PM
#5
Instructor
NICE DIY! But I was thinking of something a bit less time consuming and cheaper, something like this turtle wax kit that comes with the lubricant and only costs 10 bucks.

Also, are any of these products good as to add a "protective" coat after a person cleans the headlights so the wont go bad again??


or this TRIPLE THICK "GLAZE"


But I don't really want to damage my headlights using these chemicals, but I am interested in that spray on glaze protection. Or the clear coat spray
Also, are any of these products good as to add a "protective" coat after a person cleans the headlights so the wont go bad again??
or this TRIPLE THICK "GLAZE"
But I don't really want to damage my headlights using these chemicals, but I am interested in that spray on glaze protection. Or the clear coat spray
07-17-2010, 03:25 PM
#6
Suzuka Master
iTrader: (1)
God is in the details.
Great job and writeup!
Great job and writeup!
07-17-2010, 03:38 PM
#7
OG 3.x^7 rawr
Thread Starter
iTrader: (5)
Join Date: Feb 2007
Location: Centreville, VA
Age: 38
Posts: 685
Likes: 0
Received 5 Likes
on
5 Posts
NICE DIY! But I was thinking of something a bit less time consuming and cheaper, something like this turtle wax kit that comes with the lubricant and only costs 10 bucks.
Also, are any of these products good as to add a "protective" coat after a person cleans the headlights so the wont go bad again??
[
But I don't really want to damage my headlights using these chemicals, but I am interested in that spray on glaze protection. Or the clear coat spray
Also, are any of these products good as to add a "protective" coat after a person cleans the headlights so the wont go bad again??
[
But I don't really want to damage my headlights using these chemicals, but I am interested in that spray on glaze protection. Or the clear coat spray
This is what I wanted to use.
Trending Topics
07-17-2010, 03:47 PM
#8
i am glad somebody here finally had the guts to do this.
so its only a matter of time now..........
i think it will hold up fine since its paint.
i will gv it a try tommorrow.
i also end up sanding down my lens every three - 5 months so this is a great solution.
so its only a matter of time now..........
i think it will hold up fine since its paint.
i will gv it a try tommorrow.
i also end up sanding down my lens every three - 5 months so this is a great solution.
07-17-2010, 03:52 PM
#9
The kits that you see in stores are not going to prevent it from happening again. A sealant will only slow down the process of it oxidizing. Thats why people that have used the "kits" have only lasted a few months. The spray's you listed are intended for indoor use. You can try it if you want but I would avoid it as it will probably not last outdoors.
This is what I wanted to use.

This is what I wanted to use.
that clear coat looks like its got all the bells and whistles but U-Pol Clear #1 UV Resistant Clear Coat (Aerosol Can) - is a stiff $20 or more....
 07-17-2010, 03:52 PM
#10

my light are 8 years old and still look new when they oxidize, i'll just use my glass coverage to get new ones and they will last another 8+ years
07-17-2010, 03:52 PM
#11
OG 3.x^7 rawr
Thread Starter
iTrader: (5)
Join Date: Feb 2007
Location: Centreville, VA
Age: 38
Posts: 685
Likes: 0
Received 5 Likes
on
5 Posts
good luck, take your time on preping the surface. It's what makes or breaks a paint job. Make sure you lay down enough clear as well. The first light I did, I didn't cut into the bends with the clear. So when I was compounding, the corner was bare so I had to respray.
07-18-2010, 10:14 PM
#12
5th Gear

Join Date: Jul 2010
Posts: 5
Likes: 0
Received 0 Likes
on
0 Posts
the question is, will the clear coat become yellow......... automotive clear coat probably won't yellow. but you used a lacquer- is that the same formulation as the car paint's clear coat? can you estimate how much of the clear coat you buffed out after you sprayed it? I once sprayed some krylon acrylic clear coat on a clear transparent cd case. the krylon glossy clear coat fogged it all up, and when i sanded and buffed, I pretty much took off the entire clear coat that I sprayed.
07-18-2010, 10:28 PM
#13
Whats up with RDX owners?
iTrader: (9)
He said to lay down enough clear so you wont remove it all when you buff.
Im sure the UV rated clears will stand up well to the sun.
Im sure the UV rated clears will stand up well to the sun.
07-19-2010, 05:19 AM
#17
5th Gear
Join Date: Jul 2010
Posts: 5
Likes: 0
Received 0 Likes
on
0 Posts
after searching on the internet, it seems GlassyLite is the best method to keep the lights from yellowing for a while. Amazon reviews are pretty good
reviews say that the final clear coat in GlassyLite resists chipping and yellowing, and ?permanently? bonds to polycarbonate. Seems to be superior to spray painting the headlights. For $28, it kinda seems like a ripoff, but it might be worth the headache saved. The only reason I'm hesitant to buy is because they only provide a tiny bottle of their top secret clear ''nanotech'' coat.
I know that sanding and polishing and waxing only lasts me 1 month at most before I see a slight yellowing again. And I know acrylic spray paint clear coats commonly yellow under the sun, not to mention, they're often too soft (easily scratch) when cured.
07-19-2010, 05:33 AM
#18
5th Gear
Join Date: Jul 2010
Posts: 5
Likes: 0
Received 0 Likes
on
0 Posts
http://www.autogeekonline.net/forum/...t-idea-11.html
^even more interesting. using wood urethane sealer from home depot. check out post #109. dude said it lasted one year and still looks new!
^even more interesting. using wood urethane sealer from home depot. check out post #109. dude said it lasted one year and still looks new!
07-19-2010, 06:31 AM
#19
OG 3.x^7 rawr
Thread Starter
iTrader: (5)
Join Date: Feb 2007
Location: Centreville, VA
Age: 38
Posts: 685
Likes: 0
Received 5 Likes
on
5 Posts
^I remember reading about it. I'm sure it works, a little tricky to apply the stuff from what I read. I'm going to see how it hold in a week with my lights on during the day.
There was a thread a few weeks ago about hazy headlights on which I had talked about using Solaray Headlight Lens Clear Coat. Only thing is it's expensive, and you have to have a UVA lamp for it to cure. Not many people are going to spend that kind of $ when they can just get some new headlights or buff them every few months. I opted to take a cheaper route that was going to provide some long term protection. If they last a year or two with very minimal maintenance, it's good enough for me
.
07-19-2010, 12:40 PM
#20
Regional Coordinator (Texas)
iTrader: (38)
clear caoting them is the best way to go. all that headlight restore bullshit comes back again and u can only do that a few times before u eat up most of the plastic.
08-15-2010, 01:02 PM
#21
4th Gear

Join Date: Aug 2010
Age: 56
Posts: 4
Likes: 0
Received 0 Likes
on
0 Posts
Liquid Vision
We have a product that is patented, will be on the market very soon. Easy to do. Just sand using water , wipe clean and apply pattented clear coat. Dry in minutes to a glass finish and has a 5 year warranty.
08-15-2010, 05:12 PM
#23
4th Gear
Join Date: Aug 2010
Age: 56
Posts: 4
Likes: 0
Received 0 Likes
on
0 Posts
I can not mention the price yet in public forum. There is a video on utube
http://www.youtube.com/watch?v=8IBZTNmIBWs
http://www.youtube.com/watch?v=8IBZTNmIBWs
 08-15-2010, 09:36 PM
#29
OG 3.x^7 rawr
Thread Starter
iTrader: (5)
Join Date: Feb 2007
Location: Centreville, VA
Age: 38
Posts: 685
Likes: 0
Received 5 Likes
on
5 Posts
I can not mention the price yet in public forum. There is a video on utube
http://www.youtube.com/watch?v=8IBZTNmIBWs
http://www.youtube.com/watch?v=8IBZTNmIBWs
Originally Posted by rondog
I've seen headlights that were clearcoated, and they look good when the lights are off during the day, but at night with the lights on, the whole lense looks milky and not so clear. Have you checked this out?
11-24-2010, 11:01 AM
#38
OG 3.x^7 rawr
Thread Starter
iTrader: (5)
Join Date: Feb 2007
Location: Centreville, VA
Age: 38
Posts: 685
Likes: 0
Received 5 Likes
on
5 Posts
I redid my HID wiring the last week. They still look the same. I haven't repolished or anything. Now I did notice that it somewhat chipped off at the corner but its hard to see. I'm sure it would be best if you removed your headlights and just spray the whole assembly. Of course masking the rear and bottem off. I'm thinking about doing this again when it gets warmer, but with a different clear (one I was going to get) just to see if there are any differences.
11-30-2010, 02:39 PM
#39
i wanted to share how my headlights came out from this
about 10-15 $ http://www.turtlewax.com/main.taf?p=2,1,4,32
Before(its washed with windex 2 times)
and After
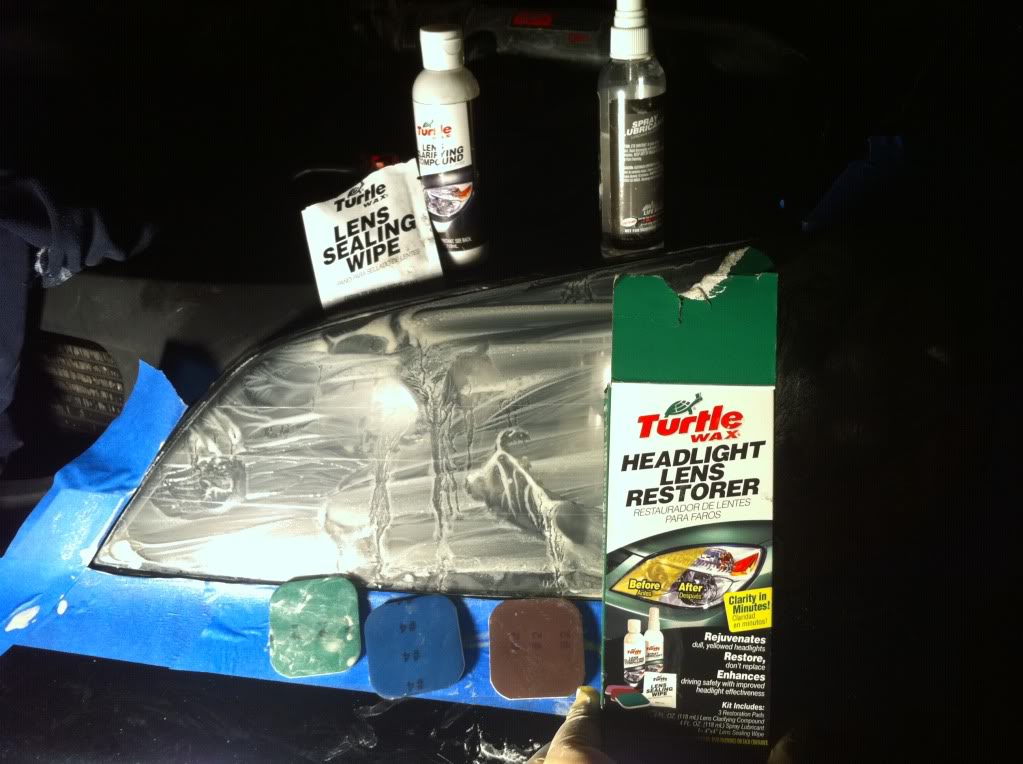
also it has some kinda sealing that u apply at the end that it will prevent from the problem in the future...
there is two kinds of these kits one does include that sealing the other one doesnt... it makes huge differenace
http://www.automoblog.net/2010/02/23...storation-kit/
as for now this is the cheapest and best solution i have ever tried. better than 3M kit for sure and require less work. i did each headlight in like 15 min.
about 10-15 $ http://www.turtlewax.com/main.taf?p=2,1,4,32
Before(its washed with windex 2 times)
and After
also it has some kinda sealing that u apply at the end that it will prevent from the problem in the future...
there is two kinds of these kits one does include that sealing the other one doesnt... it makes huge differenace
http://www.automoblog.net/2010/02/23...storation-kit/
as for now this is the cheapest and best solution i have ever tried. better than 3M kit for sure and require less work. i did each headlight in like 15 min.
11-30-2010, 02:43 PM
#40
Whats up with RDX owners?
iTrader: (9)
Just an FYI, that sealant they provide wont last forever. You do need to treat them as if they were paint with wax/sealants to keep it protected.