Dual piston caliper upgrade diy
 09-02-2008, 07:11 PM
#1
Jhatt from Ludhianna
Thread Starter
Join Date: Jun 2006
Age: 53
Posts: 410
Likes: 0
Received 0 Likes
on
0 Posts
Dual piston caliper upgrade diy
****OK THOSE WHO DON'T KNOW HOW TO SAFELY JACK UP THEIR CARS ON A JACK STAND PLEASE DON'T ATTEMPT THIS UPGRADE****
The parts ordered from www.rockauto.com, do a search for this website coupons and you can get additional 5-10% off on your cart, below are the exact parts that you will need:
CALIPERS from a
1994 AURA LEGEND GS 3.2L
Brand Raybestos part # RC10628 && RC10627, these are fully loaded calipers with the mounting brackets...you need the one with the mounting brackets.
ROTORS FROM :
1996 HONDA PRELUDE VTEC
part # 39796374R, buy the ones that are 11-3\32" in diameter, some models had 10" dia ones but you need the one that says 11.5" dia
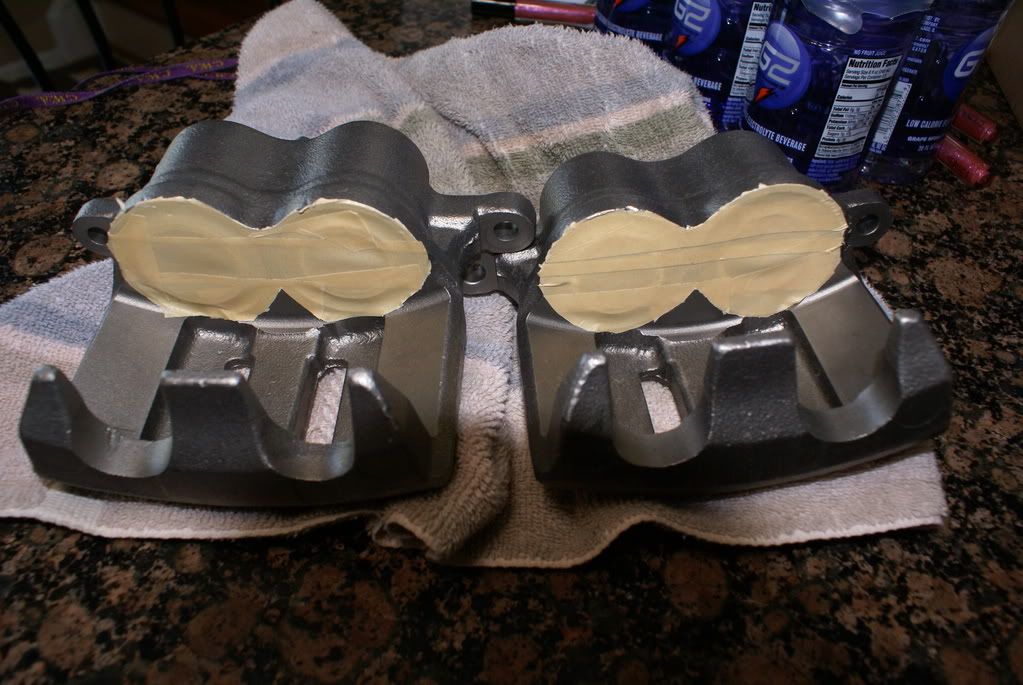
If you plan to paint the caliper this is the time you can do that. Clean the calipers with some break cleaner and prep them for the caliper spray paint like below such that the piston and the rubber seal are blocked:
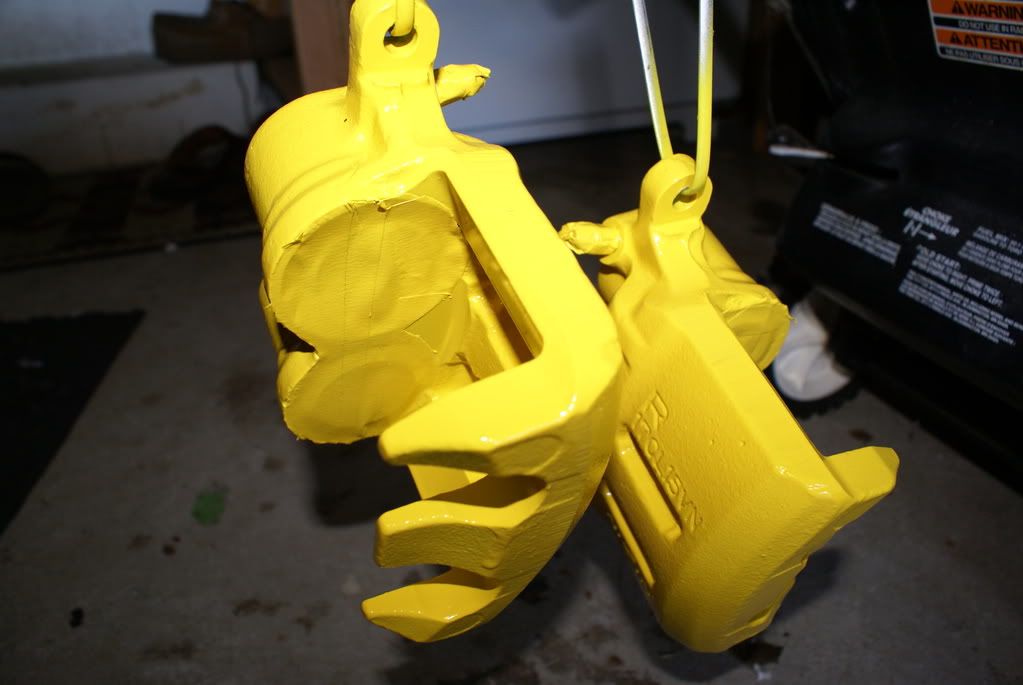
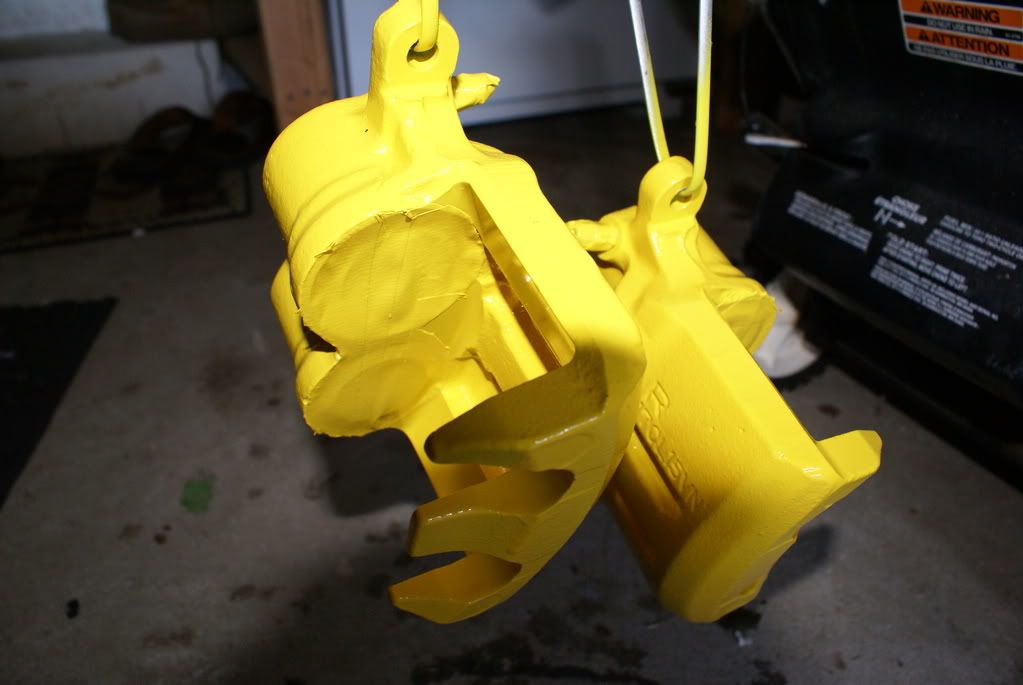
I took some barbecue skewers and suspended the calipers for the spray shot:
After you are done spray painting let it set for curing and start working on the actual swap.
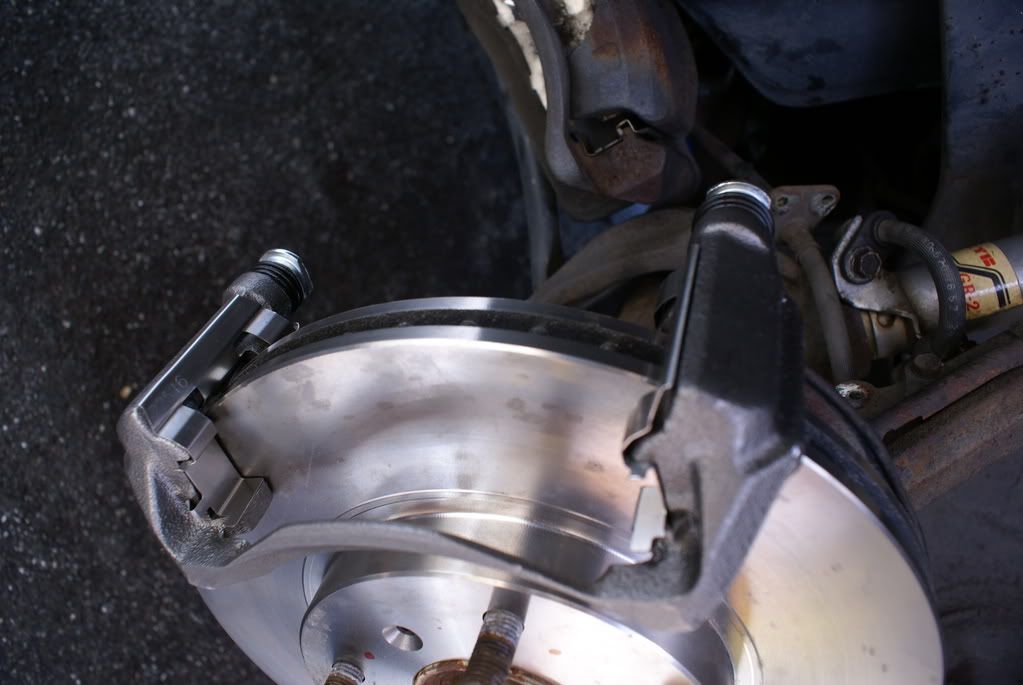
After you have safely jacked up the car unhook the wheel&tire. Loosen the caliper glide bolts and slide the caliper off the glide this gives you enough room to unhook the bracket. After the caliper has been free do not disconnect the brake line you will do this later just tuck the caliper safely such that it does not pull of the brake line. Also remove all the supporting brackets that attache the brake line to the suspension so you have enough slack. SINCE YOU WILL BE UNHOOKING THE BRAKE LINE THIS WOULD BE THE RIGHT OPPORTUNITY TO REPLACE THEM IF YOU CAN, AS OLDER LINES HAVE FATIGUED AND NEWER LINES WILL MAKE THE BRAKE JOB 100% NEW AND MORE RESPONSIVE AS WHEN YOU BRAKE THE OLD BRAKE LINES TEND TO FLEX THERE BY LOSING SOME AMOUNT OF YOUR FOOT PRESSURE.
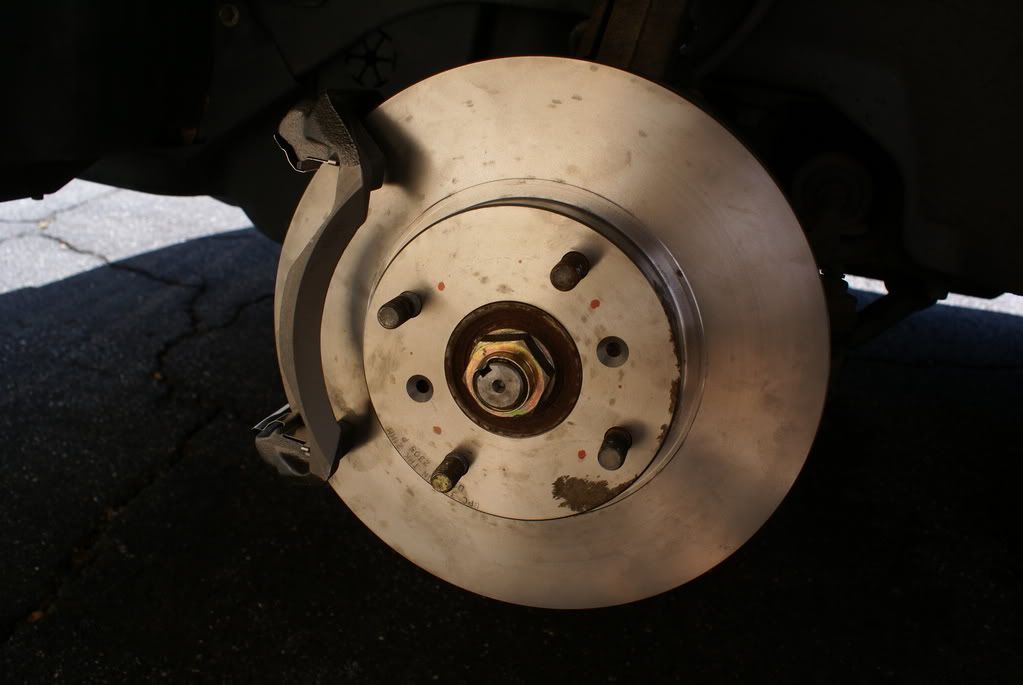
NOW ONE VERY VERY IMPORTANT THING THE CALIPER COME MARKED "R" AND "L" BUT WHEN YOU INSTALL YOU WILL DO THE OPPOSITE IF YOU DON'T DO THIS YOU WILL NEVER BE ABLE TO BLEED THE SYSTEM..i.e FROM THE DRIVERS PERSPECTIVE USE THE CALIPERS MARKED "R" ON THE LEFT SIDE AND THE ONES MARKED "L" ON THE RIGHT SIDE, TRUST ME I DID THIS MISTAKE AND IT COST ME $200 JUST TO TAKE TO PEPBOYS AND GeT THEM RE-SWAPPED TO BE ABLE TO BLEED, THE IDEA BEING THAT THE BLEEDER SCREW SHOULD BE POINTING UPWARDS AND IF YOU SEE THE PICS BELOW WHEN I INSTALLED THEM THEY ARE POINTING DOWNWARDS THERE BY TRAPPING AIR AT THE TOP OF THE CALIPERS.
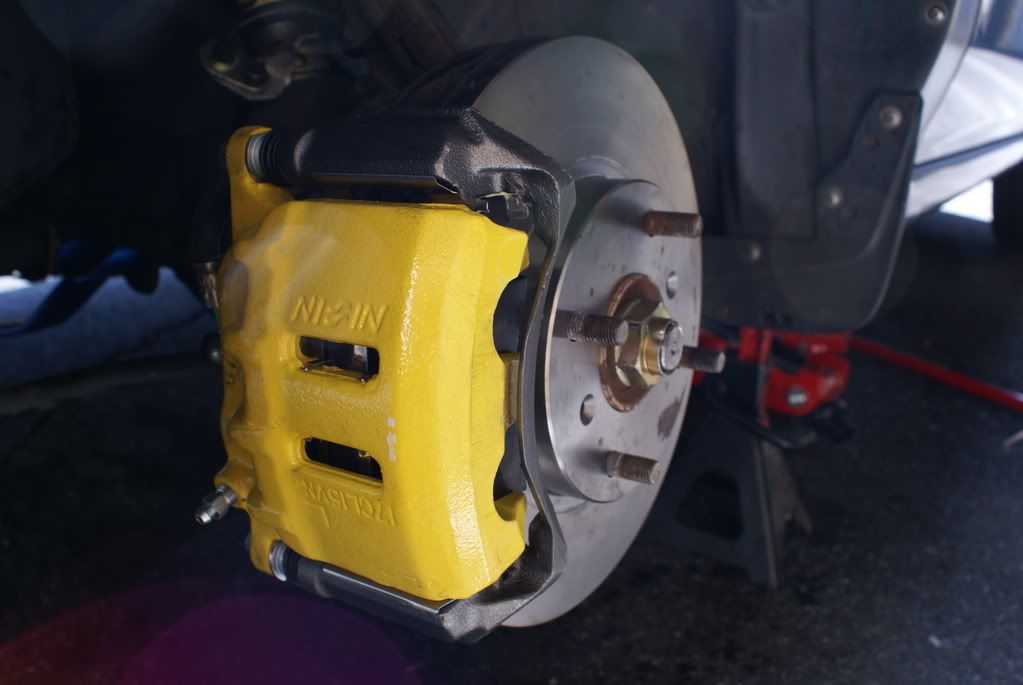
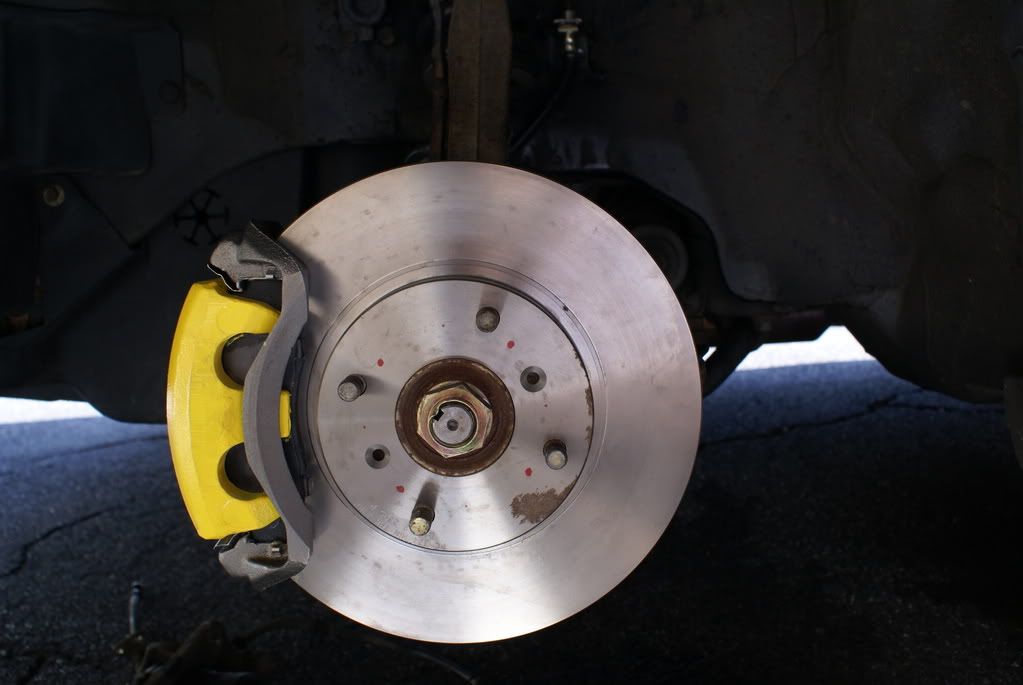
After you have installed the bracket install the pads apply a little bit of lubricant on the slide pins so that the pads can slide on the pins easily. Place the pads and snap the calipers on there and tighter the slide bolts on the calipers. Check that all the bolts are tightened properly.
Now hook up the new brake line to the new caliper and also to all the points on the suspension making sure that the other end is close to the frame line. Now unhook the old brake line from the frame/metal tubing end and quickly tighten the new line on. Now make sure that the brake fluid resivour is full with brake fluid. Ask a friend to help you pump the brake for you after a couple of pumps till your friend can feel some pressure tell him to hold the brake pedal in the pressed position and release the brake bleeder screw to let the brake fluid bleed. Repeat the process a number of time till you see clear brake fluid flush out of the bleeder screw making sure that you keep topping the resivour with brake fluid. IF YOU DON'T PAY ATTENTION TO THE RESIVOUR FLUID LEVEL AND YOU ACCIDENTALLY SUCK IN AIR YOU ARE DONE NOW YOU WILL NEED A COMPLETE BRAKE SYSTEM BLEED SO BE CAREFUL .
.
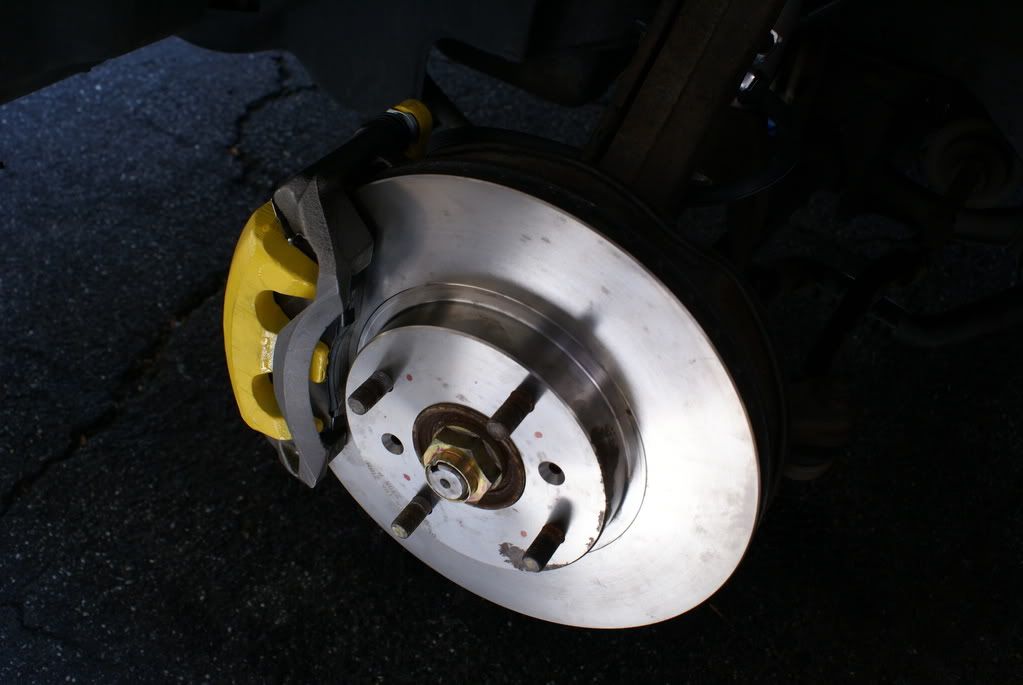
After you are done on one side do the other side and when done test drive the car very very slowly and gently making suer that you have gotten the correct braking ability.
THIS IS THE BEST MOD/UPGRADE THAT I DID TO THIS CAR ....ANY QUESTION PM ME AND I WILL BE MORE THAN GLAD TO HELP YOU OUT...
ENJOY...
JFK

The parts ordered from www.rockauto.com, do a search for this website coupons and you can get additional 5-10% off on your cart, below are the exact parts that you will need:
CALIPERS from a
1994 AURA LEGEND GS 3.2L
Brand Raybestos part # RC10628 && RC10627, these are fully loaded calipers with the mounting brackets...you need the one with the mounting brackets.
ROTORS FROM :
1996 HONDA PRELUDE VTEC
part # 39796374R, buy the ones that are 11-3\32" in diameter, some models had 10" dia ones but you need the one that says 11.5" dia
If you plan to paint the caliper this is the time you can do that. Clean the calipers with some break cleaner and prep them for the caliper spray paint like below such that the piston and the rubber seal are blocked:
I took some barbecue skewers and suspended the calipers for the spray shot:
After you are done spray painting let it set for curing and start working on the actual swap.
After you have safely jacked up the car unhook the wheel&tire. Loosen the caliper glide bolts and slide the caliper off the glide this gives you enough room to unhook the bracket. After the caliper has been free do not disconnect the brake line you will do this later just tuck the caliper safely such that it does not pull of the brake line. Also remove all the supporting brackets that attache the brake line to the suspension so you have enough slack. SINCE YOU WILL BE UNHOOKING THE BRAKE LINE THIS WOULD BE THE RIGHT OPPORTUNITY TO REPLACE THEM IF YOU CAN, AS OLDER LINES HAVE FATIGUED AND NEWER LINES WILL MAKE THE BRAKE JOB 100% NEW AND MORE RESPONSIVE AS WHEN YOU BRAKE THE OLD BRAKE LINES TEND TO FLEX THERE BY LOSING SOME AMOUNT OF YOUR FOOT PRESSURE.
NOW ONE VERY VERY IMPORTANT THING THE CALIPER COME MARKED "R" AND "L" BUT WHEN YOU INSTALL YOU WILL DO THE OPPOSITE IF YOU DON'T DO THIS YOU WILL NEVER BE ABLE TO BLEED THE SYSTEM..i.e FROM THE DRIVERS PERSPECTIVE USE THE CALIPERS MARKED "R" ON THE LEFT SIDE AND THE ONES MARKED "L" ON THE RIGHT SIDE, TRUST ME I DID THIS MISTAKE AND IT COST ME $200 JUST TO TAKE TO PEPBOYS AND GeT THEM RE-SWAPPED TO BE ABLE TO BLEED, THE IDEA BEING THAT THE BLEEDER SCREW SHOULD BE POINTING UPWARDS AND IF YOU SEE THE PICS BELOW WHEN I INSTALLED THEM THEY ARE POINTING DOWNWARDS THERE BY TRAPPING AIR AT THE TOP OF THE CALIPERS.
After you have installed the bracket install the pads apply a little bit of lubricant on the slide pins so that the pads can slide on the pins easily. Place the pads and snap the calipers on there and tighter the slide bolts on the calipers. Check that all the bolts are tightened properly.
Now hook up the new brake line to the new caliper and also to all the points on the suspension making sure that the other end is close to the frame line. Now unhook the old brake line from the frame/metal tubing end and quickly tighten the new line on. Now make sure that the brake fluid resivour is full with brake fluid. Ask a friend to help you pump the brake for you after a couple of pumps till your friend can feel some pressure tell him to hold the brake pedal in the pressed position and release the brake bleeder screw to let the brake fluid bleed. Repeat the process a number of time till you see clear brake fluid flush out of the bleeder screw making sure that you keep topping the resivour with brake fluid. IF YOU DON'T PAY ATTENTION TO THE RESIVOUR FLUID LEVEL AND YOU ACCIDENTALLY SUCK IN AIR YOU ARE DONE NOW YOU WILL NEED A COMPLETE BRAKE SYSTEM BLEED SO BE CAREFUL
.After you are done on one side do the other side and when done test drive the car very very slowly and gently making suer that you have gotten the correct braking ability.
THIS IS THE BEST MOD/UPGRADE THAT I DID TO THIS CAR
....ANY QUESTION PM ME AND I WILL BE MORE THAN GLAD TO HELP YOU OUT...ENJOY...
JFK
 09-02-2008, 09:25 PM
#5
Senior Moderator
Regional Coordinator
(Mid-Atlantic)
Regional Coordinator
(Mid-Atlantic)
iTrader: (6)
Great write up javed, I def may give this a try since your directions were pretty straight forward, I have new brake lines to install too. I may be pm'ing you for some help. Also, moved this to the diy forum. Did you do both sides at the same time? Or one side at a time? Good work
09-03-2008, 03:42 AM
#7
Jhatt from Ludhianna
Thread Starter
Join Date: Jun 2006
Age: 53
Posts: 410
Likes: 0
Received 0 Likes
on
0 Posts
Yes "AznxTL" i regret it now for painting them.....I should have left then to the original color that they came in...oh BTW what you see isthe nicer version after the pepboys guys resawpped them thye virtually destroyed the paint job.............imagine the brake fluid and paint...........it looks real ugly now will have to do a touch up again,,,,,but might juts change it ti black or some thing...
"blackack: definatley man any time and yes I did both at the same time...
Later
"blackack: definatley man any time and yes I did both at the same time...
Later
Trending Topics
 09-03-2008, 10:25 PM
#11
Senior Moderator
Regional Coordinator
(Mid-Atlantic)
Regional Coordinator
(Mid-Atlantic)
iTrader: (6)
The only issue I have is bleeding the brakes, even with a bleeder kit, I dunno if I trust myself doing that. Advice?
09-04-2008, 12:22 AM
#12
Burning Brakes
Join Date: May 2003
Location: Missing In Acton, ON Canada
Age: 46
Posts: 804
Likes: 0
Received 1 Like
on
1 Post
gravity bleed chris, gravity bleed.
i was also thinking that if you left them the way you installed them then all you would have to do to bleed them is undo the bottom bolt and lift the caliper up (like you would to change the pads anyways) until the bleeder is above the rest of the caliper. that way the caliper order would be fine.
still not sure about the proportioning valve thing though. i would think with a bigger caliper up from than normal it might no work 100% correctly.
09-04-2008, 12:32 AM
#13
Burning Brakes
Join Date: May 2003
Location: Missing In Acton, ON Canada
Age: 46
Posts: 804
Likes: 0
Received 1 Like
on
1 Post
did you even read the post? the car is obv a CL, and since he said to get the 96 vtec lude rotors it would be a 2.3CL because he didn't have to do the ROH conversion like you would on a 2.2CL and a 3.0 would already have the proper rotors.. also he said the caliper comes loaded with teh brackets.
09-04-2008, 09:30 AM
#14
Jhatt from Ludhianna
Thread Starter
Join Date: Jun 2006
Age: 53
Posts: 410
Likes: 0
Received 0 Likes
on
0 Posts
Thanks "davzille" he should have read the post...any ways the car is a 98 2.3cl....and no you don't need the propotioning valve form the legend as the complete brake assembly works fine I have really had a go at them and they hold up and do feel enhanced braking ability.....but again I would not know the difference unless I install the propoting valve as you said..... but so far so good....I am happy with this upgrade and thankx to you all that I got the insperation to do this....
hey "chris" going by you skill's I would say this would be a cake walk for you and as far as bleeding is concerned that is easy too if you follow the special not that I wrote about swapping the "R" and the "L" just get a buddy of yours andtell him to start pumping the shit out of the brake pedal , once he feels the brake pressure build up tell him to hold the pedal at depressed position and then you can open the bleeder screw and drain the brake fluid...repeat this step a couple of times till you see clear fuild squirt out of the bleeder screw.....one more thing before you move on try this...turn the ignition/start the car and see if you feel the same brake pressure with the brake boost assit if you do feel the same pressure as without the car turned on then you are good now move on to the other wheel.....REMEMBER RESIVOUR SOULD BE FULL AT ALL TIMES DO NOT........ I SAY DO NOT SUCK ANY AIR IN THE SYSTEM DUE TO INSUFFICIENT FLUID....
good luck and pm me and I will give you my cell # so you can call me if need be....
later
JFK
09-05-2008, 01:54 AM
#15
did you even read the post? the car is obv a CL, and since he said to get the 96 vtec lude rotors it would be a 2.3CL because he didn't have to do the ROH conversion like you would on a 2.2CL and a 3.0 would already have the proper rotors.. also he said the caliper comes loaded with teh brackets.
Thanks "davzille" he should have read the post...any ways the car is a 98 2.3cl....and no you don't need the propotioning valve form the legend as the complete brake assembly works fine I have really had a go at them and they hold up and do feel enhanced braking ability.....but again I would not know the difference unless I install the propoting valve as you said..... but so far so good....I am happy with this upgrade and thankx to you all that I got the insperation to do this....
hey "chris" going by you skill's I would say this would be a cake walk for you and as far as bleeding is concerned that is easy too if you follow the special not that I wrote about swapping the "R" and the "L" just get a buddy of yours andtell him to start pumping the shit out of the brake pedal , once he feels the brake pressure build up tell him to hold the pedal at depressed position and then you can open the bleeder screw and drain the brake fluid...repeat this step a couple of times till you see clear fuild squirt out of the bleeder screw.....one more thing before you move on try this...turn the ignition/start the car and see if you feel the same brake pressure with the brake boost assit if you do feel the same pressure as without the car turned on then you are good now move on to the other wheel.....REMEMBER RESIVOUR SOULD BE FULL AT ALL TIMES DO NOT........ I SAY DO NOT SUCK ANY AIR IN THE SYSTEM DUE TO INSUFFICIENT FLUID....
good luck and pm me and I will give you my cell # so you can call me if need be....
later
JFK
hey "chris" going by you skill's I would say this would be a cake walk for you and as far as bleeding is concerned that is easy too if you follow the special not that I wrote about swapping the "R" and the "L" just get a buddy of yours andtell him to start pumping the shit out of the brake pedal , once he feels the brake pressure build up tell him to hold the pedal at depressed position and then you can open the bleeder screw and drain the brake fluid...repeat this step a couple of times till you see clear fuild squirt out of the bleeder screw.....one more thing before you move on try this...turn the ignition/start the car and see if you feel the same brake pressure with the brake boost assit if you do feel the same pressure as without the car turned on then you are good now move on to the other wheel.....REMEMBER RESIVOUR SOULD BE FULL AT ALL TIMES DO NOT........ I SAY DO NOT SUCK ANY AIR IN THE SYSTEM DUE TO INSUFFICIENT FLUID....
good luck and pm me and I will give you my cell # so you can call me if need be....
later
JFK
Wow thanks guys, way to be mature, just wanted to know what kind of rotor thickness I�m looking at since usually I see this swap on V6s with V6 rotors, so by that 300mm x 28mm. You said nothing about what car you were working on and at the time I didn't feel like inferring it from the forum it was posted in and the fact that it�s a four lug, people do post in the wrong forum at times. I was trying to lead onto what kind of size brackets come stock on those Legends since I assumed they were 28mm and the rotors that would fit best are 28mm rotors and those lude rotors seemed to be thinner.
You didn't hear me criticizing your yellow paint job, now did you?
09-05-2008, 02:26 PM
#17
Senior Moderator
Regional Coordinator
(Mid-Atlantic)
Regional Coordinator
(Mid-Atlantic)
iTrader: (6)
Wow thanks guys, way to be mature, just wanted to know what kind of rotor thickness I�m looking at since usually I see this swap on V6s with V6 rotors, so by that 300mm x 28mm. You said nothing about what car you were working on and at the time I didn't feel like inferring it from the forum it was posted in and the fact that it�s a four lug, people do post in the wrong forum at times. I was trying to lead onto what kind of size brackets come stock on those Legends since I assumed they were 28mm and the rotors that would fit best are 28mm rotors and those lude rotors seemed to be thinner.
You didn't hear me criticizing your yellow paint job, now did you?
Brakes
Dual piston calipers can be fit into car. Parts needed are Calipers from a Legend. Rotors are from a prelude. For the Legend Calipers, Type II equipped including the GS sedan or LS coupe, 93-95. are the only kind with dual piston so you will need to locate these types. 2.2/2.3 needs the caliper brackets from 3.0CL, Legend, or 94-96 vtec prelude. Adding this will give you larger rotors and dual piston calipers for greater stopping power.
Dual piston calipers can be fit into car. Parts needed are Calipers from a Legend. Rotors are from a prelude. For the Legend Calipers, Type II equipped including the GS sedan or LS coupe, 93-95. are the only kind with dual piston so you will need to locate these types. 2.2/2.3 needs the caliper brackets from 3.0CL, Legend, or 94-96 vtec prelude. Adding this will give you larger rotors and dual piston calipers for greater stopping power.

Thread
Thread Starter
Forum
Replies
Last Post
rp_guy
Member Cars for Sale
9
07-16-2017 07:33 AM